Author

Gregg Overcash

Browsing

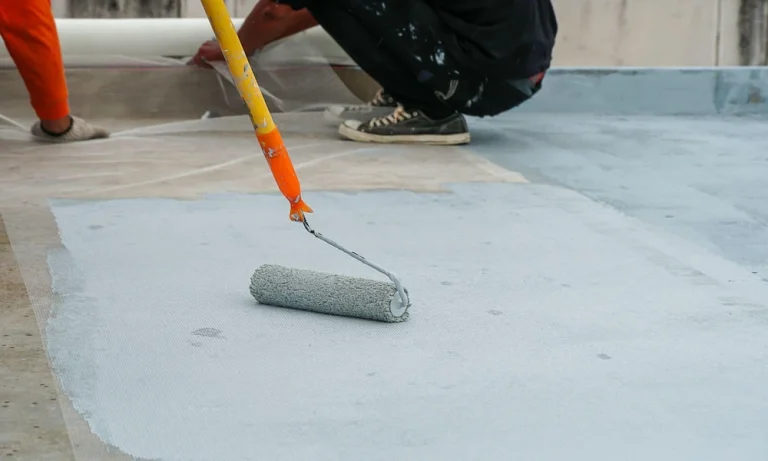
Once a roof, balcony or bathroom begins to leak, applying a new waterproofing layer directly over the existing one can seem like the quickest and most affordable solution. In some cases, this approach works well and saves the cost and mess of full removal. In others, it traps problems beneath the surface and leads to early failure. Whether overlaying a waterproofing membrane in Singapore is suitable depends on several factors, from the condition of the old layer to the chemistry of the materials involved.

Condition of the Existing Membrane

A new layer is only as reliable as the surface it bonds to. Before considering an overlay, the old membrane should be checked closely for problems such as these:

  • Blisters or bubbles, which suggest trapped air or moisture beneath the surface.
  • Areas where the membrane has peeled away or lost adhesion to the substrate.
  • Widespread cracking, brittleness or chalking caused by age and sun exposure.
  • Patches that have been repaired many times with different products.
  • Soft or spongy sections that indicate the layer below may be saturated.

Chemical Compatibility Between Products

Not every waterproofing material bonds well to every other type. The combination of old and new products plays a major part in whether an overlay will hold, particularly in situations like these:

  • Bituminous membranes, which may release oils that interfere with the bonding of some liquid-applied coatings.
  • Solvent-based products, which can soften or damage certain existing layers.
  • Polyurethane, acrylic and cementitious systems, which each have their own adhesion requirements.
  • Manufacturer guidelines that may specify whether a product can be applied over existing coatings.

Surface Preparation and Priming

Even when the old membrane is in reasonable condition, careful preparation is needed before a new layer is applied. A building materials supplier can often advise on suitable primers, cleaners and bonding agents for the specific combination of products, as preparation typically involves the following:

  • Cleaning away dirt, moss, oil and loose material from the surface.
  • Removing any sections that are flaking or poorly bonded.
  • Lightly abrading glossy surfaces to help the new layer grip.
  • Applying a compatible primer and allowing it to cure fully.
  • Carrying out a small adhesion test before treating the whole area.

Trapped Moisture Beneath the Old Layer

Water that has already found its way under the existing membrane does not disappear when a new layer goes on top. If anything, it may become sealed in, which can cause these issues:

  • Vapour pressure that pushes the new membrane upwards and creates blisters.
  • Continued deterioration of the concrete or screed underneath.
  • Mould growth or damp patches on ceilings and walls below.
  • Leaks that reappear because the original entry point was never located and repaired.
  • Corrosion of steel reinforcement if water remains in the concrete for long periods.

Thickness, Levels and Detailing

Adding another layer changes the build-up of the surface, which may affect how water drains and how surrounding fixtures fit. It helps to check these details:

  • Whether floor drains and outlets still sit at the lowest point after the overlay.
  • Whether door thresholds and upstands remain high enough to keep water out.
  • How joints, corners and pipe penetrations will be sealed and reinforced.
  • Whether the added weight is acceptable for the roof or structure.
  • Whether the finished surface will carry foot traffic and needs a protective topcoat.

Recognising When Removal Is the Wiser Choice

An overlay is not always the right answer. If the existing membrane is badly damaged, saturated with water or incompatible with the new product, removing it and starting again may cost more upfront but often results in a longer-lasting repair. Having the surface inspected by a waterproofing specialist before deciding helps avoid paying twice for the same problem.

Planning to fix a leaking roof or balcony? Speak with our team at Ardex-Quicseal to find compatible waterproofing membranes and primers.

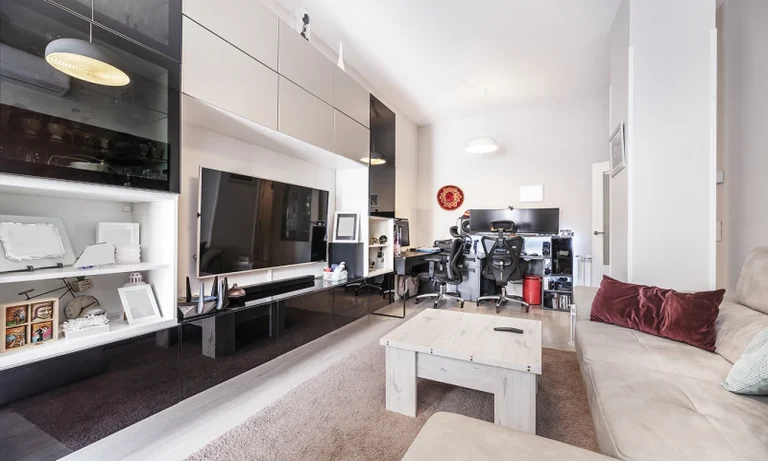
A 4-room HDB flat needs to support daily life while making sensible use of its available floor area. Living, dining, cooking, working and resting may all happen within a relatively defined footprint, so design decisions can have a noticeable effect on comfort.

Good HDB interior design starts with the way the household uses the flat. Instead of selecting finishes first, homeowners can consider movement, storage, furniture proportions and lighting before deciding on the decorative direction. A practical foundation makes it easier to create a home that looks cohesive without sacrificing usability.

1. Start with the Layout

The layout should reflect how the household moves through the flat each day. Consider where family members enter, where shoes and bags are placed, how food moves from the kitchen to the dining area and how people access bedrooms.

Avoid filling every available section with furniture. Open circulation can make a home feel more spacious and reduce the sense of congestion.

For a 4-room HDB interior design project, furniture dimensions should be measured before purchase. A sofa that looks suitable in a showroom may take up considerably more room once placed within the actual living area.

2. Plan Storage Early

Storage should be considered during the initial planning stage rather than added as an afterthought. Built-in cabinetry can use vertical areas efficiently, particularly in rooms where floor space is limited.

Think about what needs to be stored and how frequently it is accessed. Everyday items should remain easy to reach, while seasonal belongings can be placed in less accessible areas.

A good storage plan can also reduce visual clutter. When frequently used belongings have designated places, the rest of the home can remain easier to organise.

3. Choose Materials For Daily Use

Materials should suit the household’s routines. A busy family may need surfaces that are easy to clean, while households with pets may have additional considerations around flooring and furniture fabrics.

Do not choose materials based on appearance alone. Ask how they will respond to moisture, heat, cleaning products, scratches and regular use.

A well-designed HDB interior balances visual appeal with practical maintenance, particularly in areas such as kitchens and bathrooms.

4. Use Lighting Strategically

Lighting can change how a compact home feels. A single overhead fixture may not provide enough flexibility for reading, dining, cooking and relaxing.

Layered lighting can create different levels of illumination. Task lighting can support specific activities, while ambient lighting provides general brightness. Decorative fixtures can introduce visual interest without taking up floor space.

Natural light should also be considered. Keep windows as open as practical and avoid placing bulky furniture where it unnecessarily restricts daylight.

5. Select Furniture By Scale

Furniture needs to suit the dimensions of the rooms. Large pieces can reduce circulation and make a living room feel crowded, while furniture that is too small may leave the room feeling disconnected.

Measure the width, depth and height of each major piece. Remember to consider door swings, cabinet openings and walking routes.

For a 4-room HDB interior design flat, flexible furniture can also be useful. Extendable dining tables, storage beds or movable side tables may support changing household needs without requiring more floor area.

6. Keep A Consistent Direction

A consistent design direction helps the flat feel connected. This does not mean every room needs identical colours or furniture. Instead, repeat selected materials, tones or shapes throughout the home.

For example, timber tones used in the living area could appear again in bedroom cabinetry. A consistent neutral base can allow different rooms to have their own accents without appearing unrelated.

Design Priorities

Priority Main Question Design Goal
Layout How does the household move? Better circulation
Storage What needs to be kept? Less clutter
Materials How will surfaces be used? Easier maintenance
Lighting What activities need light? Greater flexibility
Furniture Does each piece fit? Better proportions
Direction Do rooms feel connected? Visual cohesion

Contact Hoft Interior to discuss your 4-room HDB flat, preferred layout and practical design priorities before planning the next stage of renovation.

Custom kitchen cabinetry

Custom kitchen cabinets are one of the biggest investments you’ll make during a remodel. But the biggest mistakes happen when cabinets are treated mostly like a style choice instead of a functional one.

Cabinetry has the biggest influence on how your kitchen actually functions on a daily basis, more so than countertops, tile, and appliances. The right cabinets will elevate the style of the kitchen. The wrong ones will be annoying every single day.

This is especially true with custom cabinetry, which is an investment for a reason. You can accommodate the quirks of your room, add functionality, and choose styles and finishes that will stand the test of time.

Below are a few things to consider before you get started planning your custom cabinetry.

Start With How the Kitchen Is Actually Used

Think about who’s using the kitchen and what happens there. Take note of pain points – places where things don’t currently fit well, where you’re reaching across the room for things, where a second person blocks your ability to open a trash bin, etc. Then think about what would be your dream fix if you could redesign the room.

Common requests include cabinets that go all the way to the top of the wall, storage for specific appliances, easier access to dishes used daily, etc. From there, we’ll help you work through layout and functionality in detail, whether you’re looking for a cabinet maker near Western High School or planning a project elsewhere in the area.

If you’ve been thinking about custom cabinetry features you’ve seen online and want to incorporate them, bring inspiration photos to our initial design meeting. But it’s good to be flexible. Complicated cabinet boxes are costly, and we want to make sure they’re going to be worth it for how often and how you use your kitchen.

For example, it’s easy to fall in love with those spice racks you see in kitchen showrooms. But if you don’t use your kitchen often and you already have an awkwardly-sized cabinet in the right location, a couple of adjustable shelves may be a simpler and more cost-effective solution.

Measure the Room Before Falling in Love With a Layout

Sometimes, we’ll visit a customer’s home and find out their dream feature just isn’t going to work. For example, they may envision a kitchen island, but the walkway would be too tight.

Walkways are supposed to be at least 36″ so there’s room to maneuver, open cabinet doors, open the oven, etc. You may be okay with a tight space until someone else needs to squeeze by while you’re using the stove.

The same goes for appliances. We need to have your appliances figured out before cabinets are finalized, because we need to make sure they’ll fit. Appliance garages are another feature that sounds great until you realize your blender isn’t going to fit inside. We can help you with appliance selections and brands that offer different depths and heights, too.

Choose Storage Features That Solve Real Problems

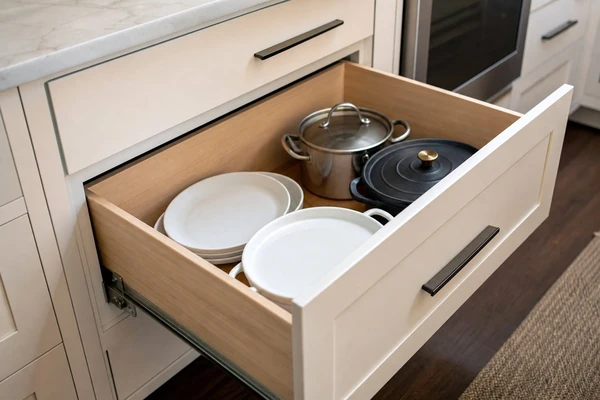
  • Deep drawers instead of lower cabinets for dish and cookware storage
  • Pull-out pantry shelving so you can actually see what’s in the back of the cabinet
  • Charging drawers for phones and other devices
  • Garages for appliances you use daily
  • Vertical storage for baking sheets, cutting boards, trays, etc.

Look Beyond the Cabinet Boxes

  • Framed vs. frameless construction
  • Recessed-panel or flat-front cabinet doors
  • Open shelving or glass-front upper cabinets
  • Glazed cabinet doors
  • Countertop material
  • Painted cabinets
  • Crown molding
  • Wood species and finish
  • Hardware styles and finishes

There are no right or wrong answers here. It’s helpful to think about what kinds of styles you gravitate towards and what would best mesh with the rest of your home. For instance, flat-front cabinet doors, which Britannica covers at britannica.com/technology/cabinet-furniture, are going to give you a sleeker, more contemporary look while framed or recessed-panel doors will give your kitchen more texture. You might be tempted to follow trends and go with very dark cabinets, but we’d be hesitant to recommend that choice for a smaller kitchen without great lighting. Lighter colors will open up a space.

Article image

Before the Project Moves Forward

Custom kitchen cabinets are going to influence everything else in the room, from outlets and tile to countertops and lighting. So, we’ll dig into design and functionality with you during your first meeting so we can be confident we’re building something you’re going to love and that’s going to mesh well with the rest of the project.

Once the design and functionality of your kitchen is finalized, our team will make sure we’re accounting for filler pieces, cabinet panels, appliance transitions, outlet locations, plumbing, floor height, backsplashes, lighting, countertop templates, etc.

So before you come in, gather inspiration photos of styles you love, take note of items you struggle to store in your kitchen and any pain points in terms of functionality. Have a sense of appliances you love and get dimensions if possible. With all of that info, we’ll be ready to dive in and plan the perfect kitchen for your family.

To learn more, reach out to our team and schedule a consultation. We’ll walk through your Davie home together, take measurements and photos, discuss your remodel, and talk through custom cabinetry options. Then, we’ll follow up within days with a design and a quote.

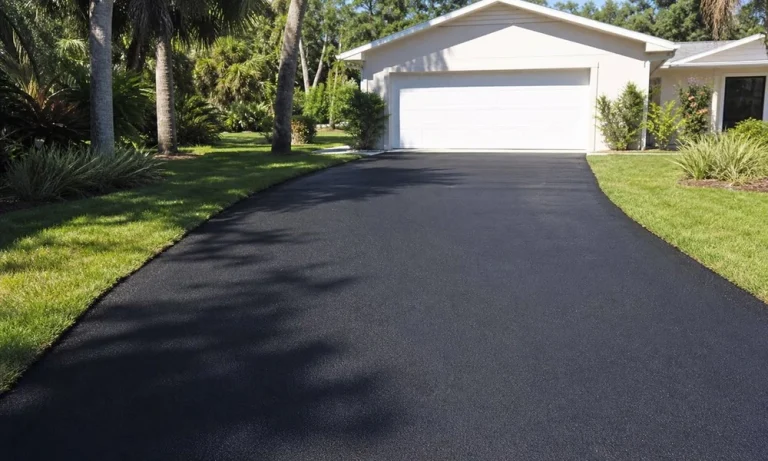
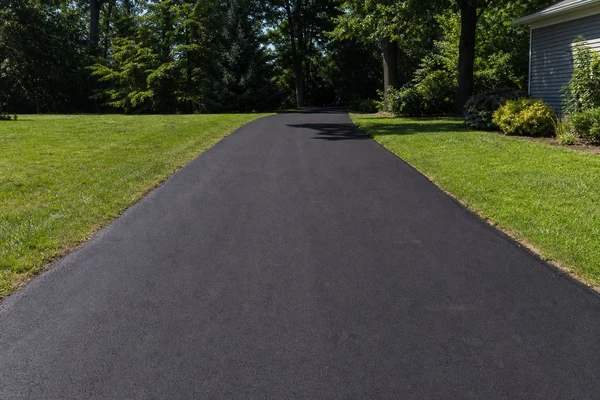
A paved driveway or lot can look fine until cracks begin to appear, the color fades, and rough spots become visible. Sealcoating is one preventative measure that allows asphalt to endure the effects of weather, heavy equipment, vehicle traffic, and general wear and tear long before minor surface deterioration becomes costly to fix.

Sealcoating is not a replacement for repairing or replacing damaged pavement. It is, however, a protective treatment applied to pavement that remains structurally sound and able to be maintained.

What Sealcoating Can Accomplish

The binders in asphalt eventually break down from exposure to weather, oils, and ultraviolet rays – click https://www.who.int/news-room/fact-sheets/detail/ultraviolet-radiation for more. Sealcoat applied correctly will provide a covering that slows this process.

While the result is typically a darker and more even-looking surface, aesthetics are only part of what a sealcoat can do. A sealcoat may also help block water from entering through small gaps in the surface. Preventing water from getting underneath the surface is critical because water under the asphalt can cause deterioration of the base, leading to additional cracking, depressions, and damaged edges.

A sealcoated surface will also be easier to sweep and clean, especially in areas where dirt, leaves, and other vehicle debris accumulate. For property owners considering this type of protection, Blacktop By Beede Paving offers sealcoating services designed to help maintain asphalt surfaces.

Inspecting Pavement Before Sealing

The ideal time to sealcoat is when there is no widespread structural damage. Walk around the lot or driveway, and inspect the condition of the pavement beyond its color. Fading is not always an indication of a severe problem, while cracks and soft spots usually are.

Article image

Take note of any of the following:

  • Minor surface cracks that haven’t progressed too far
  • A dull, gray color with a dried-out or worn look
  • Areas of roughness
  • Stains that should be removed prior to sealing
  • Cracks, potholes, or dips that need repair before coating

Never use a sealcoat to conceal any kind of serious damage. Allow the repair to dry thoroughly, and fill the cracks before applying a sealcoat.

Waiting for the Right Weather

To achieve a smooth and even finish, the asphalt must be clean and dry during application, which means that the weather must cooperate. Waiting for a window of dry weather will allow the crew to prepare the surface, perform any necessary repairs, and allow the coating to cure without interference from rain or water pooling on the surface.

Once the work is complete, avoid walking or driving on the surface for at least 24 hours, unless otherwise directed by the paving company in charge of your project.

Taking this precaution will help you avoid tire marks, scuffing, and uneven wear before the coating hardens.

Skip This If the Surface Is Damaged

If you notice extensive alligator cracking, large potholes, crumbling edges, or areas that bounce or flex under vehicle weight, then sealcoating isn’t the right choice. These symptoms indicate underlying problems that sealcoating cannot address.

In such cases, patching, resurfacing, or complete reconstruction might be a better investment. A black coating applied to severely deteriorating asphalt (click here to know more) may give the appearance of improvement but could also mask the true state of the pavement.

Why Proper Preparation Matters

Most of the benefit of this treatment comes from preparation rather than simply applying a coating to the asphalt. All loose debris should be removed, and the surface should be swept and cleaned of oil spots. Any cracked or failing areas should be repaired.

Proper drainage should also be ensured. Standing water can reduce the lifespan of both the asphalt and the coating. If water pools in a certain area after a rain, then that issue should be addressed before sealcoating.

Article image

Be sure to schedule this treatment when access to the property is available. Cars, dumpsters, gates, and other items may need to be relocated so that all surfaces can be treated without leaving any unsealed areas.

When considering a maintenance schedule, it’s best to look at the pavement’s condition, the amount of traffic it receives, and its exposure to the elements, rather than a specific time of year.

Driveways that receive more sunlight, have vehicles making tight turns, or sit adjacent to a landscaped area may require more frequent maintenance than those in a quiet neighborhood with minimal traffic or in the shade.

A qualified contractor can assess whether the existing sealant still needs to be left alone or if it’s time for a thorough cleaning, crack sealing, and additional sealant.

Maintaining the Pavement After Treatment

When the coating has dried, continue to keep the surface clean and remove fresh oil or chemical spills as soon as they occur. Avoid turning heavy vehicles back and forth on the same spot, especially during warmer months when the asphalt may be softer.

Continue to inspect the surface for signs of cracking, drainage issues, and edge wear. Record any areas of damage ahead of your next inspection or maintenance visit.

Staying on top of laundry can be difficult when you’re balancing work, family responsibilities, school activities, and a busy personal schedule. Clothing, towels, bedding, and other household linens quickly accumulate, making laundry one of the most time-consuming chores in any home. Residents throughout the 80831 area of Colorado can simplify their weekly routine with Laundry Lounge. Their pickup and delivery laundry service provides a convenient way to enjoy fresh, professionally cleaned laundry without spending hours washing, drying, folding, and sorting multiple loads.

Whether you’re managing a growing family, working long hours, commuting, or simply looking for a better way to handle household chores, Laundry Lounge offers dependable service designed to fit your lifestyle. Every order is carefully handled from pickup through delivery, allowing you to enjoy clean laundry while reclaiming valuable time.

Make Laundry Day Stress-Free

Laundry involves much more than loading a washing machine. Clothes must be sorted by fabric and color, washed using the proper settings, transferred to the dryer, folded neatly, and put away. These repetitive tasks can consume several hours each week, leaving little time for the activities you actually enjoy.

With Laundry Lounge’s pickup and delivery service, the entire process becomes effortless. Simply schedule a pickup, place your laundry in the designated collection area, and let the experienced team handle everything. Your clothing and household linens are professionally washed, carefully dried, neatly folded, and delivered back to your home clean, fresh, and ready to use.

Instead of dedicating your weekends to laundry, you can spend more time with family, enjoy local attractions, catch up on work, or simply relax.

Careful Cleaning for Everyday Fabrics

Every customer’s laundry is processed individually using commercial-grade equipment and quality laundry products to help provide consistently clean, fresh results. Laundry Lounge follows garment care instructions whenever possible, helping preserve the appearance and longevity of your clothing while providing thorough cleaning for your household linens.

The pickup and delivery laundry service is ideal for cleaning a wide variety of everyday items, including:

  • Everyday clothing
  • Business and office attire
  • Children’s clothing
  • Bed sheets and pillowcases
  • Bath towels and washcloths
  • Comforters and blankets
  • Workout and athletic apparel
  • Household linens

Each completed order is carefully folded before delivery, making it easy to unpack and organize everything once your laundry arrives home.

Flexible Scheduling for Busy Households

Every household has its own routine, which is why Laundry Lounge offers pickup and delivery service seven days a week. Customers can choose recurring weekly pickups for ongoing convenience or schedule service whenever additional assistance is needed. Flexible scheduling allows professional laundry care to fit comfortably into even the busiest lifestyle.

If you’re unavailable during pickup or delivery, arrangements can often be made to leave your laundry in a designated secure location, making the service even more convenient for busy families and professionals.

A Practical Solution for Every Lifestyle

Residents throughout the 80831 area appreciate having one less household chore to manage. Families enjoy more quality time together, professionals reclaim valuable evenings, students can focus on school and extracurricular activities, and seniors avoid carrying heavy laundry baskets or waiting through multiple wash and dry cycles.

Having professionally cleaned and freshly folded laundry delivered directly to your home helps reduce stress while making it easier to maintain an organized household week after week.

Proudly Serving the 80831 Community

Laundry Lounge is a family-owned and operated business proudly serving the 80831 area and surrounding Colorado Springs communities with complete residential and commercial laundry solutions. In addition to pickup and delivery, the company offers wash and fold service, self-service laundromats, hotel and motel laundry, restaurant linen service, Airbnb and vacation rental laundry, medical laundry, towel service, uniform cleaning, and commercial laundry services for businesses throughout the region.

To learn more about convenient local service, visit the 80831 Pickup and Delivery Laundry Service page.

Contact Laundry Lounge

Laundry Lounge
3359 N Academy Blvd
Colorado Springs, CO 80917

Phone: (719) 375-1936
Email: cleanliving@ourlaundrylounge.com
Hours: Open Daily, 7:00 AM – 10:00 PM
Website: https://www.ourlaundrylounge.com/

If you’re ready to simplify your weekly routine, Laundry Lounge provides dependable pickup and delivery laundry service that combines convenience, careful garment care, and flexible scheduling. Residents throughout the 80831 area can enjoy professionally cleaned, neatly folded laundry delivered directly to their doorstep, saving time while keeping clothing and household linens fresh, clean, and ready for everyday life.

Does your house need a fence? Does your house look better with a fence? Whether you’re selling now or in the next 60-90 days, installing a new fence before listing a home is something to consider. Here’s why and what to do first. Click on this site for more information.

Maybe it’s a fence panel that’s tilted a little sideways by the driveway, or a gate that’s dragging, or a backyard that doesn’t quite feel enclosed. Those kinds of things pop up in photos. Or maybe the patio looks great, but there’s a hole in the fence that you never noticed until someone’s standing right next to it, looking over the back yard. Maybe your new cushions make the patio look inviting, but if the fencing looks old and worn, it can be jarring. For sellers considering adding a fence within the next few months before going to market, here’s how to get started.

Start With What Buyers Notice

Walk the yard the way buyers do, checking every detail. Pay attention to things like a loose nail, a broken latch, a gate that sticks, or a post that’s pulling away from the ground. These things may seem fine if you’ve lived with them for years, but when buyers are walking around, even little things draw their attention.

Look for bigger issues that need fixing. Is the fence leaning against a bush? Does the gate drag and need a shove to close? Are there mismatched replacement boards? These things can make a nice-looking yard feel like another chore for the buyers. Also, think about how the fence works with the way you want the yard to look. Is there a hook for string lights still on the house? That could be a nice touch, especially with a basic, modern fence behind it.

Know When a Repair Won’t Do

Some fences can’t really be repaired. Replacing one board is easy; replacing the boards on three sides of your yard can be a challenge, because the wood grain and color won’t quite match. It can be hard to tell just by looking at if you can repair the fence or if you need to replace it.

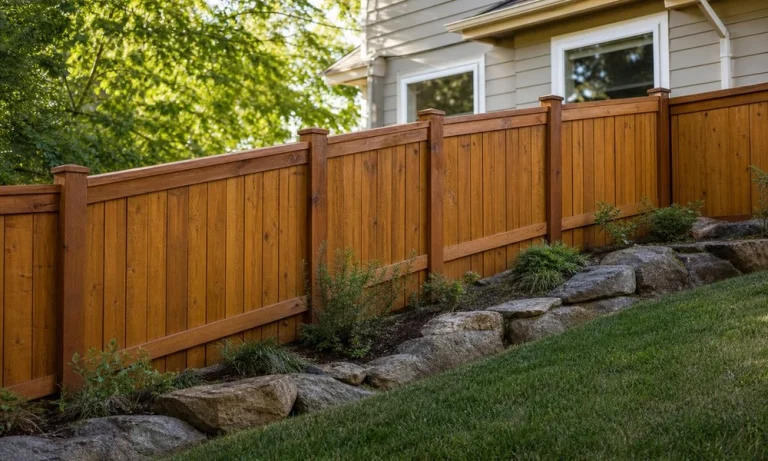
Look at the posts first – if they’re straight and the boards are level, then there’s a good chance you only need to replace some of the boards. Maybe you just need a new latch, and some of the boards aligned. It can make all the difference in how a back yard or side yard looks (Justice Fence covers fence installation if you want that route).

If the posts are leaning, or if you can see gaps between the boards, then replacing the whole fence will probably be easier. That way, buyers don’t have to worry about whether they’re going to pull apart when they lean on it, or whether a neighboring property is peeking through the fence.

Article image

Choose What Works with the Yard

A clean, simple fence looks great with a freshly renovated patio (https://www.gharpedia.com/blog/renovating-patio-for-2023/), a new coat of paint, or a new front door. Sometimes you want a fence that looks good but doesn’t compete with the yard. Maybe you want a neutral-colored fence so that it doesn’t clash with the deck chairs or the potted plants or the barbecue grill.

In a townhouse, privacy may be the main concern. If the patio is right next to a neighbor’s deck, or if there’s a neighbor’s balcony right above the patio, then a fence might be a good idea. A nice fence can help you feel more comfortable when you’re outside, especially if you have pets.

On a corner lot, a fence can block your view of the yard, especially if the yard is small. If the fence blocks your view, you might not notice that it’s blocking the view from the front yard. Make sure that you’re getting the right amount of privacy.

Talk Through Shared Boundaries

Before you order any fence, talk to your neighbors. Is the fence going to go right up against their fence? Will you need to dig near their shed? Do they have any fences already? This is important to know before your crew shows up so that they don’t have to move anything around or deal with a neighbor’s complaint. You’ll want to get a quote on the fence, but you also need to make sure that the neighbor’s fence isn’t in the way.

Leave Enough Time Before Listing

Fencing takes time, so make sure that you’re scheduling things well in advance. You need to be able to finish the work well before you take photos, and before your neighbors and potential buyers come around. You need to leave time for the yard to settle, and for any repairs or changes to be made. After the fence is done, you need to make sure that everything looks clean. Clean up the yard, put the furniture back in place, and make sure the gates are secure. Then, when you go to photograph it again, you can check the fence line and make sure that everything looks good.

Key Takeaways

Investing in professional asphalt services can boost property value by 10% to 20%. This improvement stems from enhanced aesthetics and a perception of lower ongoing maintenance needs.

Quality asphalt not only uplifts curb appeal but also shapes the first impression for potential buyers or tenants, contributing significantly to overall satisfaction and attractiveness of the property.

Regular maintenance-such as crack filling and seal coating-is crucial. It helps lengthen the life of asphalt surfaces while preventing expensive repairs in the future.

Taking care of minor repairs through routine upkeep can stop small issues from growing into costly problems, helping to maintain the safety and integrity of asphalt surfaces.

Asphalt contractors are essential when it comes to enhancing safety, effectively managing hazards like cracks and potholes that could endanger pedestrians and vehicles.

Incorporating the Americans with Disabilities Act (ADA) guidelines is critical since proper asphalt installation is key to ensuring accessibility and inclusiveness for all users.

With their expertise, asphalt contractors deliver time-saving solutions and are adept at anticipating challenges, thus ensuring paving projects are completed efficiently and within budget.

Maximizing Property Value through Professional Asphalt Services

The ROI on Asphalt Investments: A Financial Breakdown

Investing in professional asphalt services isn’t merely cosmetic; it’s a strategic decision likely to elevate property value significantly. Just think about it: a well-maintained asphalt driveway or parking lot does more than look inviting-it communicates professionalism and attention to detail. Buyers are often willing to pay a premium for a property that appears to require less future maintenance. The return on investment (ROI) for asphalt paving can be quite impressive, with estimates indicating a potential increase of 10% to 20% depending on market conditions.

Understanding typical costs for asphalt installation or repairs is fundamental. Clients should prepare for expenses that reflect quality service and materials. Yet, those ready to invest often experience a financial return that far surpasses initial expenditures. Consider this: upgrading an aging parking lot might save thousands down the road by preventing extensive water damage or erosion due to cracks and potholes.

How Quality Asphalt Enhances Curb Appeal

Asphalt embodies more than just a layer of blacktop. It acts as the canvas for first impressions of a property. A freshly laid asphalt surface significantly boosts curb appeal-a critical element for both residential and commercial properties. Prospective tenants or buyers often assess a property’s value based on the quality of the surface. Failing to maintain asphalt can lead to the opposite perception, indicating neglect. An appealing driveway or parking area invites clients, increases property attractiveness, and enhances overall satisfaction. Quality asphalt serves as a welcome mat, showcasing the property’s best features.

However, the benefits extend beyond mere appearance. A well-constructed asphalt surface offers durability, minimizing the chance of costly repairs in the future. To summarize, professionalism is evident when asphalt surfaces are meticulously cared for.

Innovative Maintenance Plans for Long-Lasting Results

Unpacking Cost-Effective Solutions for Driveway Longevity

Many property managers and homeowners overlook the critical link between routine maintenance and asphalt surface longevity. A cost-effective maintenance plan can dramatically lessen damage and extend the lifespan of asphalt. Key elements of this strategy include crack filling and seal coating. Lacking regular inspections, minor issues could snowball into major financial burdens. Asphalt contractors recommend thorough inspections every few years to highlight minor repairs before they escalate.

  • Crack Filling: Proactive measures to prevent water intrusion.
  • Seal Coating: Protects against UV rays, oil spills, and weather effects.
  • Regular Inspections: Monitor wear and tear to address issues early.

As professionals advise, tackling minor problems through strategic maintenance can yield significant savings over time. Investing early in small repairs reduces the chances of requiring a complete surface overhaul later on. This forward-thinking approach is invaluable in property management.

How Regular Maintenance Prevents Major Repairs

Regular maintenance encompasses more than aesthetics-it ultimately saves a substantial amount of money in the long haul. By taking care of minor repairs, property owners can avert major expenses. A small crack, if neglected, may develop into a pothole, which isn’t just unsightly; it’s also a safety concern. Asphalt contractors emphasize that regular maintenance keeps surfaces safe and intact.

  • Inspection Frequency: Conduct surface assessments annually.
  • Timely Repairs: Address issues promptly as they arise.
  • Weather Considerations: Tailor maintenance strategies based on local climate.

Clients who prioritize routine inspections often express satisfaction with the longevity and appearance of their asphalt surfaces. Proactive maintenance keeps these areas both attractive and functional.

Enhancing Safety and Accessibility with Asphalt Projects

The Role of Professional Asphalt in Injury Prevention

Safety should always occupy a top-tier position in property owners’ concerns. Cracks, uneven surfaces, and potholes introduce serious injury risks for both pedestrians and vehicles. Asphalt contractors play a vital role in mitigating these dangers through skillful paving and prompt repairs. Tackling potential hazards goes beyond avoiding lawsuits; it’s about fostering an environment that prioritizes safety.

Consider the impact: a smooth, well-maintained surface is essential for any commercial property. It not only signifies a commitment to safety but also enhances user experience. Employees, clients, and customers appreciate this attention to detail.

Creating Smooth Surfaces for All: ADA Compliance Explained

Accessibility is a paramount concern in today’s society. Companies are focused on offering equal access for everyone, and asphalt is crucial in this effort. Professionals ensure that the standards laid out by the Americans with Disabilities Act (ADA) are met. Proper sloping, designated parking spaces, and clear pathways contribute to smoother experiences for individuals with disabilities.

  • Access Ramps: Smooth transitions are vital.
  • Designated Parking: Must be appropriately positioned.
  • Clear Pathways: Well-defined markings prevent confusion and enhance safety.

Choosing asphalt that accommodates all users highlights a company’s commitment to inclusivity. Compliance isn’t just a matter of adhering to rules; it enriches the user experience for everyone involved.

Expertise That Stands the Test of Time

Why Experience Matters in Asphalt Contracting

Like a fine wine, experience holds significant value in asphalt contracting. Professionals with years of hands-on skills grasp the nuances of various projects. Their understanding of local climates, soil conditions, and proper application techniques distinguishes seasoned contractors from the rest. Clients typically seek contractors who possess a proven track record when it comes to paving investments.

Engaging an experienced asphalt contractor frequently leads to time-saving solutions. They can foresee challenges and propose effective solutions swiftly, keeping projects on schedule and within budget. Leaning on experts is critical for maintaining and transforming crucial asphalt surfaces.

Case Studies: Successful Asphalt Projects in Your Area

Curious about the outcomes? Numerous successful asphalt projects demonstrate the impact that quality work can have on property. A particular local shopping center, for example, invested in a new parking lot. This initiative resulted in increased traffic and attracted new tenants. Post-project data indicated a 30% increase in patron visits, attributed to superior asphalt paving.

“Quality paving was a big deal for our business.”

Such stories illustrate how asphalt contractors collaborate with property owners to create lasting results. Whether enhancing a residential driveway or a large commercial lot, sound paving practices are reflected in the success stories dotting communities.

Investing in professional asphalt services is vital, not just for aesthetics but also for safety, durability, and increased property value. Being aware of the advantages that come with hiring asphalt contractors equips property owners with the knowledge needed for informed decision-making. Each asphalt project represents a chance for improvement and the realization of positive returns.

FAQ

What types of asphalt services are typically offered?

Asphalt services range widely, including installation, repair, paving, seal coating, and crack filling. Professionals customize their offerings based on the specific requirements of each project, ensuring that services meet the diverse needs of both residential and commercial clients.

How can a property owner choose the right asphalt contractor?

Selecting the appropriate asphalt contractor involves considering experience, customer reviews, and their portfolio of completed works. It’s equally crucial to confirm they are well-versed in local regulations and codes to ensure compliance throughout the project.

What factors influence the cost of asphalt installation?

Various elements influence asphalt installation costs, such as the size of the area, the thickness of the paving, site preparation, and local labor rates. Additionally, using high-quality materials will affect the total investment. Grasping these factors can aid in effectively planning a budget.

How does climate affect asphalt performance?

Climate significantly impacts asphalt performance. Extreme temperatures can lead to cracking and overall wear. Areas that experience freeze-thaw cycles may require special considerations during installation to enhance longevity. Experienced contractors account for these aspects when planning projects.

What maintenance practices can homeowners implement?

Homeowners can carry out straightforward maintenance practices such as performing regular inspections, addressing cracks promptly, and seal coating to guard against damage. Developing a maintenance schedule can help extend the life of the asphalt surface, maintaining optimal performance and appearance.

Are there eco-friendly options in asphalt paving?

Indeed, there are eco-friendly options available in asphalt paving, such as utilizing recycled asphalt materials and engaging in lower-energy production methods. This approach not only lessens the environmental impact but can also be cost-effective long-term. Professionals strive for sustainability in their practices to meet modern demands.

How can asphalt contracting influence property marketing strategies?

High-quality asphalt surfaces greatly enhance property marketing by elevating curb appeal and creating a positive first impression. Well-maintained driveways and parking areas signal quality, resulting in heightened interest from prospective buyers or tenants.

What types of properties benefit most from professional asphalt services?

Both residential and commercial properties gain a variety of advantages from professional asphalt services. Whether it’s homes needing driveways or commercial lots requiring robust paving, any property featuring asphalt surfaces can see enhancements in safety, aesthetics, and value through expert services.

Useful Resources

Wildfire season seems to start earlier and last longer every year—especially for homeowners in California and other fire-prone regions. Preparing your home now can make a major difference in protecting your family, property, and peace of mind as temperatures rise and winds pick up. From creating defensible space to upgrading your storage and emergency supplies, here’s how to make sure your home is truly ready for wildfire season.

Understanding Wildfire Risk Where You Live

Wildfire readiness starts with knowing your local risk level. Check fire danger ratings from your local fire department or state forestry agency to understand how your area is classified. Homes located near open fields, undeveloped land, chaparral, or hillsides are more vulnerable because fires can spread rapidly through dry brush. Even suburban neighborhoods can face ember attacks, where small burning particles travel miles on the wind and ignite roofs, decks, or landscaping.

Being proactive with prevention and preparedness is essential because conditions can change quickly. A mild spring can turn into a dry, high-risk summer almost overnight—and having the right safeguards in place can save your property and possibly your life.

Create a Defensible Space Around Your Home

One of the most effective steps to protect your home is creating defensible space—the buffer zone between your home and the surrounding vegetation. Experts recommend maintaining 100 feet of defensible space, divided into two zones:

  • Zone 1 (0–30 feet): Keep this area lean and green. Remove all dead plants, dry leaves, and pine needles from your lawn, roof, and rain gutters. Trim trees at least 10 feet away from structures and prune branches so there’s no direct pathway for flames.
  • Zone 2 (30–100 feet): Reduce fuel for fires by cutting tall grasses to four inches or less and spacing trees and shrubs apart. Store flammable materials, such as woodpiles and outdoor furniture, away from your home or in fire-resistant containers.

In addition to landscaping, maintain clear access routes for fire crews. Driveways should be kept free from overhanging branches or vegetation that could block emergency vehicles.

Strengthen Your Home’s Defenses

Building materials and maintenance choices can make a big difference in wildfire resilience. Focus on upgrades that reduce ignition risk and improve structural resistance.

  • Roof: Replace wood shakes with Class A fire-rated materials like composite shingles, metal, or clay tiles.
  • Windows: Install dual-pane tempered glass to resist heat and prevent cracking.
  • Vents: Cover attic and crawl space vents with 1/8-inch metal mesh to block embers.
  • Siding and Decking: Choose noncombustible materials such as fiber cement, metal, or brick instead of untreated wood.

If your garage or storage area contains flammable tools, paint, or gardening chemicals, consider reorganizing with safer storage. Fire-resistant sheds made from resin materials offer extra protection and durability. A well-designed resin shed kit from Keter is a smart investment, keeping essentials secure and away from direct heat or flame exposure.

Prepare an Emergency Plan and Supply Kit

When wildfires threaten, seconds matter. Every household should have a written emergency plan and supply kit ready to grab at a moment’s notice. 

Here’s what your kit should include:

  • Non-perishable food and bottled water for at least three days, stored in an 88 qt large ice cooler to keep it all organized and ready to go
  • A first aid kit and necessary medications
  • Flashlights, batteries, and a portable radio
  • Important documents (birth certificates, insurance papers, mortgages) stored securely or digitized
  • N95 masks for smoke protection
  • Phone chargers and power banks
  • Maps marked with multiple evacuation routes

Practice your evacuation plan regularly with all household members, including children and pets. Know how to disconnect utilities quickly and what to do if sheltering in place becomes necessary.

Stay Informed with Technology

Modern tools make it easier to stay up to date in real time. Download official emergency alert apps and subscribe to local wildfire warning systems. Many states and counties use opt-in text and push notifications to warn residents about fire conditions and evacuation orders. You can also follow updates on community social media pages managed by verified emergency services.

If you live in a high-risk area, consider installing outdoor weather and smoke sensors to alert you to rising temperatures or poor air quality. Smart home devices, such as automated sprinklers or cameras, can help monitor property conditions and provide early detection of approaching flames.

Take Preventive Action All Year Long

Wildfire protection isn’t a one-time task; it’s an ongoing effort. Schedule seasonal maintenance to keep your landscaping, home exterior, and emergency kits ready. In spring, clear vegetation and update your storage. During summer, review your evacuation plan and check for roof debris or clogged gutters. Fall is the time to inspect vents and siding, while winter is a good time to upgrade materials or expand your defensible space.

Small, consistent actions each season make your property more resilient and reduce stress when fire weather arrives. It’s also important to stay connected with neighbors—shared preparedness strengthens community response and can help prevent fires from spreading.

Preparing your home for wildfire season is about more than just checking boxes—it’s about empowering yourself and your family to act confidently when danger arises. By creating defensible space, fortifying your home exterior, organizing fire-safe storage, and maintaining a detailed evacuation plan, you’ll dramatically increase your safety and minimize risk.

No matter where you live, proactive wildfire preparation is one of the best investments you can make. Start today, and let your home stand strong through this—and every—fire season.

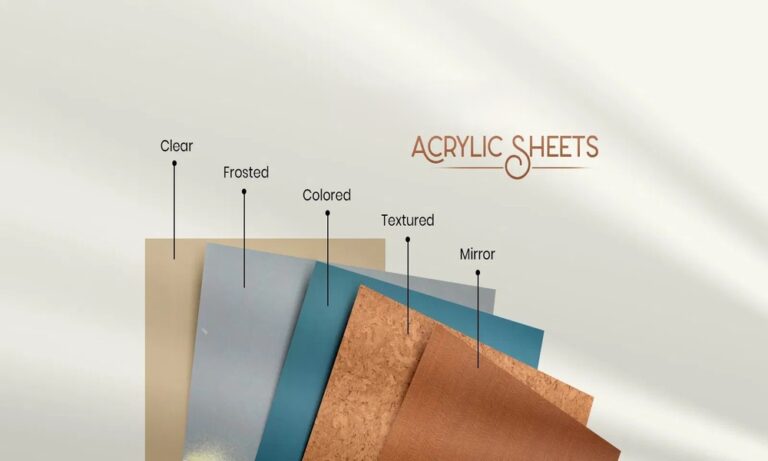
Interior palettes in 2026 are embracing expression, warmth, and a sense of self. Rather than sticking with the usual, safe neutrals, designers are experimenting with colours that feel both personal and harmonious. This shift is especially noticeable in the realm of acrylic sheet colours, where the finishes have become more than just functional. They now play a crucial role in defining the atmosphere and character of a given environment.

Nature-Inspired and Earthy Acrylic Colour Palettes
This year’s trend sees a significant change: colours drawn from nature are on the rise. Sage green, olive, and eucalyptus tones are increasingly favoured for kitchens, clothing, and wall decor.

These colours conjure a sense of calm, while also offering a depth that works well in both compact and spacious settings.

Earthy tones are making a comeback, alongside greens. Think terracotta, clay, and warm browns. These colours are helping to create interiors that feel both grounded and inviting.

Soft neutrals are undergoing a transformation, too. The trend is shifting away from the bright whites and icy greys of the past. Now, warmer shades are taking center stage. Think off-white, beige, taupe, and mushroom grey. These hues bring a quiet depth to a room, avoiding the starkness of their predecessors. Their versatility is becoming evident, making them ideal for broad coverage.

These trending acrylic neutrals serve as a foundation, letting textures, lighting, and furniture take center stage with ease. 

Statement Shades, Finishes, and Layered Colour Play

Bold colours are making a comeback, but this time with a more refined approach.
Emerald green, burgundy, and peacock blue – those rich, deep hues – are making a statement. They’re showing up as accents, not the main event. These colours inject personality and visual flair, especially when set against lighter backgrounds. The key? Balance is key. Use those vibrant colours thoughtfully, drawing attention to particular elements without overwhelming the space.

A significant trend in 2026 acrylic sheet design is the embrace of layered and tonal color palettes. Designers are moving away from a single, unchanging color, instead exploring subtle variations of the same hue across different surfaces. This approach introduces depth and a sense of flow, resulting in more unified spaces. Techniques such as combining matte and glossy finishes within similar tones further amplify this layered appearance.

Pastels are undergoing a refinement, with shades like subdued mint, dusty pink, and gentle lavender adding freshness without being overpowering. These tones work well in bedrooms, study areas, and kitchen shutters, offering a soft contrast to deeper colours beautifully complemented by finishes like CF 187.

High-gloss finishes continue to play an important role in modern interiors. Acrylic surfaces, known for their reflective quality, enhance the impact of colour by adding brightness and visual clarity. This makes even darker shades feel less heavy, especially when combined with good lighting. Whether it’s a sumptuous charcoal or a profound teal, the finish contributes to an airy feel within the room.

Metallic and special-effect finishes are also gaining traction in the world of acrylic shades. Delicate champagne, bronze, and pearlescent hues are being employed to add a hint of visual intrigue, avoiding anything too ostentatious. These finishes are especially effective in modern interiors, where subtlety is valued over flamboyant embellishments.

The year 2026 will see a clear move toward personalization.

Interiors are no longer designed around a single trend but are instead curated to reflect individual preferences. Solid Acrylic sheets, offered in a wide array of colours and finishes, bring this design approach to life. They facilitate everything from subtle sophistication to striking, attention-grabbing designs.

Even as colour trends evolve, the aim remains the same: to create spaces that feel both current and welcoming.

The right acrylic sheet colours, when paired with a well-considered blend of neutrals and pops of colour, can inject both dimension and balance into a room. Brands such as Royale Touche offer a range of carefully chosen options, making it simpler to incorporate these trends into spaces that feel both of the moment and enduring.

A swimming pool is a great place to relax and have fun. But over time, parts of a pool can wear out or break. Small problems can turn into bigger issues if they are not fixed right away. Pool repairs are not just about looks. They also play a big role in keeping the pool safe and the water clean.

Fixing Cracks and Leaks

Cracks in the pool surface may seem small at first, but they can grow over time. Leaks can cause water loss and damage to the area around the pool. More importantly, cracks can create sharp edges that may cause injuries. Repairing these issues helps keep swimmers safe and prevents further damage.

Keeping Equipment Working Properly

Pool systems rely on equipment like pumps, filters, and heaters. When these parts stop working well, the water may not stay clean. A broken pump or filter can allow dirt, bacteria, and algae to build up. This can make the pool unsafe to swim in. Regular repairs make sure all equipment works as it should, helping to keep the water clear and healthy.

Improving Water Circulation

Good water flow is key to a clean pool. When water circulates properly, chemicals spread evenly, and debris is filtered out. If there is a problem with the circulation system, some areas of the pool may not get enough treatment. This can lead to cloudy water or algae growth. Fixing circulation issues helps maintain better water quality.

Preventing Electrical Hazards

Pools often have electrical parts, such as lights and control systems. If these are damaged or not installed correctly, they can become dangerous. Faulty wiring can increase the risk of electric shock. Repairing and checking electrical components helps reduce these risks and keeps the pool safe for everyone.

Maintaining Proper Chemical Balance

When a pool has damaged equipment, it can be harder to keep the right chemical levels. Poor balance can cause skin irritation, eye discomfort, and unsafe swimming conditions. By repairing pool systems, it becomes easier to maintain the correct chemical levels and keep the water safe.

At Perfect Catch Electric, we know how important a safe and clean pool is for your home or business. We work with care to repair electrical systems and support proper pool function. Our team helps ensure that your pool stays safe, efficient, and ready to enjoy. When you trust us with your pool repairs, we are here to help you keep your water clean and your swimmers protected.

This post was written by a professional at Perfect Catch Electric. Perfect Catch Electric is a family-owned pool electrical specialist serving Largo and the greater Tampa Bay area. With over 30 years of experience, we focus exclusively on electrical systems for pools and spas, including pumps, heaters, automation, lighting, salt systems, and bonding and grounding. Our work is always code-compliant, safe, and built to last. Licensed and insured, we pride ourselves on honest service, clear communication, and reliable solutions that keep pools operating efficiently and safely. When it comes to pool electrical work, pool repair Largo FL, experience matters-and Perfect Catch Electric delivers it every time.