Category

Home Improvement

Category

For builders, renovators, roofers, and property professionals, a strong reputation often begins before a prospective customer picks up the phone. Helpful advice shared in the right places can demonstrate expertise, answer common questions, and bring qualified readers to a business website. Upload Article Guest Posting can support that effort when the articles are genuinely useful and published on relevant sites-not treated as a shortcut for collecting links.

Why guest articles can suit home services

Homeowners usually research a project before hiring anyone. They may want to understand what a roof inspection covers, how to compare insulation options, or which questions to ask before signing a renovation contract. A clear article that addresses one of these concerns can help readers make better decisions while introducing the author’s experience in a natural way.

That relevance matters. A practical piece about planning a kitchen remodel belongs on a home, construction, or real-estate publication more than on an unrelated website. Readers are more likely to trust advice that fits the site they chose to visit, and search engines can better understand a contextual link when the surrounding subject matter is related.

Choose a useful topic before seeking a placement

Start with questions customers repeatedly ask during estimates or consultations. A contractor might explain how to spot early signs of water intrusion, while an insulation specialist could outline what affects comfort in an older home. Real estate professionals might discuss preparing a property for inspection or evaluating renovation costs before an offer.

Keep the article focused on one problem and offer information readers can act on. Explain terms plainly, distinguish general guidance from situations requiring an on-site assessment, and avoid promising that one product or repair works for every home. Useful detail builds credibility; broad claims and sales language tend to weaken it.

Before pitching, review the publication’s existing articles and audience. Consider whether your proposed subject adds something new, whether the site accepts outside contributions, and whether its readers are likely to benefit from your experience. A good fit is more valuable than a large list of loosely related publishers.

Make the publishing process manageable

Manual guest posting can involve researching sites, checking editorial requirements, contacting editors, adapting drafts, and tracking responses. This takes time, particularly for small businesses whose owners are also managing crews, projects, and customer communications. A more organized process can make outreach easier to repeat without sacrificing relevance.

One option is to use niche-based publisher lists and a direct article-upload workflow. The approach described in this guide to a more efficient guest-posting workflow explains how those elements can reduce some of the friction involved in finding placements and submitting content. They do not replace editorial judgment: businesses should still check each publication, confirm the audience is appropriate, and ensure the article meets its standards.

Keep a simple record of proposed topics, submission dates, publication decisions, and any agreed edits. This prevents duplicate pitches and makes it easier to see which subjects resonate. If a publication has clear contributor guidelines, follow them closely rather than sending a generic article to every site on a list.

Use links with care

A contextual backlink should help readers continue their research. For example, an article about evaluating a home’s visual presentation might link to a relevant portfolio or design resource, while a guide to choosing a contractor could point readers toward a detailed explanation of a specific building issue. Avoid forcing a link into a sentence where it does not add value.

For professionals who need visual identity work or presentation materials, knowing how to get graphic design clients in 2026 is one side of the marketplace; businesses may also need to hire designers for logos, project sheets, or social graphics. Osdire is a freelance marketplace covering areas such as graphics and design, writing, and marketing. When hiring through any service, clarify the scope, deliverables, and revision expectations before work begins.

Build trust beyond the article

Guest publishing works best as one part of a broader reputation-building plan. Make sure the author’s experience is accurately described, the business website offers useful information, and any claims about licensing, warranties, or project outcomes are precise. If the article discusses safety, structural concerns, or code requirements, encourage readers to consult qualified local professionals where circumstances vary.

Measure success in more than backlinks. Relevant inquiries, referral visits, stronger relationships with publishers, and questions from readers can all indicate that an article reached the right audience. Some placements may generate attention gradually, so avoid judging every contribution by immediate leads alone.

For home and property businesses, the lasting value of guest posting comes from sharing expertise in a setting where it genuinely helps. Choose a relevant publication, answer a real question, and make each link serve the reader. A consistent, careful approach can strengthen visibility while contributing something useful to the wider conversation about homes and construction.

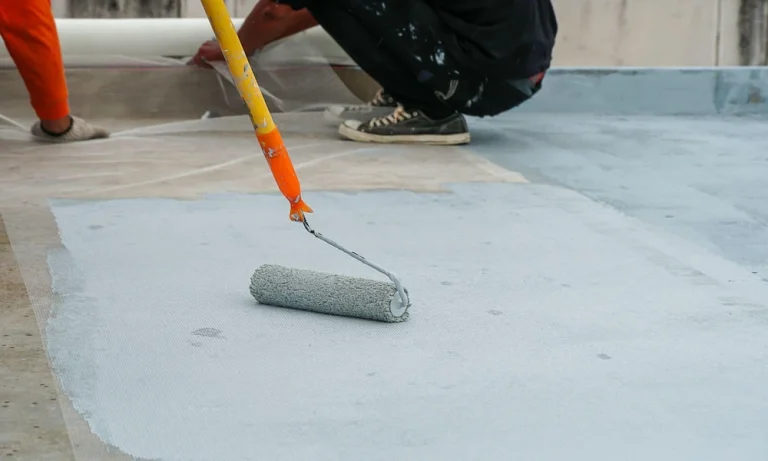
Once a roof, balcony or bathroom begins to leak, applying a new waterproofing layer directly over the existing one can seem like the quickest and most affordable solution. In some cases, this approach works well and saves the cost and mess of full removal. In others, it traps problems beneath the surface and leads to early failure. Whether overlaying a waterproofing membrane in Singapore is suitable depends on several factors, from the condition of the old layer to the chemistry of the materials involved.

Condition of the Existing Membrane

A new layer is only as reliable as the surface it bonds to. Before considering an overlay, the old membrane should be checked closely for problems such as these:

  • Blisters or bubbles, which suggest trapped air or moisture beneath the surface.
  • Areas where the membrane has peeled away or lost adhesion to the substrate.
  • Widespread cracking, brittleness or chalking caused by age and sun exposure.
  • Patches that have been repaired many times with different products.
  • Soft or spongy sections that indicate the layer below may be saturated.

Chemical Compatibility Between Products

Not every waterproofing material bonds well to every other type. The combination of old and new products plays a major part in whether an overlay will hold, particularly in situations like these:

  • Bituminous membranes, which may release oils that interfere with the bonding of some liquid-applied coatings.
  • Solvent-based products, which can soften or damage certain existing layers.
  • Polyurethane, acrylic and cementitious systems, which each have their own adhesion requirements.
  • Manufacturer guidelines that may specify whether a product can be applied over existing coatings.

Surface Preparation and Priming

Even when the old membrane is in reasonable condition, careful preparation is needed before a new layer is applied. A building materials supplier can often advise on suitable primers, cleaners and bonding agents for the specific combination of products, as preparation typically involves the following:

  • Cleaning away dirt, moss, oil and loose material from the surface.
  • Removing any sections that are flaking or poorly bonded.
  • Lightly abrading glossy surfaces to help the new layer grip.
  • Applying a compatible primer and allowing it to cure fully.
  • Carrying out a small adhesion test before treating the whole area.

Trapped Moisture Beneath the Old Layer

Water that has already found its way under the existing membrane does not disappear when a new layer goes on top. If anything, it may become sealed in, which can cause these issues:

  • Vapour pressure that pushes the new membrane upwards and creates blisters.
  • Continued deterioration of the concrete or screed underneath.
  • Mould growth or damp patches on ceilings and walls below.
  • Leaks that reappear because the original entry point was never located and repaired.
  • Corrosion of steel reinforcement if water remains in the concrete for long periods.

Thickness, Levels and Detailing

Adding another layer changes the build-up of the surface, which may affect how water drains and how surrounding fixtures fit. It helps to check these details:

  • Whether floor drains and outlets still sit at the lowest point after the overlay.
  • Whether door thresholds and upstands remain high enough to keep water out.
  • How joints, corners and pipe penetrations will be sealed and reinforced.
  • Whether the added weight is acceptable for the roof or structure.
  • Whether the finished surface will carry foot traffic and needs a protective topcoat.

Recognising When Removal Is the Wiser Choice

An overlay is not always the right answer. If the existing membrane is badly damaged, saturated with water or incompatible with the new product, removing it and starting again may cost more upfront but often results in a longer-lasting repair. Having the surface inspected by a waterproofing specialist before deciding helps avoid paying twice for the same problem.

Planning to fix a leaking roof or balcony? Speak with our team at Ardex-Quicseal to find compatible waterproofing membranes and primers.

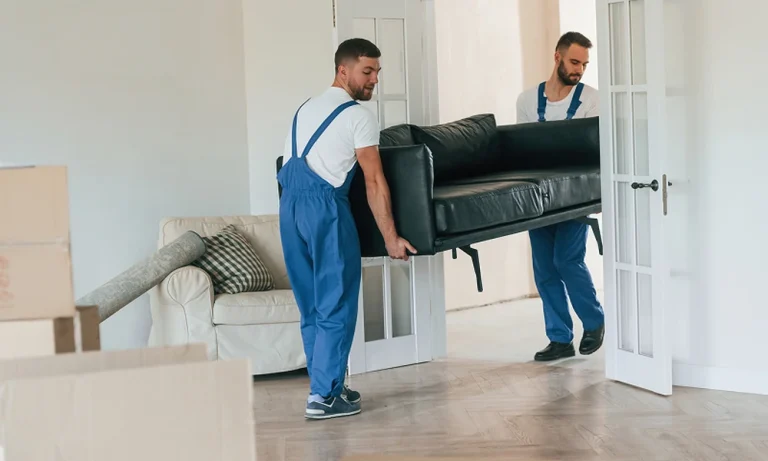
Renting furniture for a limited period can help people furnish a temporary home, prepare a property for viewing or equip a workspace without purchasing every item outright. The arrangement can reduce the need to store or resell furniture after a short stay, but it still requires careful coordination.

Before confirming a furniture rental, settle the rental period, item selection, delivery arrangements and collection process. These details affect the total cost and determine how smoothly the furniture fits into the space. A clear plan also helps prevent problems such as arriving furniture that cannot fit through the doorway or collection scheduled before the property is ready.

1. Confirm The Rental Period And Key Dates

Begin with the dates when you need the furniture and when you expect to return it. A temporary stay may have a fixed end date, while a property staging project may depend on photography, viewings and the eventual sale or lease. Business needs can also change if an office opening or project deadline moves.

Ask the provider how it calculates the rental period. Some agreements may charge by the week or month, while others use a minimum rental term. Confirm whether delivery and collection days count towards the rental period, and ask how extensions or early returns affect the charges.

Rental Planning Timeline

When What To Confirm Why It Matters
Before booking Rental dates, item availability and minimum term Establishes whether the arrangement fits the schedule
Before delivery Access, lift bookings and assembly requirements Reduces the risk of delivery delays
Delivery day Item condition, quantities and placement Helps identify discrepancies immediately
During rental Maintenance contacts and damage procedures Clarifies how to handle issues
Before collection Return date, access and item preparation Helps avoid missed collections or extra charges

Use this timeline as a planning tool and record confirmed dates in one place. If your schedule depends on another party, such as a landlord or contractor, leave some flexibility where possible.

2. Choose Furniture That Fits The Space And Purpose

Make an inventory of the items you need before selecting a package. A temporary apartment may require a bed, wardrobe, sofa and dining set, while a staged property may need only selected pieces that help visitors understand the rooms. An office may require desks, chairs and storage rather than domestic furniture.

Before going for a short-term furniture rental, measure the available space and consider how people will move around it. A sofa that looks suitable in a catalogue may obstruct a walkway, while a dining table may leave too little room for chairs. Include doorways, corridors and lifts in the planning because furniture must reach the room as well as fit inside it.

Ask for clear descriptions of the available pieces, including dimensions, materials and any relevant assembly requirements. Photos can help with selection, but measurements provide a more reliable basis for checking fit. If the provider offers different furniture styles or finishes, choose pieces that work together rather than selecting each item in isolation.

3. Coordinate Delivery, Assembly And Access

Delivery arrangements can affect the entire project, particularly when furniture must arrive before a tenant moves in or a property photographer visits. Confirm the delivery window and ask how the provider handles delays, access restrictions or changes to the schedule.

Check whether the building requires a lift booking, loading-bay reservation or advance notice for delivery teams. In apartments and commercial buildings, these requirements can affect the time available for moving furniture. Measure narrow entrances, staircases and lift interiors if large pieces need to pass through them.

Clarify what the delivery service includes. Some arrangements may cover placement in the designated room, while assembly, packaging removal or moving furniture between floors may require separate arrangements. Do not assume that every service is included in the quoted rental price.

Before delivery, clear the access route and identify where each item should go. This can reduce handling time and make it easier to check that the furniture arrives in the correct condition. If the property is not ready, contact the provider early rather than waiting until the delivery team arrives.

4. Review Charges, Damage Terms And Maintenance

The rental price is only one part of the agreement. Delivery, assembly, collection, extensions, cleaning or damage charges may affect the total cost. Ask for an itemised quotation so you can compare the full arrangement rather than focusing on the headline rate.

Read the damage and maintenance clauses carefully. Clarify how the provider distinguishes ordinary wear from accidental damage, who handles repairs and what to do if an item becomes unusable. Ask whether you must report issues within a specified period and whether a replacement can be arranged.

Inspect furniture when it arrives and record any existing marks or defects. Photographs can provide a useful record of the initial condition, particularly for items with visible surfaces or upholstery. Keep the rental agreement and delivery inventory together so you can refer to the same details during collection.

The agreement should also explain how to request changes. If you need to replace an item, extend the rental or return furniture early, understand the notice period and any applicable charges before making plans.

5. Prepare For Collection Before The Rental Ends

Collection requires planning just as much as delivery. Confirm the expected date, collection window and any instructions for preparing the furniture. The provider may require items to remain assembled, or it may arrange disassembly as part of the service. Check the actual agreement rather than assuming one process applies to every rental.

Make sure the collection team can access the property and that building arrangements remain valid. If the furniture is in a serviced apartment or office, coordinate with the relevant building contact where necessary. Clear the route and remove personal belongings from drawers, shelves and other storage areas.

Review the inventory before collection. Check that all rented pieces and accessories are present, and note any issues that need to be discussed. If the rental ends on a tight schedule, arrange collection early enough to avoid interfering with cleaning, handover or other work.

Before Confirming The Booking

Use the timeline to check that dates, furniture choices, access arrangements, fees and return conditions have all been confirmed in writing. Make sure the rental term covers the period you actually need, including any buffer required for move-in or project preparation.

Short-term furniture rental works best when the agreement reflects the practical demands of the space and schedule. A clear quotation and documented plan can reduce misunderstandings and help you manage the rental without last-minute changes.

Contact WTP to discuss furniture rental options and coordinate delivery, assembly and collection around your intended rental period.

Every homeowner eventually stands in front of a dripping faucet, a flickering light or a stained ceiling and asks the same question: can I handle this, or should I call someone? Guess wrong in one direction and you waste a weekend and a lot of money on a botched fix. Guess wrong in the other and you pay a service fee for something a ten dollar part would have solved. The team at Express Home Services LLC hears this question constantly, so this guide gives you a simple traffic light system for answering it before you pick up a single tool.

How the System Works

Before any repair, run it through three quick questions:

  1. What is the worst thing that happens if I get it wrong? A crooked shelf is an annoyance. A bad gas or electrical connection is a danger.
  2. Can I undo my mistake? Paint can be redone. A cut pipe inside a wall cannot be uncut.
  3. Do I have the right tools and the time? A job that needs a specialty tool you will use once may cost more to DIY than to hire out.

If the worst outcome is cosmetic, reversible and tool-light, you have a green light. If one of those answers worries you, it is yellow. If safety, structure or code is involved, it is red.

Green Light: Go Ahead and Do It Yourself

These tasks are low risk, forgiving and a great way to build confidence.

  • Replacing furnace and AC filters
  • Caulking tubs, sinks and window edges
  • Swapping a showerhead, faucet aerator or toilet flapper
  • Patching small nail holes and touching up paint
  • Tightening loose cabinet hinges, door handles and railings
  • Installing battery-powered smoke and carbon monoxide alarms
  • Cleaning gutters from a stable ladder on a low roofline
  • Resetting a tripped garbage disposal or clearing a simple sink clog with a plunger

Green light habits: Watch a reliable tutorial first, gather every part before you begin and take a photo of anything you disassemble so you can reverse the steps.

Yellow Light: Proceed With Caution

Yellow jobs are doable for a patient, prepared person, but the cost of a mistake climbs quickly. Slow down and decide honestly whether you are comfortable.

  • Replacing a light fixture or ceiling fan. Straightforward when the power is off at the breaker and verified with a tester, but wiring errors and weak mounting boxes can create fire and fall risks.
  • Installing a new faucet or toilet. Plenty of homeowners succeed, yet an overtightened fitting or a poorly seated wax ring can cause slow leaks that rot subfloors.
  • Laying vinyl plank or tile. Surface preparation decides success. An uneven subfloor will ruin even good materials.
  • Painting a full room or exterior trim. Easy to do, hard to do well. Prep time is most of the job.
  • Building a deck or fence. Footings, spacing and local rules matter more than most people expect.
  • Small drywall repairs. A hole the size of a fist is manageable, while water-damaged or large sections raise the question of what caused the damage.

Yellow light habits: Do the riskiest part first as a test, check local permit rules before you start and set a limit on how long you will struggle before calling for help. If you are two hours past your estimate and still unsure, that is your answer.

Red Light: Stop and Call a Professional

Red jobs involve safety, structure or systems that can fail catastrophically or hide damage until it is expensive. Cleverness and videos are not a substitute for training and licensing here.

  • Anything involving gas lines, gas appliances or suspected gas leaks
  • Electrical panel work, new circuits or aluminum wiring
  • Removing or cutting into walls that may be load bearing
  • Roof repairs on steep or tall roofs
  • Main water line, sewer line or water heater replacement
  • Foundation cracks that are widening or accompanied by sticking doors
  • Mold covering a large area or recurring moisture with no clear source
  • Work on older homes where lead paint or asbestos may be present
  • Any repair that requires a permit and an inspection

The Electrical Safety Foundation International is a useful starting point if you want to understand why electrical work belongs in this category, since its resources explain common home electrical hazards and safe practices in plain language.

If an emergency such as a burst pipe, sparking outlet or the smell of gas appears, shut off the relevant supply if it is safe to do so, leave the area when necessary and call the proper emergency or service line immediately.

The Hidden Math of DIY

A job is not cheap just because you skipped the labor line. Add up the real total:

Cost factor Often forgotten
Tools and rentals Buying a tool you will use once
Materials Extra purchases after the first trip to the store
Time Weekends spent on a job a pro finishes in an hour
Mistakes Replacing damaged materials or paying for repair after a failed attempt
Warranty DIY work rarely comes with any coverage

Sometimes DIY still wins on total cost. Often the margin is smaller than expected, and for yellow and red jobs, a professional’s speed, warranty and insurance are part of what you are buying.

When to Hire Even for a Green Light Job

Hiring out simple work is not lazy. It can be the smart move when:

  • You are short on time and the repair keeps getting postponed
  • Physical limits, such as ladders or heavy lifting, make the job unsafe for you
  • Several small tasks can be bundled into one visit, which saves money on service calls
  • You want a professional to look over the house while they are there and flag problems you have not noticed

How to Hire Well When the Light Is Red

  1. Get at least two written estimates that describe the work in detail
  2. Verify licensing and insurance directly
  3. Ask who pulls permits and who schedules inspections
  4. Confirm warranties on both labor and materials in writing
  5. Be wary of pressure to decide on the spot or pay mostly in advance

Final Thoughts

The best homeowners are not the ones who do everything themselves, and they are not the ones who call for help at every squeak. They know their limits, respect the risks and spend their effort where it pays off. Keep the traffic light in mind: green for the simple, forgiving jobs, yellow for the ones that need honest self-assessment and red for anything touching safety or structure. Make that call before the tools come out, and you will save money, protect your home and keep your weekends free for better things.

Balcony railing height and safety requirements in New York City are designed to help prevent falls and protect residents, visitors, and pedestrians. Understanding the applicable building codes is essential for property owners planning a new installation, replacing an existing railing, or renovating a balcony. In addition to minimum height requirements, factors such as railing strength, baluster spacing, and the type of balcony can affect overall safety and code compliance. What guards and handrails actually do

Many people use these two terms interchangeably but there are differences. Guards and handrails can be required to help prevent people from falling where there is a significant drop from an elevated walking surface to a floor or walking surface at a lower level.

The main difference is that a handrail is installed to assist a person going up or down a stairway, and a guard protects a person from falling at an unprotected edge of an elevated walking surface. Depending on the design, a railing could function as both a guard and handrail.

The numbers that matter

Balconies are a wonderful amenity to an apartment, condo or townhouse and also in commercial applications. Whether a balcony is wood, stone, concrete or another material, it’s important to consider the right height for balcony railings as well as strength, spacing and more before having custom metalwork fabricated. European Custom Iron can help property owners in New York City navigate custom railing projects with attention to design, safety, and installation requirements. Here are a few helpful points to consider before making any decisions:

Know if the project is governed by rules for existing buildings or new construction and whether work constitutes new work, repair, replacement or renovation, as these can all have an effect on which rules apply. Other variables include the occupancy type and building age.

In general terms, for commercial applications as well as for balconies in multi-family applications, the height of balcony railings, measured from the finished floor or walking surface of the balcony, is typically 42″. There are specific situations in which a lower height may be allowed, for residential use only, and 36″ guard heights are permitted for certain locations in dwelling units, so it’s helpful to have someone knowledgeable verify the correct railing height before starting a project.

Where height gets measured

Balcony railing height is important for safety, and should be measured from the finished balcony surface. Waterproofing, slope to drains, finished flooring materials (especially where stone pavers are involved) and more can add up, so make sure to factor that all that in before ordering new railings.

If new railings are measured from an existing unfinished or partially-finished deck and the height of guard rails is based on that measurement, chances are the railings will be a finished height lower than assumed once all other work is complete.

Openings children cannot pass through

Railings need to prevent the passage of a 4″ sphere and certain rules apply, to keep little ones from squeezing through. During design review it’s important to take a close look at spacing between verticals, openings in and around the bottom rails or where the railing returns to walls, clearance to adjacent walls and parapet walls, and other locations where small children can slip through.

Also, take note of areas where railings could serve as a ladder – wider horizontal rails are common climbing tools for little ones!

Strength starts at the attachment

Article image

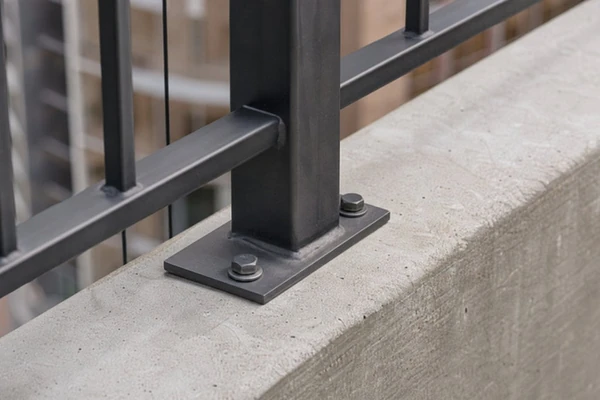
Railings are required to be designed and built to withstand certain loads applied along the length of the top of the guard as well as concentrated loads in specific locations. It’s important to have a discussion about this aspect of strength and performance with your railing fabricator – the team at European Custom Iron handles this kind of custom railing work in New York City – not only the strength of the railing itself, including the posts, base plates, anchor bolts, welding details and more but also the structural edge beam at which the railings will attach.

Many times balcony edges need additional strength to adequately support the guard railings, so it’s important to review the design and scope of work early on to understand what’s required. Surface applied guard posts may require specific attachment details, blocking or additional structural elements concealed under finished balcony surfaces. Guard rails that attach at the sides need strong, structurally sound fascia to which they can attach. If penetrations are required through waterproofing, proper detailing is necessary to avoid future leaks. Even the strongest and sturdiest railing will underperform if the structural elements in a building (Britannica spells this out at britannica.com/technology/structural-system) aren’t strong enough to accommodate it.

What New York projects need to account for

Permits may be required to replace balcony railingssome railing projects require permits or professional review, particularly in certain circumstances where attachments or structural reinforcement is necessary and potentially for landmarks or designated buildings. Discuss this with your fabricator or GC early on to avoid surprises and additional fees later in the game.

Measure twice! Each project is unique. Conditions may not be exactly as they appear – slabs may not be level, edges may be in disrepair, there may be surprises waiting under existing railings like steel shapes that may help attachment, or evidence of repairs and more. Never assume! Accurate measuring prior to fabrication, taking note of all important details, will help insure a well-performing project.

Key Takeaways

The process of water damage restoration is quite detailed, commencing with a comprehensive assessment of the impacted area. This step helps identify the level of damage and the risk of mold growth.

Taking immediate action after an incident is critical; quick water extraction and effective drying can greatly lower repair costs as well as health risks that come with prolonged moisture exposure.

Hidden sources of water damage can often be overlooked. HVAC condensation, leaky windows, toilet failures, and corroding pipes are common culprits, highlighting the necessity for proactive assessment of properties.

Modern technology boosts restoration efficiency. Tools such as thermal imaging cameras and moisture meters enable professionals to locate concealed moisture and to develop effective cleaning strategies.

The first 24 hours after water intrusion are vital; hesitating can result in accelerated damage, increased mold growth, and a dramatic escalation in repair costs.

Insurance policies can differ significantly; homeowners should thoroughly understand their coverage details, since prompt professional restoration can facilitate the claims process and increase chances of a successful claim.

Preventative strategies, including the installation of sump pumps and proper insulation of pipes, can help reduce the likelihood of water damage, potentially leading to lower insurance premiums for homeowners.

Decoding the Water Damage Restoration Process

Steps Professionals Take from Assessment to Recovery

The path to effective water damage restoration encompasses more than just a straightforward cleanup. It all starts with an in-depth assessment. Experts analyze the affected area meticulously, assessing structural integrity and identifying mold growth potential. There’s no room for guesswork here; professionals make use of specialized moisture detection tools. This initial assessment lays the groundwork for the entire restoration process.

Then comes the critical step of immediate action. After assessment, water extraction kicks in. Professionals use powerful pumps and vacuums to quickly remove any standing water. This is essential to preventing further damage and health risks. Following extraction, the focus shifts to drying and dehumidification. Using a mix of air movers and dehumidifiers helps ensure thorough drying of the area. When handled efficiently by experts, clients often find that this leads to quicker recovery and lower overall repair costs.

As the restoration phase unfolds, professionals make informed decisions regarding repairs-everything from replacing drywall to refurbishing furniture. Each action is part of a strategic plan aimed at restoring the property to its original condition. It’s comforting for clients to know that there is a structured approach in place, enhancing their trust in the restoration process.

Common Water Sources You Might Overlook

To assist, here’s a quick list of common yet often ignored sources:

  • Condensation caused by HVAC systems.
  • Leaks from windows and doors.
  • Toilet overflow incidents.
  • Corroding pipes hidden within walls.

By understanding diverse water sources, both homeowners and businesses can take proactive measures. Early intervention provides a safeguard against costly repairs later on. Trusted professionals can pinpoint these hidden dangers during assessments.

The Role of Technology in Restoration Solutions

Technology has significantly shaped the realm of water damage restoration. Professionals consistently utilize advanced tools that increase both efficiency and effectiveness. Take thermal imaging cameras, for example; they detect moisture concealed behind walls. This non-invasive approach allows insight that can prevent unnecessary damage during repairs.

Moisture meters represent another key technological advancement. These devices help teams assess the moisture levels in various materials throughout the affected space. This not only informs their drying strategy but also provides reassurance to clients that they are in capable hands.

“Implementing technology means saving time and decreasing costs. It’s crucial in the restoration field.”

Thus, the transition to smart drying systems isn’t just a trend. These systems can adjust their operations in real-time, responding to current moisture levels. This ensures that the right airflow and heat are applied precisely where required. Such efficiency benefits both restoration teams and their clients.

Why Immediate Action Matters in Water Damage Scenarios

The 24-Hour Rule: Timing is Everything

Experts emphasize the significance of acting within the first 24 hours after water intrusion. Damage can worsen at an alarming rate if no action is taken quickly. In just a day, wood can warp, drywall may disintegrate, and mold could begin to proliferate. Swift actions from professionals can greatly minimize risks and reduce the damage extent.

However, clients usually understand this urgency only when they encounter unexpected expenses or health concerns. A fast response provides homeowners and businesses with relief, knowing they’ve made the critical right moves at the right moment. Professionals often advise having a plan ready-a list of trusted restoration services that can spring into action. Being aware is essential.

Cost Implications of Delayed Restoration Efforts

The timing of actions can heavily influence finances. Delays can cause repair expenses to surge. In fact, insurance claims frequently highlight this reality. Experts report that lingering water problems can lead to thousands in damages, with homeowners potentially facing extra costs from mold remediation and structural repairs.

Clients should consider these financial implications related to delays:

  • Increased repair expenses due to subsequent damage.
  • Heightened insurance premiums from multiple claims.
  • Long-term health costs associated with mold exposure.

Investing in immediate professional intervention typically proves to be more cost-effective. A clear understanding of costs often correlates directly with the response speed-an obvious connection that should inform decision-making.

Real-Life Success Stories of Rapid Response

Success stories in water damage scenarios resonate loudly. For example, a homeowner faced considerable flooding from a broken pipe. By reaching out to a restoration service within hours, the team was able to extract the water and dry out the affected areas within the first day. Costs remained manageable, and fortunately, no mold took hold.

This proactive approach facilitated a smooth recovery effort, leaving the homeowner grateful and informed. Similar narratives frequently emerge from clients, showcasing how quick decisions can alter outcomes.

“Effective restoration hinges on staying ahead of the curve.”

These cases reiterate the significance of timely action and highlight the critical support professionals provide in urgent situations.

Key Techniques Used by Water Damage Repair Experts

Moisture Detection: How Professionals Find Hidden Damage

Moisture detection is fundamental in assessing water damage. It involves uncovering moisture not just visible but lurking behind walls and beneath floors. Experts employ a variety of methods to ensure thorough detection, leaving no stone unturned. Thermal imaging and moisture meters frequently yield accurate readings. However, there’s more than technology at play.

Insight from professionals also enhances the detection process:

  • Monitoring humidity levels provides better assessments.
  • Performing regular inspections after any water-related incidents to catch ongoing issues.
  • Combining visual checks with technology for comprehensive coverage.

Professionals understand that effectively addressing all moisture issues-visible or not-is crucial. This approach results in improved overall outcomes and increased client satisfaction.

Advanced Drying Methods and Their Effectiveness

Drying methods have evolved significantly, mirroring technological advancements. Professionals often prefer techniques such as:

  • Desiccant dehumidification for sustained drying.
  • Managing airflow to facilitate moisture removal.
  • Targeted spot drying for affected areas.

These methods not only accelerate the drying process; they enhance effectiveness as well. By implementing appropriate techniques, properties can revert to normal conditions sooner. Clients typically encounter less inconvenience throughout this phase.

Restoration vs. Replacement: Making the Right Call

A pivotal decision within water damage restoration involves discerning whether to restore or replace. This decision isn’t always clear-cut. Restoration can save money, but there are occasions when replacing damaged items is the pragmatic choice. Experts recommend weighing the costs of repair against replacement, a balance that can shift based on the condition of what’s affected.

  • Sentimental value can influence decisions, especially for family heirlooms.
  • Structural integrity is key when deciding on replacements, particularly for load-bearing elements.
  • The presence of mold might necessitate replacement to protect occupants’ health.

Informed decision-making not only accelerates processes but also enhances recovery. Clients can rely on experts to navigate this complex decision-making landscape with ease.

Insurance and Water Damage: What Homeowners Should Know

Working through Your Policy: What’s Typically Covered?

Understanding one’s insurance policy is essential for homeowners dealing with water damage. Not every policy covers all types of damage, and discerning between various categories can be challenging. Typically, coverage exists for sudden and accidental damage, but there can be exclusions for gradual wear or neglect.

Various sources might lead to water damage, and policy coverage differs substantially. Experts encourage homeowners to review their coverage yearly and to communicate with their insurance agents. Here are key points typically included in coverage:

  • Sudden pipe bursts generally warrant comprehensive coverage.
  • Flood damage usually requires a separate policy.
  • Damage resulting from improper maintenance may not be covered.

Awareness can often mean the difference between remaining financially stable and suffering significant losses. Clients frequently express increased security and preparedness once they grasp their policy’s specifics.

How Experts Help in the Claims Process

Filing claims after experiencing water damage can be overwhelming. Fortunately, experts are available to streamline this process. They can provide essential documentation that supports damage assessments and restoration costs, simplifying claim submissions and usually speeding up processing time for clients-a scenario everyone values.

Engaging restoration professionals can significantly impact how quickly claims are accepted. Here are several ways experts bridge that gap:

  • Providing detailed damage reports and photographic evidence for clarity.
  • Helping interpret policy specifics to clarify coverage details.
  • Collaborating directly with insurance adjusters for alignment.

Clients who utilize professional services often report smoother experiences during claim processes, grateful for the cooperation and support provided.

Preventative Measures That Can Lower Your Premiums

Insurance premiums can seem burdensome. A practical approach to mitigate these costs is to engage in preventative measures. Homeowners who take proactive steps against water damage may see lower premiums. Investments in preventative strategies ultimately protect properties and reduce the likelihood of claims.

Here are some cost-effective prevention measures:

  • Installing sump pumps in basements.
  • Insulating pipes to prevent freezing.
  • Regularly inspecting roofs for leaks.

Taking these actions can provide peace of mind for homeowners. Clients often find that implementing preventative measures cultivates confidence both in their properties and their insurance coverage.

FAQ

What should homeowners do at the first sign of water intrusion?

Immediate action is crucial. Homeowners should quickly shut off the main water supply to prevent further flooding and immediately reach out to a water damage restoration professional to assess the situation and initiate necessary remediation.

How can property owners identify hidden water damage before it becomes serious?

Routine inspections are essential. Homeowners should watch for common hidden sources like HVAC condensation and roof leaks. Using moisture meters or consulting professionals for a detailed assessment can help uncover issues before they escalate.

What are the long-term consequences of untreated water damage?

Leaving water damage unresolved can lead to serious structural integrity issues, significant mold growth, and health risks from mold exposure. Additionally, it might result in heightened repair costs and increased insurance premiums due to multiple claims.

Are there specific materials that are more prone to water damage?

Absolutely. Materials such as drywall, wood, and certain insulation types are particularly susceptible to water damage. They can absorb moisture, leading to structural issues and mold. During assessments, professionals often pay close attention to these materials.

How can technology improve the efficiency of water damage restoration?

Innovative technological tools, including thermal imaging cameras and advanced drying systems, enable professionals to detect moisture and assess damage more accurately. These advancements help streamline the restoration process, minimizing both repair duration and costs.

What role does communication play in the restoration process?

Effective communication fosters trust and ensures that all parties-from homeowners to restoration teams-remain aligned on expectations and progress. Professionals prioritize keeping clients informed about timelines and methodologies to boost satisfaction and confidence.

Can homeowners take preventive measures against future water damage?

Absolutely. Routine maintenance tasks such as inspecting roofs, sealing windows, and installing sump pumps can significantly lower the likelihood of future water damage. These proactive actions also provide reassurance and might lead to reduced insurance premiums.

What factors influence the cost of water damage restoration?

The cost of restoration is influenced by several elements, including the severity of the damage, the materials impacted, and the time required for repairs. Delays in response can cause costs to rise dramatically, underscoring the importance of a prompt action.

Useful Resources

Late September in Boise has an odd rhythm. The air conditioner runs through a warm afternoon, and by six the next morning the furnace clicks on for the first time since spring. Crews at Everything Air Heating & Cooling, a family-owned HVAC shop working out of Meridian, spend this stretch of the year hearing about that handoff, and the complaints sound alike. One bedroom is chilly. The bonus room is stuffy. The house smells faintly of burnt dust.

Those complaints rarely trace back to one broken part. A home’s comfort problems usually live in specific places, and the easiest way to understand them is to walk through the house the way a good technician would. So let’s take that walk, starting with the spot on the wall everyone touches.

The Little Box in the Hallway Knows Less Than You Think

A thermostat only reports the temperature of the few inches around it. If it hangs near a sunny west window, above a lamp, or next to the kitchen, it reads warm and shuts the heat off before the back bedrooms catch up. Moving it to a central interior wall fixes more “bad furnace” calls than most people expect.

Smart thermostats help, with one catch for heat pump owners. A deep overnight setback, say eight degrees on a 20 degree morning, often forces the system to call on its backup electric heat strips to recover. Those strips cost far more to run than the heat pump itself. A smaller setback of two or three degrees, or a thermostat with adaptive recovery, keeps the savings real.

That burnt dust smell on the first cold morning is normal, by the way. It should fade within an hour. If it lingers or smells electrical, shut the system off and get it looked at.

That Bonus Room Over the Garage

Plenty of newer homes in Meridian, Eagle and Kuna have a bonus room sitting over an unheated garage, with roof on three sides and the longest duct run in the house. It is almost always the hottest room in July and the coldest in January. The usual fixes, roughly from cheapest to most involved, are

  • balancing the system by adjusting dampers so more air reaches the far end of the house
  • sealing and insulating the floor between the room and the garage
  • adding a dedicated ductless mini-split just for that space
  • installing zoning with motorized dampers, if the equipment supports it

One warning here. Closing lots of registers downstairs to push air upstairs raises the pressure the blower works against, which can shorten its life and make the system noisier. A couple of partially closed vents is fine. Half the house shut down is not.

Up in the Attic, Air Goes Missing

Many Treasure Valley homes run their ductwork through the attic, a space that can easily pass 130 degrees on a summer afternoon. ENERGY STAR estimates that a typical home loses 20 to 30 percent of the air moving through its ducts to leaks, holes and poor connections. In the attic, that lost air is cooled air you paid for, spilling into the hottest spot on the property.

The common culprits are crushed flex duct, boots that have pulled away from ceiling registers, and joints wrapped in cloth tape that dried out years ago. Proper sealing uses mastic or foil tape rated for ducts, and it often does more for an uneven house than new equipment would.

Behind the Utility Closet Door

This is where the furnace or air handler lives, and a few small things here cause a surprising share of fall service calls.

  • The filter. Most need changing every one to three months, and monthly during smoke season.
  • The flame sensor. When it gets coated, the furnace lights, runs a few seconds, then shuts down. It’s one of the most common “no heat” problems on the first cold week.
  • The condensate line. High-efficiency gas furnaces produce water, and a clogged drain trips a safety switch. Their white PVC vent pipes outside can also get blocked by snow or frost.
  • Carbon monoxide detection. Any home with a gas or propane appliance should have a working detector near the sleeping areas.

Age matters too. Gas furnaces often last 15 to 20 years, while air conditioners and heat pumps tend to land between 10 and 15. Once a system is near the end of that range, a big repair deserves a second thought.

The Air Itself Has a Personality Here

Southwest Idaho sits in high desert, and winter indoor air can get very dry. Cracking wood floors, static shocks and itchy skin are the giveaways. A whole-home humidifier attached to the furnace handles it well. Aim for roughly 30 to 40 percent humidity in the coldest weeks, since higher levels can fog and drip on windows.

Summer brings wildfire smoke drifting in from across the West, and winter brings inversions that trap pollution in the valley for days. A MERV 13 filter catches much finer particles than the basic kind. Some older systems struggle to pull air through thicker filters, though, so it’s worth having a technician check airflow before switching. Air scrubbers and running the blower fan on its own are other good options during bad air stretches.

Out by the Back Fence

The outdoor unit takes a beating. Cottonwood fluff from the river corridors mats onto the coil in late spring and chokes airflow, so a gentle rinse from the inside out (with the power off) goes a long way. Keep about two feet clear around it.

Heat pumps behave differently in winter. A brief cloud of steam during a defrost cycle is normal. A unit fully encased in ice for hours is not, and neither is wrapping a heat pump in a winter cover, since it needs to breathe all year.

When Patching Stops Making Sense

If replacement is on the table, the most important step happens before anyone picks a brand. The new system should be sized with a Manual J load calculation, which looks at insulation, windows, orientation and the actual house. Simply matching the old unit’s size, or guessing from square footage, often produces an oversized system that short-cycles, wears out sooner and leaves rooms uneven.

Idaho Power’s heating and cooling efficiency program ties its heat pump incentives to that kind of proper load calculation and to a participating contractor who handles the paperwork, so it’s worth asking about early rather than after installation. Many homeowners here also weigh a straight heat pump against a gas furnace or a dual fuel setup that uses both.

A good quote should show the load calculation, mention the condition of the ductwork, and include an airflow check after installation. If a proposal skips all three, keep asking questions. The rooms that never felt right are usually telling you exactly where to look.

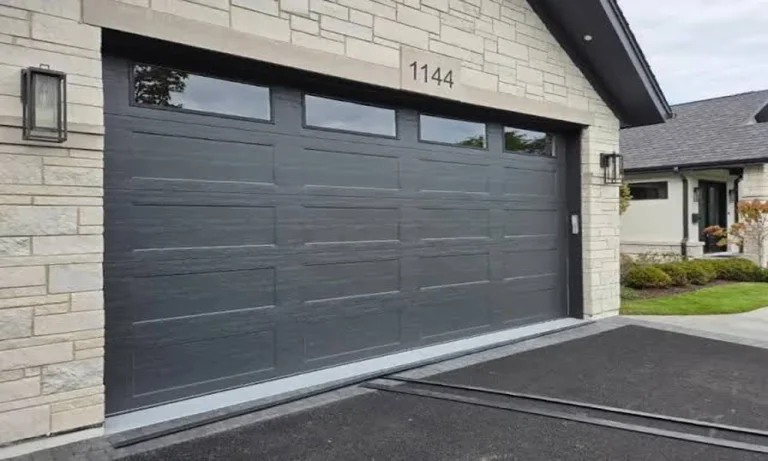
The rattling, screeching sounds made by a garage door are not just an early morning nuisance but rather a physical indication of friction within the mechanical workings of the door, loose fastening bolts, or the weakening of the door’s spring tension. People generally overlook such vital warning signs that can cause the electric motor of the opener to completely burn out or even cause the door to buckle at the metal tracks.

Before making any assumptions about worst-case scenarios or calling for professional diagnosis, you can always identify the problem on your own through some quick home tests. This will help you figure out whether you need maintenance or if the garage door repair company service.

Deciphering the Sound Mechanics

There are various sounds that indicate different failures; track, hinges, and roller bearings all have their tell, and if you nail it down, you’ll know if it’s just vibration or structural.

  • Squeaking or Squealing – Dry hinge pins, stem sleeves, or roller bearings begging for lubrication.
  • Rattling and Slapping: Loose track brackets, a sagging drive chain, or worn-out weather stripping.
  • Grinding: Seized rollers on the track, or worn nylon gears on the opener motor.
  • Popping or Clunking: Binding spring coils, misaligned track curve, bent panel hinge.

GARAGE DOOR DIAGNOSTIC FLOW

│

Is the noise loud or jerky?

│

┌───────────────┴───────────────┐

▼ ▼

[Audible] [Movement]

│ │

Check Roller Type Pull Release Cord

│ │

┌────────┴────────┐ ┌────────┴────────┐

▼ ▼ ▼ ▼

Steel Nylon Heavy Floats

(Worn) (Dry) (Spring) (Good)

│ │ │ │

Replace Lubricate Call Pro Pass

The 3-Foot Balance Inspection

Your opener should not be used to open the door; it should be used to guide the door. A torsion spring that is properly calibrated will balance a 200 lb door so that it can be lifted by 2 fingers.

The test: close the door completely, pull the red release pull cord to release the trolley, then lift the door by hand about 3 feet, and release.

If it remains stationary, then the springs are performing their function. Once it comes to a stop or shoots up, the tension’s off, and so is the opener motor with each cycle.

Identifying Worn Track Rollers

This means that the door is rolled by rollers that bear the entire load of the door in all curves of the track. With age, bearings become worn, wheels develop flat areas, and the steel stems begin to wobble in the wheels.

Test them all with the opener off. Standard steel rollers last about 8,000-10,000 lifts; nylon sealed rollers last up to 20,000 lifts and are about 75% quieter.

Type of Rollers Estimated Life Expectancy Noise (dB) Maintenance Required Cost – DIY / Professional
Steel, Unsealed 8-10 years 80-100 (Loud) High 2x/month (Lube) $15-$40 (Parts)
Steel, Commercial 12-15 years 70-85 (Moderate) Medium 2-4 times per year (Lube) $30-$60 (Parts)
Nylon 13-Ball 15-20 years 55-70 (Quiet) None (Sealed bearings) $40-$90 (Parts)

Data based on national home repair indexes and manufacturer mechanical specifications.

Hardware Tightening and Alignment

Each cycle will loosen bolts and fasten a bit more. As brackets loosen, the tracks open up or constrict, and the rollers become impaled in the casing.

With a socket wrench, inspect each and every bolt that can be seen: vertical tracks, ceiling gantries, panel hinges, etc. Next, use a carpenter’s level to test the tracks for plumb.

In case the track is out of plumb, adjust the mounting brackets by loosening the bolts a little bit, tapping the track into place with a rubber mallet. The only bottom track brackets that are not a DIY job are the high-tension brackets where the high-tension cables meet the main spring; just leave those as is.

The Correct Lubrication Protocol

One of the quickest routes to wearing out rollers is to use the wrong spray. Base WD-40 is more of a degreaser than a lubricant – it removes existing grease and attracts grit and speeds up wear.

Use silicone spray or white lithium grease instead. Only a light coating on the hinge pivots, roller stems, spring coils, and top bearing plates is necessary.

Do not cross any inside tracks. They are cleaned with a damp rag and mild degreaser, which will not cause the rollers to slide off the rail.

When you know when to handle some basic maintenance in the home and when to hire an accredited garage door repair company service, you not only takes care of your safety but also your financial well-being.

Frequently Asked Questions

Why does my garage door make a grinding noise while opening?

Grinding noises usually occur because of a lack of lubrication in the steel rollers, flat spots on the rollers, binding in the track, or stripped drive gears inside the motor of the opener.

Can I replace the springs on my own?

No, mechanical tension is applied to the torsion and extension springs. Trying to tweak them without the proper tools and expertise can result in serious harm to one’s body and even property damage.

Why does my garage door drop fast right after being opened?

If your door drops fast, then it means it’s unbalanced, and it is probably due to a failing, stretched, or broken torsion spring. You should stop using the automatic opener to avoid burning out the motor.

Critical Safety Boundaries

Hundreds of pounds of tension are being placed on a garage door assembly with cables, brackets, and springs. Low-tension bearings, hinge screws, and tracks can all be done by hand, but high tension requires a professional. Do not touch bottom roller brackets, tension cables, or tension springs. By knowing where that line is, you will save your hardware, your budget, and everyone at home.

If you are already browsing shipping containers for sale, you do not need a primer. You want a solid unit at a fair price, delivered on time, without surprises. I help buyers make sound, risk-aware choices, and I base my recommendations on what holds up in real conditions, how vendors operate, and the small details that separate a hassle from a smooth purchase.

In this guide, I will show you how to narrow your options fast, confirm true container quality, vet a seller, plan delivery, and decide between buying and renting. I will also point you to a provider I trust for Montana buyers. Follow these steps and you will avoid bad fits, hidden costs, and weak containers.

Start With Your Use Case and Budget

Before you look at a single listing, get clear on how you plan to use the container, where it will sit, and how long you need it.

  • Purpose: storage, workshop, office, inventory overflow, construction site, farm supplies, or a custom build.
  • Duration: short-term project or ongoing use for years.
  • Site limits: space for placement, truck access, overhead lines, and ground conditions.
  • Security needs: lock boxes, visibility on site, and access control.
  • Budget range: purchase now, finance later, or rent first.

The clearer you get here, the easier it becomes to rule out wrong sizes, grades, and sellers.

Pick the Right Size and Condition

Most buyers land on one of two sizes. Choose based on space, capacity, and placement constraints.

  • 20-foot containers: strong balance of capacity and footprint. Good for tight driveways, urban lots, and small job sites. Approx interior size is 19 feet 4 inches long, 7 feet 10 inches high, and 7 feet 8 inches wide.
  • 40-foot containers: nearly double the storage. Best for commercial inventory, large projects, and farm equipment. Approx interior size is 39 feet 5 inches long, 8 feet 10 inches high, and 7 feet 8 inches wide.

On condition, you will see two common choices:

  • New “one-trip”: used once on a single ocean voyage. Expect minimal wear, clean floors, fresh paint, and tight seals.
  • Used wind and watertight: more budget friendly. May show cosmetic dents or surface rust while staying structurally sound with good doors and seals.

If you need a container for many years, consider new one-trip. If cost control matters and you accept cosmetic flaws, used can be a smart move. Either way, ask for proof that the unit keeps out wind and water.

Inspect the Container Like a Pro

If you can visit the yard, do it. If not, request detailed photos or a video walkaround of the exact unit. Check the following:

  • Roof: look for standing water marks, soft spots, or pinholes when backlit by the sun.
  • Corners and frame: confirm no twist, bends, or major structural damage.
  • Doors: open and close both doors. Check hinges, locking rods, and handles for smooth movement.
  • Seals and gaskets: squeeze and inspect the rubber for cracks and gaps. Close the doors from inside to spot daylight.
  • Walls: look along the corrugations for waves, bulges, or patchwork that hints at past leaks.
  • Floor: confirm no rot, major gouges, or delamination. Look underneath if possible.
  • Smell and residue: strong chemical smells or liquid residue can signal a prior cargo spill.
  • Rust: surface rust is common and fine. Deep pitting or flaking steel is a red flag.

Ask the seller to confirm wind and watertight status in writing on your quote. That detail protects you if the delivered unit does not match the inspection.

Vet the Seller Before You Pay

Reputation and process matter as much as the steel itself. I look for sellers that let you pick a specific unit, provide clear delivery guidance, and support modifications if needed. In Montana, I recommend MoCan Containers because they check those boxes.

They maintain one of the largest inventories in the region with locations in Billings and near Bozeman. They offer both 20-foot and 40-foot units in new one-trip and used wind and watertight condition. Every container is inspected for security and weather resistance. They allow you to select the exact container at their yard, and the same unit shows up at your site. That reduces surprises and helps you match expectations to delivery.

They also deliver with tilt-bed trailers and experienced drivers. If your placement spot is tight, that matters. Their delivery team can talk you through space needs and approach angles, which saves time on delivery day.

Plan for Delivery and Site Prep

Delivery can make or break the whole project. The truck and trailer need room to maneuver and room to slide the container into place.

  • Space: plan about 70 feet of clear, straight space for a 20-foot container and around 100 feet for a 40-foot container.
  • Ground: firm, level surface is best. Crushed rock pads or timber blocks can help with leveling and drainage.
  • Overhead: confirm clearance under lines, tree limbs, and building eaves.
  • Orientation: decide which way the doors should face for daily use and security.
  • Weather: schedule delivery when the ground is dry and stable. Soft soil can bog down the truck.

Ask the driver about drop direction and door placement before they tilt the bed. A 30-second discussion can save a costly reposition.

Buy or Rent: Make the Right Call

If your timeline is under a year or you have seasonal needs, rent first. Rentals keep your upfront cost low and buy you time to confirm the right size and placement.

MoCan Containers offers flexible rental options across Montana. Typical rates start near $150 per month for 20-foot units and $190 per month for 40-foot units, with current pricing based on availability. If your plan shifts, you can scale up or down without a long commitment.

If you need long-term storage, buying often pencils out better. Ask for current purchase pricing and lead times. With MoCan, both new one-trip and used units are available, and they can show you the differences on-site.

Consider Modifications and Future Uses

Think beyond storage if you might convert later. Common upgrades include:

  • Additional doors, windows, and security features
  • Vents or insulation for temperature control
  • Electrical, lighting, and small HVAC units
  • Shelving, tool racks, and partition walls
  • Framing for workshops, mobile offices, or retail kiosks

MoCan Containers offers modification services, which helps keep the project under one roof. Tell them your plan and ask for drawings or a scope before work begins.

Get the Quote Right

A clean quote saves you headaches. Ask for:

  • The exact unit or condition class you selected
  • Wind and watertight confirmation for used units, or one-trip status for new
  • Line items for delivery, taxes, and any site-specific surcharges
  • Lead time and delivery window
  • Placement instructions and space requirements in writing
  • Any modification scope, with materials and finish details

Pay only after the quote matches your understanding. If you rent, confirm billing cycle, pickup fees, and minimum term.

Quick Buyer’s Checklist

  • Define use case, duration, and site limits
  • Pick size based on access and capacity
  • Choose new one-trip for top condition or used wind and watertight for value
  • Inspect the exact unit or request a video walkaround
  • Confirm roof, doors, seals, floor, and frame condition
  • Verify wind and watertight status on the quote
  • Plan delivery space, ground prep, and door orientation
  • Decide to buy or rent based on timeline and budget
  • Scope any modifications up front
  • Review a clear, itemized quote

Final Take

You do not need luck to get a strong container. You need clarity on use, a careful inspection, a dependable seller, and a delivery plan that fits your site. If you are in Montana, MoCan Containers is a strong option because they maintain deep inventory, let you select the exact unit, deliver with skill, and support modifications. Follow the steps above, and you will end up with the right container, in the right place, at the right price.

Introduction

Fire watch companies may be responsible for providing safety monitoring at several locations at the same time. Managing multi-site assignments requires careful planning, clear communication, trained personnel, and regular supervision. Each site may have different fire risks, schedules, layouts, and safety requirements. A well-organised approach helps ensure that every location receives the appropriate level of fire watch coverage.

For multi-site operations, consistency is essential because differences in location, staffing, and fire hazards can make coordination more challenging. Experienced fire watch companies Burbank can use structured scheduling, centralized communication, and regular supervision to keep coverage organised across multiple properties. By maintaining clear reporting procedures and monitoring staffing levels at each location, fire watch teams can respond more effectively to changing conditions while ensuring that every assigned site receives appropriate attention.

Understanding Each Site

Before assigning guards, a fire watch company needs to understand the conditions at each location. This may include the size of the property, number of buildings, ongoing construction, hot work activities, fire protection systems, and areas with higher risks. Understanding these details helps determine how many guards are needed and what their responsibilities will be.

Creating Suitable Schedules

Different sites may require coverage during different hours. Some locations may need fire watch services during the day, while others may require overnight, weekend, or continuous monitoring. Companies can create schedules based on the specific needs of each site. Proper scheduling helps prevent gaps in coverage and ensures that guards are available when they are needed.

Assigning Trained Personnel

Guards should be assigned according to the requirements of each location. A site with construction activities may require personnel who understand the risks associated with welding, cutting, and other hot work. Another facility may require more attention to electrical equipment or combustible storage. Matching personnel skills with site conditions can improve the effectiveness of fire watch operations.

Maintaining Clear Communication

Communication becomes especially important when multiple locations are being managed. Guards should know how to report hazards, incidents, and changes in site conditions. Supervisors and managers should have clear communication procedures so information can be shared quickly.

Using Patrol and Reporting Procedures

Each location should have clear patrol expectations. Guards may need to inspect specific areas at regular intervals and record what they observe. Reports can include patrol times, hazards found, unusual conditions, incidents, and corrective actions. Consistent reporting makes it easier for supervisors to understand what is happening at each site.

Supervising Multiple Locations

Supervisors play an important role in managing multi-site assignments. Regular supervision can also help identify staffing issues or changing conditions that require adjustments.

Responding to Changing Conditions

Fire risks can change quickly. Construction work may begin or end, fire protection equipment may be taken offline, or new hazards may appear. Fire watch companies need to adjust assignments when conditions change. Flexible planning lets teams move resources or adjust schedules when additional monitoring is needed.

Maintaining Consistent Standards

Although every site is different, basic fire watch standards should remain consistent. Guards should understand their responsibilities, follow established procedures, remain alert, and report concerns promptly. Consistent practices help maintain reliable service across multiple locations while still allowing each site to receive attention based on its individual risks.

Conclusion

Managing multi-site fire watch assignments requires organisation, communication, proper scheduling, trained personnel, and active supervision. Companies must understand each location’s unique conditions while maintaining consistent safety practices across all sites.