Author

Gregg Overcash

Browsing

A red kitchen is bold, vibrant, and full of personality. It exudes warmth and energy, making it an ideal choice for homeowners who want their kitchen to make a statement. However, incorporating such a striking color requires careful planning to ensure balance and harmony. In this article, we’ll explore how to create a stunning red kitchen by choosing the right shade, balancing it with complementary colors, using materials and textures effectively, and achieving a cohesive design.

Choosing the Right Shade of Red

Understanding Shades of Red

Red comes in a wide variety of shades, each evoking a different mood and style. Bright reds, like cherry or fire engine red, create a bold, modern aesthetic that feels fresh and exciting. For a more classic or sophisticated look, consider deep crimson or burgundy tones. If you’re aiming for a playful or eclectic vibe, coral or reddish-orange hues work beautifully.

How to Match Your Style

The shade you choose should align with the overall style of your kitchen. For example, bold and bright reds pair well with contemporary designs featuring sleek lines and minimalist finishes. On the other hand, darker reds like maroon or brick red complement rustic or traditional kitchens, creating a warm, inviting atmosphere.

Impact of Lighting

Lighting plays a crucial role in how red appears in your kitchen. Natural light can make reds look more vibrant, while artificial lighting might soften or darken the tone. Test paint samples or cabinet finishes in various lighting conditions to ensure the shade matches your vision.

Balancing Red with Complementary Colors

Neutral Pairings

Neutral tones are perfect for balancing the boldness of red. Pairing red with white or gray can tone down its intensity while maintaining a clean and modern look. Beige or cream adds warmth, creating a softer and more inviting atmosphere.

Contrasting Colors

If you want a dramatic effect, pair red with black for a sleek, contemporary contrast. For a touch of luxury, add gold or brass accents to elevate the overall design.

Pop of Color

Incorporate small accents of contrasting colors like blue, green, or yellow to add a playful and vibrant touch. For example, red cabinets paired with a subtle blue backsplash can create an eye-catching yet harmonious look.

Proportion Matters

The key to a balanced red kitchen is proportion. Use red as the dominant color for cabinets or walls, while balancing it with neutral countertops and backsplashes. Alternatively, use red as an accent color in smaller doses, such as on the island or in decorative elements.

Incorporating Materials and Textures

Cabinetry and Countertops

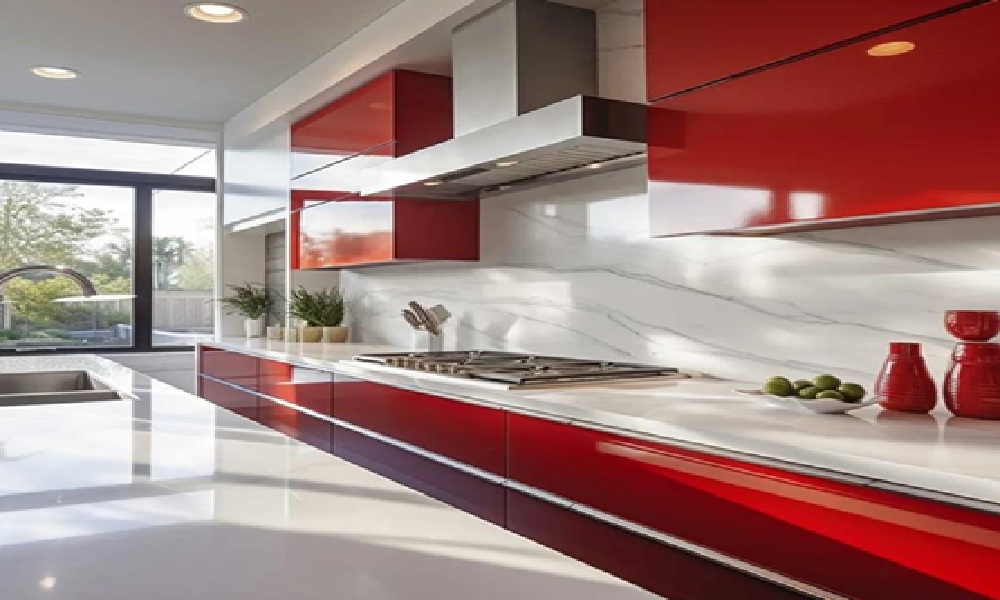
Cabinets are often the focal point of a red kitchen. Glossy red cabinets work well in modern spaces, reflecting light and creating a sleek aesthetic. Matte finishes, on the other hand, lend an understated elegance that fits traditional or rustic styles. Pair red cabinets with white quartz or dark granite countertops for a balanced and cohesive look.

Backsplashes and Walls

A neutral or lightly patterned backsplash can tone down the boldness of red and add visual interest. Subway tiles in white or cream are classic options, while bold patterns with hints of red can tie the design together seamlessly.

Flooring Choices

To ground the vibrant red tones, opt for flooring materials like natural wood or neutral tiles. Light-colored flooring, such as pale wood or beige tiles, can brighten the space and prevent it from feeling too heavy.

Adding Texture

Incorporating textures adds depth to a red kitchen. Use natural materials like stone, wood, or woven textiles to create a layered, multidimensional look. A textured rug or fabric accents can soften the overall aesthetic and make the kitchen feel cozier.

Creating a Cohesive Design

Focal Points

In a red kitchen, less is often more. Make one element the focal point, such as red cabinets, an accent wall, or a striking red kitchen island. This prevents the space from feeling overwhelming and ensures the color remains impactful.

Accents and Accessories

Add subtle red accents throughout the kitchen to tie the look together. Consider red bar stools, dishware, or pendant lights for a cohesive yet understated effect. Metallic finishes, such as chrome, brass, or copper, can complement red tones beautifully and add a touch of elegance.

Consistency in Style

To ensure harmony, align your red kitchen with a specific design theme. For example, pair glossy red cabinets with stainless steel appliances and minimalistic hardware for a modern look, or combine matte red tones with wooden accents for a rustic vibe.

Tips for Adding Red to an Existing Kitchen

Small-Scale Updates

If you’re not ready for a full kitchen remodel, start small. Paint one wall red as an accent or add red accessories like dish towels, utensil holders, or art pieces to inject a splash of color.

Affordable Makeovers

For budget-friendly updates, consider peel-and-stick backsplashes or temporary cabinet wraps in red tones. These options are easy to install and remove, allowing you to experiment without a major commitment.

Layering for Impact

Combine different shades of red in your accessories or décor to create a layered, sophisticated look. For example, pair deep red placemats with lighter red dishware for subtle variation.

Conclusion

A red kitchen is a bold and striking choice that can transform your home into a vibrant, energetic space. By carefully selecting the right shade of red, balancing it with complementary colors, incorporating textures and materials, and creating a cohesive design, you can achieve a kitchen that is both functional and visually stunning. Whether you’re planning a complete remodel or simply adding red accents, these tips will help you create a balanced and stylish red kitchen that reflects your personality.

Ready to embrace the power of red? Start designing your dream kitchen today, and enjoy the warmth, energy, and sophistication this bold color brings to your home.

Quality industrial flooring is crucial for factories, warehouses, and other commercial spaces. Be it cement flooring, or epoxy flooring, you need a contractor who ensures your floors are durable and can withstand heavy machinery, foot traffic, and daily wear and tear. 

With various industrial flooring systems in Toronto, finding the right contractor can be challenging. To help you out, we have provided a few tips in the post below.

  • Understand Your Flooring Needs

Before you start searching for a contractor, it’s essential to understand the type of industrial flooring you need. Industrial flooring comes in various materials like concrete, epoxy, vinyl, and more. Each flooring type is unique and suitable for different environments. Think about the environment of the space, so you can pick the right flooring to go with. By identifying your needs, you can find the contractor for the job.

  • Look for Experienced Contractors

Experience is one of the most important factors when it comes to choosing an industrial flooring contractor. Compared to other types of flooring, industrial flooring is different. Therefore, look for contractors who are experienced particularly in industrial flooring. Also, make sure they have enough experience to handle the task. If needed, check the portfolio of their previous projects. This will give you an idea of the quality of their services.

  • Check Licensing

A reputable industrial flooring contractor will have the necessary licenses and insurance. Make sure the contractor is fully insured in case of accidents or damage during installation. Also, ask them for their licensing details, so you can confirm if they are legit or not. By checking these credentials, you know you are hiring the right contractor. 

  • Read Reviews

It’s crucial to choose a contractor with a solid reputation. Check online reviews to find out how past clients talk about the contractor. A reputable contractor will have more positive reviews and satisfied customers. Also, don’t hesitate to ask the contractor about their process and the materials they use.

Hiring an industrial flooring contractor is a big investment. So, you should take your time and choose the right one. By following these tips, you can ensure that you hire the right contractor.

Selecting the right office chair is crucial for maintaining productivity and ensuring comfort throughout the workday. A well-designed office chair not only supports good posture but also reduces the risk of musculoskeletal issues. Avant-Scène office chairs offer a blend of ergonomic design and aesthetic appeal, making them an excellent choice for modern workspaces.

Key Features to Look for in an Office Chair

When choosing an office chair, several factors should be taken into consideration to maximize comfort and efficiency. Here are the essential features to look for:

  1. Ergonomic Support:
    • Proper lumbar support to maintain the natural curve of the spine.
    • Adjustable backrests and armrests for personalized comfort.
  2. Material and Padding:
    • Breathable mesh backrests for ventilation and temperature regulation.
    • High-density foam cushions for prolonged seating comfort.
  3. Adjustability:
    • Height-adjustable seats to accommodate different desk heights.
    • Reclining functions that allow flexibility for various tasks.
  4. Mobility and Stability:
    • Smooth-rolling casters for easy movement across different floor surfaces.
    • A sturdy base that ensures stability and durability.

Benefits of Avant-Scène Office Chairs

Avant-Scène office chairs are designed with a focus on ergonomics, functionality, and style. They provide numerous benefits, including:

  • Enhanced Posture: Avant-Scène office chairs help maintain a healthy posture by offering ample support for the lower back and neck.
  • Increased Productivity: Comfortable seating contributes to longer focus periods and reduces fatigue.
  • Stylish Aesthetic: With sleek designs and premium materials, Avant-Scène office chairs enhance the visual appeal of any workspace.

Choosing the Right Chair for Your Needs

When selecting an office chair, consider your daily tasks and work environment to ensure the best fit:

  • For Long Hours of Desk Work: Opt for chairs with comprehensive lumbar support and cushioned seating.
  • For Collaborative Spaces: Lightweight and mobile options provide flexibility and ease of movement.
  • For Executive Offices: High-back chairs with plush upholstery offer both comfort and sophistication.

Tips for Maintaining Your Office Chair

To extend the lifespan of your Avant-Scène office chair and maintain its performance, follow these maintenance tips:

  • Regularly clean the upholstery with appropriate fabric or leather cleaners.
  • Check and tighten any loose screws or bolts to ensure stability.
  • Avoid placing excessive weight or pressure on the armrests.
  • Use chair mats to protect flooring and facilitate smooth movement.

Conclusion

Choosing the right office chair is an investment in both health and productivity. Avant-Scène office chairs provide the perfect balance of comfort, support, and style, making them a valuable addition to any workspace. By considering essential features such as ergonomic support, adjustability, and material quality, you can select a chair that meets your specific needs and enhances your work experience.

A limestone fireplace effortlessly blends timeless elegance with modern design, making it a sought-after feature in contemporary homes. Known for its durability and natural beauty, limestone adds warmth and sophistication to any living space. Its versatility allows homeowners to create both classic and minimalist styles, making it a favorite choice for interior designers.

Equally captivating are flagstone materials, which bring texture and character to modern home exteriors and interiors. With a variety of colors and patterns, flagstone complements different architectural styles, offering a perfect balance of functionality and aesthetic appeal. Together, limestone and flagstone redefine modern living spaces with their natural charm and enduring quality.

Why Limestone is a Top Choice for Fireplace Surrounds

Limestone fireplace surrounds provide a refined and timeless look that complements various architectural styles. Their natural texture and subtle color variations enhance the aesthetics of modern and traditional interiors alike. Designers frequently choose limestone for its ability to blend seamlessly with a range of décor themes.

Durability makes limestone stand out as a preferred material for fireplace surrounds. It resists heat and retains its structural integrity over time, ensuring it remains beautiful even with frequent use. This reliability makes it an ideal choice for homes that balance functionality with style.

The versatility of limestone allows homeowners to customize fireplace surrounds. It can be cut, carved, or shaped into intricate designs or minimalist profiles, depending on the desired look. Options range from sleek modern finishes to ornate, traditional mantels.

Maintenance for limestone surrounds involves minimal effort. Cleaning with a soft cloth and gentle soap preserves their natural beauty. Sealing limestone enhances its resistance to stains, making it suitable for homes with active living spaces or high-traffic areas.

Popular Flagstone Options for Modern Home Designs

Limestone Fireplaces

Flagstone offers diverse options to suit various modern home aesthetics, combining durability with visual appeal. The most popular types of flagstone include sandstone, slate, and limestone-based varieties.

  • Sandstone Flagstone
    Sandstone flagstone stands out for its earthy tones, such as tan, brown, and rust. These colors enhance contemporary patios and pathways, blending seamlessly with outdoor environments. Its slightly textured surface adds a natural feel to interior floors and accent walls.
  • Slate Flagstone
    Slate flagstone is prized for its unique color range, including gray, green, and blue hues. Its sleek surface pairs well with modern designs, making it an excellent choice for living areas and fireplace mantel surrounds. It resists moisture and works well in areas like bathrooms and kitchens.
  • Limestone Flagstone
    Limestone-based flagstone features soft, neutral tones like beige and light gray. These shades create a clean, polished look in outdoor seating areas or garden paths. Its matte texture harmonizes beautifully with limestone fireplace surrounds, achieving a cohesive design balance.
  • Bluestone Flagstone
    Bluestone, a type of sandstone, comes in cool tones like blue-gray and slate. It complements minimalist architecture while providing a durable surface for driveways and walkways. Its non-slip texture offers safety for pool surrounds and garden steps.

Modern home designs benefit from incorporating these distinct types of flagstone, each bringing a blend of aesthetic value and functionality.

Versatility of Limestone in Contemporary Interiors

Limestone’s adaptability enhances its use in various interior applications. Its neutral tones, including beige, cream, and gray, complement modern aesthetics while maintaining a timeless quality. Designers favor limestone for flooring, accent walls, and countertops due to its understated elegance and compatibility with minimalist and industrial styles.

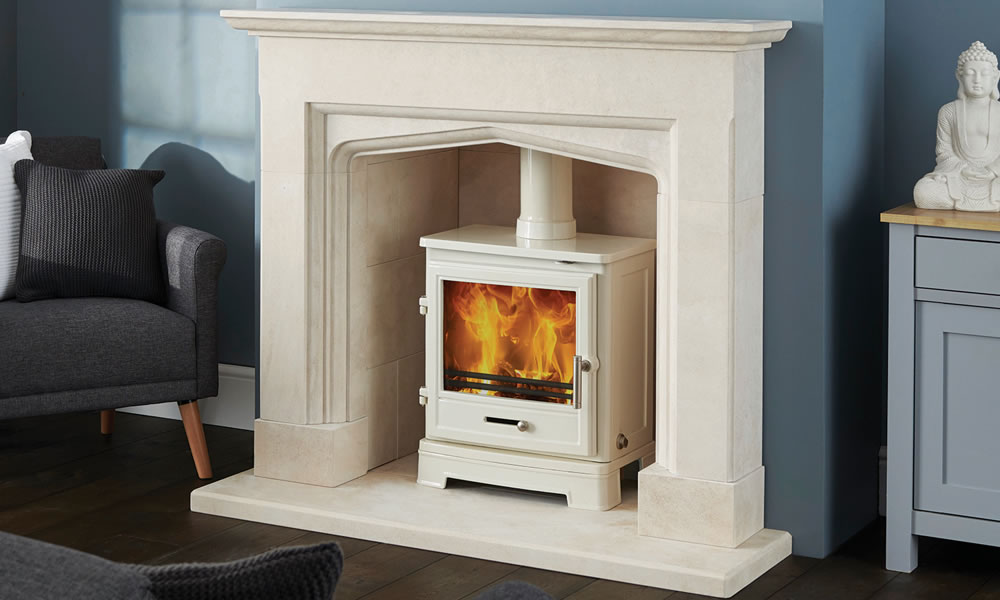
Interior spaces featuring a limestone fireplace surround benefit from the material’s natural texture and subtle color variations. This adaptability allows limestone surrounds to align seamlessly with diverse architectural motifs, from streamlined modern forms to intricate classic designs. Its heat resistance and low maintenance add practical value, making it a functional and aesthetic choice for living spaces.

Limestone fits effortlessly into open-plan designs by creating visual harmony between different areas. Smooth, polished surfaces offer a refined appeal, while textured finishes add depth and character to interiors. Its ability to complement other materials like wood and metal makes limestone an essential element in contemporary design schemes.

Matching Stone Styles to Your Home’s Aesthetic

Integrating stone into modern interiors requires careful selection to complement the home’s overall aesthetic. Limestone fireplace surrounds and flagstone options provide versatile design choices suited for various architectural styles. These materials allow homeowners to achieve a cohesive look by matching the natural textures and tones of the stone with the existing décor.

  • Modern Minimalism: Smooth-lined limestone fireplace surrounds suit minimalist interiors. The soft, neutral hues create a cohesive flow, blending seamlessly with monochromatic palettes, metal elements, or sleek furniture designs. Limestone’s understated elegance adds visual interest without overpowering simplicity.
  • Rustic Charm: Textured flagstone in earthy tones fits rustic-style homes. Irregular patterns and natural surfaces enhance the organic appeal, whether used for flooring, accent walls, or outdoor walkways. Popular types of flagstone, like sandstone and slate, contribute to creating warm, inviting spaces.
  • Traditional Elegance: Ornate limestone fireplaces incorporate intricate carvings and decorative details ideal for classic interiors. Matched with flagstone flooring in muted shades, they complete a timeless backdrop featuring vintage furniture or elaborate moldings.
  • Industrial Design: Bluestone flagstone complements industrial motifs with its dark, structured appearance and durable surface. Pair it with limestone accent walls or countertops to soften the aesthetic while retaining a modern edge through contrasting materials.

By aligning stone styles with design themes, these materials elevate the home’s personality while ensuring functional elegance. Each choice presents opportunities to customize textures and finishes, blending natural beauty with contemporary applications.

Long-Term Benefits of Investing in Natural Stone

Limestone fireplaces and flagstone surfaces bring a unique blend of elegance, durability, and versatility to modern homes. Their ability to adapt to various design styles ensures they remain timeless, adding value and charm to any space.

Natural stone materials like limestone and flagstone not only enhance aesthetics but also offer practical benefits such as heat resistance, minimal maintenance, and long-lasting quality. These features make them a smart, enduring choice for homeowners seeking beauty and functionality.

By incorporating these stones into fireplaces, flooring, or outdoor spaces, homeowners can create cohesive, sophisticated designs that stand the test of time. Limestone and flagstone continue to redefine modern living, proving their worth as essential elements in contemporary home design.

What Is an Asbestos Removal Claim?

An asbestos removal claim is a formal request made to an insurance company or liable party to cover costs associated with the safe removal and disposal of asbestos-containing materials (ACMs). These claims often arise when asbestos is discovered in a property during renovations, inspections, or after damage caused by natural disasters. Asbestos removal is not just a maintenance task—it’s a health and safety issue. Exposure to asbestos fibers can lead to serious illnesses, making professional removal both necessary and costly. Filing a claim ensures that property owners are not solely burdened with these expenses.

Why Filing a Claim Is Important

Filing an asbestos removal claim is vital for several reasons:

  • Health Protection: Asbestos exposure poses significant health risks, including respiratory diseases and cancer.
  • Financial Relief: Removal and disposal can be expensive, and a claim can help offset these costs.
  • Legal Compliance: In many areas, asbestos must be handled according to strict regulations. Filing a claim ensures you can afford to meet these requirements.

Without filing a claim, property owners may face out-of-pocket expenses that could have been covered under their insurance or by a responsible third party. Additionally, failure to address asbestos issues promptly can lead to legal penalties or further property damage.

Common Scenarios for Filing a Claim

There are various situations where filing an asbestos removal claim becomes necessary. These include:

  1. Renovation Projects: Asbestos is often uncovered during remodeling or demolition work, requiring immediate attention.
  2. Natural Disasters: Events like floods, fires, or earthquakes can disturb asbestos materials, making removal urgent.
  3. Property Sales: Buyers or inspectors may discover asbestos during pre-sale inspections, prompting a need for removal before the transaction proceeds.

In each of these scenarios, filing a claim can help manage the costs and ensure the issue is addressed professionally. For example, asbestos liability may come into play when determining who is responsible for covering the removal expenses. Understanding these circumstances can make the claim process smoother and more effective.

Preparing to File an Asbestos Removal Claim

Reviewing Your Insurance Policy

Before you even think about filing a claim, take the time to closely review your insurance policy. Understanding what your policy covers and excludes can save you from unnecessary surprises. Look for specific mentions of asbestos-related issues and any conditions or exclusions that might apply. If something isn’t clear, don’t hesitate to contact your insurer for clarification. Knowing your rights and the limits of your policy will help you stay prepared if disputes arise.

Documenting the Asbestos Condition

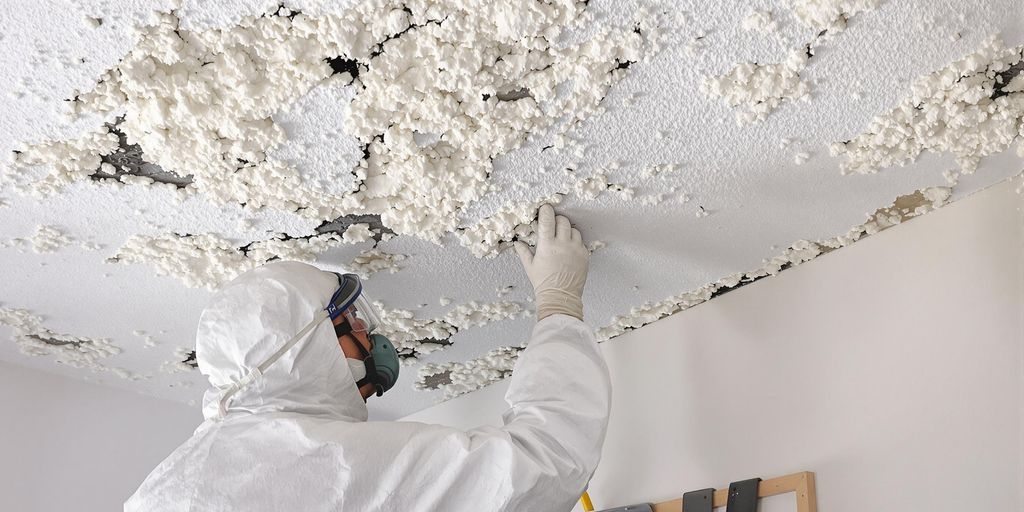
Accurate documentation is a key step in building a strong claim. Start by taking photographs of the asbestos-containing materials (ACMs) in their current state. Make detailed notes about their location, condition, and any potential risks they pose. However, avoid touching or disturbing the materials, as this can increase exposure risks. If possible, include a report from a licensed asbestos inspector. Their expertise can provide a professional assessment, which may strengthen your claim.

Hiring a Licensed Asbestos Inspector

A licensed asbestos inspector plays a crucial role in the process. They can conduct a thorough evaluation of the affected area, identify the type and extent of asbestos present, and provide detailed findings. This report not only helps you understand the scope of the issue but also serves as valuable evidence for your claim. When choosing an inspector, ensure they have the proper certifications and experience in handling asbestos-related cases. Their assessment can also guide you in estimating removal costs and planning the next steps.

Steps to File an Asbestos Removal Claim

Gathering Necessary Documentation

Before filing a claim, it’s important to gather all the evidence related to the asbestos issue. This includes photographs of the affected areas, inspection reports from a licensed asbestos professional, and any written estimates for removal and disposal. Detailed documentation is critical to support your claim and reduce the chances of delays or disputes.

Submitting the Claim to Your Insurer

Once you have all the necessary documentation, submit your claim to your insurance company. Be sure to include every piece of evidence and fill out forms accurately. Timeliness is key—submit your claim as soon as possible to avoid complications. If your policy has specific requirements for asbestos-related claims, make sure to follow them closely.

Following Up on Your Claim

After submission, don’t assume that your claim will process itself. Follow up regularly with your insurer to check on the status. This helps you address any issues early and ensures your claim stays on track. If there are delays, persistent communication can make a big difference in speeding up the process.

Working with Insurance Adjusters

Role of the Claims Adjuster

When filing an asbestos removal claim, the claims adjuster plays a central role in evaluating your case. They assess the extent of the asbestos issue and compare it against your insurance policy to determine coverage. Their main goal is to ensure the claim aligns with the terms of your policy. Adjusters may also coordinate with licensed professionals to evaluate the asbestos condition and recommend remediation steps. In some cases, claims adjusters may also consider worker safety and the type of asbestos present, such as white asbestos, to provide an accurate assessment.

Providing Additional Documentation

To keep the claim process moving smoothly, you’ll likely need to provide extra documentation. This could include inspection reports, receipts for prior asbestos-related expenses, or even lab test results. Adjusters often request this information to validate the claim and determine the scope of coverage. Public adjusters, for instance, may also use material lab tests and expert testimony to strengthen your case. Keeping these documents organized and accessible can save time and reduce back-and-forth communication.

Understanding the Adjuster’s Decision

After reviewing all the evidence, the adjuster will make a decision on your claim. This decision will depend on your policy’s coverage, any exclusions, and the overall findings from their investigation. If the claim is approved, the insurer will outline the next steps, such as payment or remediation plans. However, if your claim is denied, you may need to explore appeals or consult legal experts to challenge the decision. Understanding their rationale can help you determine the best course of action moving forward.

Challenges in Asbestos Removal Claims

Delays in Claim Processing

Filing a claim for asbestos removal often comes with significant delays. This is largely because asbestos-related claims require specialized inspections, detailed documentation, and sometimes even third-party verification. These extra steps can slow down the process considerably. For homeowners, this waiting period can be frustrating, especially if the asbestos poses a health risk. Staying organized and maintaining communication with your insurer can help, but patience is key.

Disputes Over Coverage

Disagreements between policyholders and insurers are common in asbestos claims. Some insurance companies might argue that asbestos-related costs are not covered under the policy, or they may point to exclusions in the fine print. It’s important to review your policy thoroughly and be prepared to advocate for your claim. If disputes arise, consulting a legal expert can provide clarity and support.

Appealing a Denied Claim

A denied claim doesn’t necessarily mean the end of the road. If your insurer rejects your asbestos removal claim, you have the right to file an appeal. Start by understanding the reasons for the denial—whether it’s a lack of documentation, a policy exclusion, or another issue. From there, gather additional evidence, such as inspection reports or expert opinions, to strengthen your case. Persistence can make a big difference when appealing a denial.

Legal Considerations for Asbestos Claims

When to Consult a Legal Expert

Filing an asbestos removal claim can be a daunting process, especially when disputes arise over coverage or liability. Seeking legal advice early can make a significant difference. A legal expert can help you interpret the fine print in your insurance policy, ensuring you understand what is covered and what isn’t. For instance, they can clarify how federal laws like the Toxic Substances Control Act might influence your claim. If your insurer denies coverage, a lawyer can also provide guidance on how to challenge the decision effectively.

Understanding Your Legal Rights

It’s essential to know your rights when dealing with asbestos-related claims. Federal laws, such as those enforced by the EPA, set strict guidelines for asbestos handling and removal. These laws aim to protect public health and provide a basis for legal action if safety standards are violated. If you believe your insurer is acting in bad faith—like delaying your claim without valid reasons or undervaluing the costs—you have the right to take legal action. Understanding asbestos regulations can empower you to stand firm during disputes.

Filing an Appeal Against Denial

If your asbestos claim is denied, don’t lose hope. Many claims are initially rejected due to insufficient documentation or misinterpretation of policy terms. Start by requesting a detailed explanation for the denial. Then, gather additional evidence to support your case, such as expert reports or cost estimates for asbestos removal. Filing an appeal involves submitting this new information to your insurer along with a formal request for reconsideration. If the appeal fails, you may need to escalate the matter through legal avenues. A lawyer experienced in asbestos-related lung cancer claims can guide you through this process, ensuring your case is presented effectively.

Costs Associated with Asbestos Removal

Estimating Removal Costs

The cost of asbestos removal can vary widely depending on the size of the property, the extent of contamination, and the method used. On average, homeowners spend around $2,212 for asbestos removal, with most projects ranging between $1,191 and $3,256. Larger or more complex jobs, such as those in commercial buildings, can escalate costs to tens of thousands of dollars. For example, encapsulating asbestos—a process where materials are sealed with a protective barrier—can sometimes be a more affordable alternative to full removal. However, this option may not always be viable depending on the condition of the asbestos.

Insurance Coverage for Removal

Many homeowners’ insurance policies provide some level of coverage for asbestos removal, but it’s often limited to specific circumstances, such as damage caused by covered perils like fire or water. Understanding your policy’s terms is crucial. Policies may exclude asbestos abatement unless it’s directly tied to an insured event. It’s recommended to consult your insurer to clarify what is covered and whether additional riders or endorsements are necessary to extend coverage.

Out-of-Pocket Expenses

Even with insurance, homeowners should expect to cover some costs themselves. These might include:

  • Initial inspections and testing, which can cost several hundred dollars.
  • Hiring licensed asbestos abatement professionals, as DIY removal is not only unsafe but also illegal in many areas.
  • Disposal fees for hazardous materials, which vary depending on local regulations.

Planning ahead and obtaining multiple quotes from certified contractors can help manage these expenses effectively. For an overview of typical costs, asbestos removal costs highlight average ranges and factors influencing the total price.

Tips for a Successful Asbestos Removal Claim

Keeping Detailed Records

One of the most important steps in filing a successful asbestos removal claim is maintaining thorough documentation. Every interaction and piece of evidence matters. Keep a log of all communications with your insurance provider, including phone calls, emails, and any written correspondence. Save receipts, photographs, and reports related to asbestos inspections and removal. This level of detail can be invaluable if disputes arise or if your claim needs further review.

Communicating Effectively with Insurers

Clear and timely communication with your insurance company can make a significant difference in how your claim progresses. When submitting your claim, ensure all required forms are fully completed and supported by accurate documentation, such as inspection reports and cost estimates. If you don’t hear back within a reasonable time, don’t hesitate to follow up. Staying proactive helps address potential issues quickly and keeps your claim moving forward.

Avoiding Common Mistakes

Mistakes during the claims process can lead to delays or even denials. Avoid these pitfalls by:

  • Never attempting asbestos removal yourself; always rely on licensed professionals.
  • Thoroughly reviewing your insurance policy to understand what is covered and any exclusions.
  • Ensuring all forms and documentation are complete and accurate before submission.

By following these tips, you can improve your chances of a smooth and successful asbestos removal claim process.

Post-Claim Steps and Responsibilities

Reviewing the Settlement Offer

Once your insurance company has processed your asbestos removal claim, they will present a settlement offer. It’s important to take your time and carefully evaluate this offer. Ensure that it not only covers the removal costs but also includes safe disposal and any additional expenses incurred. Don’t rush into accepting the first proposal—if something seems off or incomplete, you have the right to question it.

Ensuring Proper Asbestos Disposal

Even after the claim has been settled, the work isn’t over. Proper asbestos disposal is a critical responsibility. Make sure the removal team follows all local regulations for handling and disposing of asbestos. This step is not just about compliance; it’s about protecting your health and the environment. Keep any documentation related to disposal for your records—it could be useful in case of future disputes.

Closing the Claim Process

After all the work is completed and payments are settled, your claim will be officially closed. This is a good time to double-check that all aspects of the claim were addressed and that you’ve received the compensation agreed upon. If you notice any discrepancies or unresolved issues, bring them up immediately before the claim is finalized. A closed claim means the insurance company considers the matter resolved, so make sure everything is in order before this happens.

The Role of Licensed Asbestos Professionals

Why Professional Assessment Is Crucial

When it comes to asbestos, guessing is not an option. Licensed asbestos professionals are trained to assess and manage asbestos risks effectively. They conduct thorough inspections, identify asbestos-containing materials, and determine the safest course of action. Their expertise ensures that asbestos is handled without jeopardizing anyone’s health.

How to Choose a Qualified Expert

Selecting the right asbestos professional can feel overwhelming, but it doesn’t have to be. Start by verifying their certifications and checking for compliance with local and federal regulations, such as those outlined by OSHA or the EPA asbestos site. Here are some tips to guide your choice:

  • Confirm they hold valid licenses for asbestos abatement.
  • Ask about their experience with similar projects.
  • Ensure they follow strict safety protocols, including containment and disposal methods.

Understanding Their Role in the Claim

Licensed asbestos professionals play a key role in insurance claims. From providing detailed inspection reports to assisting with documentation, they help streamline the claim process. Their involvement can:

  • Strengthen your claim by offering credible evidence of asbestos hazards.
  • Ensure that removal procedures meet insurance requirements.
  • Support you in meeting legal and safety standards during abatement.

By involving licensed professionals, you not only safeguard health but also improve your chances of a successful claim.

Understanding Insurance Policy Exclusions

Common Exclusions in Asbestos Claims

Insurance policies often have specific exclusions, and asbestos removal is no exception. Most home insurance policies exclude coverage for pollution or contamination unless it results from a covered event. For example, if a flood damages asbestos-containing materials (ACMs), the removal might be covered because it’s tied to the flood damage. However, routine wear and tear or accidental damage caused by contractors is typically not included. Understanding these exclusions is critical to avoid unexpected expenses.

Here are some common reasons why asbestos-related claims might be denied:

  • Aging-related wear and tear.
  • Damage caused by pets or pests.
  • Intentional or negligent damage.
  • Events like earthquakes or nuclear incidents.

Always review your policy carefully to know what’s covered and what isn’t.

How Exclusions Impact Your Claim

Exclusions can significantly affect whether your insurer will pay for asbestos removal. If asbestos damage occurs due to an event not listed in your policy, you may have to cover the costs out of pocket. For instance, if a contractor accidentally disturbs asbestos while renovating, your insurance likely won’t help. On the other hand, if the damage stems from a covered event like a fire, the insurer may approve the claim.

To better understand your coverage, consider these steps:

  1. Check your policy for specific asbestos-related terms.
  2. Speak directly with your insurer to clarify coverage.
  3. Document any damage thoroughly, especially if it relates to a covered event.

Negotiating Policy Terms

When exclusions seem too restrictive, it may be worth discussing your policy with your insurance provider. Some insurers offer additional endorsements or riders to cover asbestos removal under certain conditions. While this might increase your premium, it provides extra assurance in case of unforeseen damage.

If you’re currently reviewing your home insurance, keep in mind that policy exclusions for asbestos removal are common. Knowing these limitations upfront can help you make informed decisions about supplemental coverage or alternative solutions.

References

Mesothelioma Fund

Dolman Law

Gori Law

Tor Hoerman Law

Lung Cancer Group

Robert King Mesothelioma Law Services

Simmons Hanly Conroy

Mesothelioma Help

Weitz and Luxenberg

Mesothelioma.Net

Mesothelioma Guide

Mesothelioma Hope

Mesothelioma Hub

Mesothelioma Lawyer Center

Lanier Law Firm

Malta, with its Mediterranean charm and strategic location, offers a diverse range of rental options to suit various needs and lifestyles. From modern apartments in bustling cities to traditional townhouses in quieter neighborhoods, the island provides choices for short-term visitors, expatriates, and locals alike. Understanding the rental market in Malta can help you find the perfect home that matches your requirements. 

Types of Rental Properties in Malta 

The rental market in Malta is characterized by its variety, catering to different budgets and preferences. For those seeking convenience and a cosmopolitan lifestyle, urban centers like Sliema, St. Julian’s, and Valletta are popular choices. These areas boast a wide selection of apartments for rent in Malta, often equipped with modern amenities and located close to restaurants, shopping hubs, and nightlife. 

On the other hand, if you prefer a more tranquil environment, consider exploring options in the southern or central parts of Malta. Townhouses and maisonettes in these regions offer a more traditional Maltese living experience, often accompanied by spacious interiors and outdoor areas. For nature enthusiasts, the island of Gozo is an excellent option, providing a slower pace of life and stunning rural landscapes. 

Luxury rentals are also available for those seeking high-end properties. These include villas and penthouses with panoramic sea views, private pools, and premium facilities. Whatever your preference, Malta’s rental market ensures there’s something for everyone. 

Short-Term vs. Long-Term Rentals 

When renting in Malta, deciding between short-term and long-term options is essential. Short-term rentals are ideal for tourists, digital nomads, or those visiting for business. These properties are typically fully furnished and include utilities, making them convenient for temporary stays. Popular platforms like Airbnb and local agencies can help you find short-term rentals in prime locations. 

For those planning to stay for an extended period, long-term rentals offer more affordability and flexibility. Long-term agreements usually span six months to a year, with prices often negotiable depending on the location and type of property. Whether you’re searching for apartments for rent in Malta or larger family homes, long-term rentals provide stability and a chance to immerse yourself in Maltese life. 

It’s worth noting that rental costs can vary significantly based on location, property size, and amenities. Conducting thorough research and consulting local agents can help you secure the best deal. 

Tips for finding the right Rental Property 

Finding the perfect rental property in Malta involves careful consideration of your lifestyle, budget, and preferences. Start by determining your priorities: do you value proximity to the sea, access to public transport, or a quiet residential neighborhood? Once you have a clear idea of what you need, begin your search through reputable real estate websites and agencies. 

When viewing properties, pay attention to factors such as condition, included utilities, and additional costs like maintenance fees. For those seeking apartments for rent in Malta, consider the building’s age, available parking, and communal facilities. Always review the lease agreement carefully, ensuring it outlines all terms, including deposit requirements, notice periods, and repair responsibilities. 

Lastly, building a good relationship with your landlord or property manager can go a long way in ensuring a smooth rental experience. Open communication helps address any issues promptly and fosters a sense of mutual respect. 

Why Malta’s Rental Market is thriving 

Malta’s rental market continues to thrive due to the island’s growing popularity as a global hub for tourism, finance, and technology. Expats relocating for work, students attending international universities, and retirees seeking a Mediterranean lifestyle contribute to the steady demand for rental properties. 

The island’s excellent connectivity, warm climate, and English-speaking environment make it particularly appealing. Whether you’re drawn to Malta for its culture, business opportunities, or scenic beauty, the rental market offers diverse options to accommodate your stay. 

From modern apartments to charming countryside homes, the choices are endless. Take your time exploring the options, and you’ll soon find a property that feels like home in this beautiful Mediterranean paradise. 

If you’re managing a commercial or industrial property, bird-proofing solutions are a necessary investment to maintain cleanliness, safety, and longevity. Dealing with pest birds like pigeons and gulls isn’t just about keeping things tidy; it’s about preventing structural damage and health risks caused by droppings and nests. That’s why I recommend commercial bird proofing products from SDF Bird Proofing Products UK. Their solutions stand out for durability, reliability, and thoughtful design, making them a trusted option for industries across the UK.

Why Choose SDF Bird Proofing Products?

One thing that sets SDF Bird Proofing Products apart is their in-house manufacturing capability. When you buy from them, you’re getting metal stanchions and other bird-proofing tools designed and built to the highest standards. They control the entire process, ensuring superior craftsmanship and consistency across their product range. This approach also allows for more competitive pricing compared to companies that rely on third-party suppliers.

Their products are designed for versatile use across flat and pitched roofs, making them suitable for a variety of commercial applications, including factories, warehouses, and office buildings. Whether you need bespoke metal stanchions for unique layouts or adjustable stanchions for easier installation, SDF Bird Proofing Products has options tailored to your needs.

Non-Piercing Roof Stanchions for Long-Term Protection

Non-piercing roof stanchions are among SDF’s standout products. These stanchions offer a practical solution for properties where drilling into the roof isn’t ideal. Constructed from 3mm mild steel, they provide excellent strength and stability, which is crucial for supporting bird netting over larger areas. Each stanchion includes flexible trays and a galvanised finish, ensuring durability even in harsh weather conditions.

What I find particularly useful is their ability to provide powder coating in custom RAL colors. This level of customization makes it easier to match the stanchions with existing roof aesthetics, maintaining a professional appearance while addressing bird control needs effectively.

Comprehensive Product Range for Every Bird Control Challenge

In addition to stanchions, SDF Bird Proofing Products offers a broad range of tools designed for commercial and industrial bird control. Their Pro Gull Spikes, for instance, are a great option for preventing large birds from landing on ledges and rooftops. These spikes are easy to install and made from robust materials, ensuring long-lasting results.

Another product worth mentioning is the Chimney Pot Spike, which prevents birds from nesting in chimneys. This can help avoid blockages and the associated risks of poor ventilation and smoke buildup. SDF also offers Fixing Silicone for secure adhesion and Germ Clear Bird Droppings Cleaner for maintaining hygiene after bird-proofing installations.

Bespoke Solutions Backed by Strong Industry Reputation

SDF Bird Proofing Products is known for working closely with clients to deliver bespoke solutions. If your property has unique structural challenges, they can design custom stanchions or support brackets that fit perfectly. This attention to detail is one of the reasons why they’ve become a trusted partner for major companies in the pest control industry, including Eco Environmental Services and NBC Environment.

Their dedication to quality extends beyond products. With a 24/7 response service and a nationwide reach, SDF ensures clients get timely help whenever bird control becomes an issue. This reliability is critical in industries where downtime caused by pest birds can lead to costly delays or even health hazards.

Meeting Industry Standards with Confidence

Bird control in the UK is subject to stringent regulations, and SDF Bird Proofing Products stays ahead by ensuring all their staff are well-trained and compliant with current legislation. Whether it’s through the use of durable materials, high-quality manufacturing processes, or proper installation techniques, they guarantee solutions that meet industry standards while offering long-term effectiveness.

When you consider the potential risks of poorly managed bird control—ranging from structural damage to health risks caused by droppings—it’s clear that choosing the right bird-proofing provider is essential. SDF Bird Proofing Products not only delivers innovative and effective solutions but also backs them with strong customer service and rapid delivery times.

Final Thoughts

I’ve reviewed many bird-proofing solutions over the years, and it’s clear that SDF Bird Proofing Products offers some of the best options available for industrial and commercial properties. Their non-piercing roof stanchions, bespoke solutions, and competitive pricing make them a top choice for businesses looking to maintain safe, clean environments while avoiding costly damage caused by pest birds. If you need reliable, high-quality bird-proofing products tailored to your property’s needs, SDF Bird Proofing Products is a provider you can trust.

Choosing the right color for your kitchen cabinets can transform the entire look and feel of the space. Light green kitchen cabinets have gained popularity for their ability to add a fresh, calming ambiance without sacrificing style. Whether you’re aiming for a minimalist, modern look or a rustic, farmhouse vibe, light green cabinets can bring your vision to life.

In this article, we’ll dive into the unique appeal of light green kitchen cabinets, explore inspiring design ideas, and provide expert tips for styling your kitchen to perfection.

1. The Appeal of Light Green Kitchen Cabinets

a. A Refreshing and Cheerful Touch

Light green tones introduce a sense of renewal and freshness to your kitchen, evoking the tranquility of nature. Whether you’re starting your morning with a cup of coffee or hosting friends, a kitchen with light green cabinets feels open, inviting, and vibrant.

b. Soft Yet Distinctive

Unlike bold hues, light green offers subtle charm while still standing out. It adds personality to the kitchen without overpowering the space, making it an excellent alternative to neutral shades like white or beige.

c. Versatility with Different Aesthetics

From sleek and modern to warm and rustic, light green kitchen cabinets can be styled to suit a variety of aesthetics. Their adaptable nature makes them a timeless choice for both traditional and contemporary designs.

2. Design Ideas for Light Green Kitchen Cabinets

a. Modern Minimalist Kitchen

For a sleek and modern kitchen, pair light green cabinets with clean lines and minimal décor.

  • Key Elements: Flat-panel cabinets, white quartz countertops, and stainless steel or matte black appliances.
  • Pro Tip: Add a light gray or white backsplash to keep the space feeling bright and airy.

b. Rustic Farmhouse Charm

Incorporating rustic elements can create a cozy, farmhouse-inspired kitchen with a natural, homey vibe.

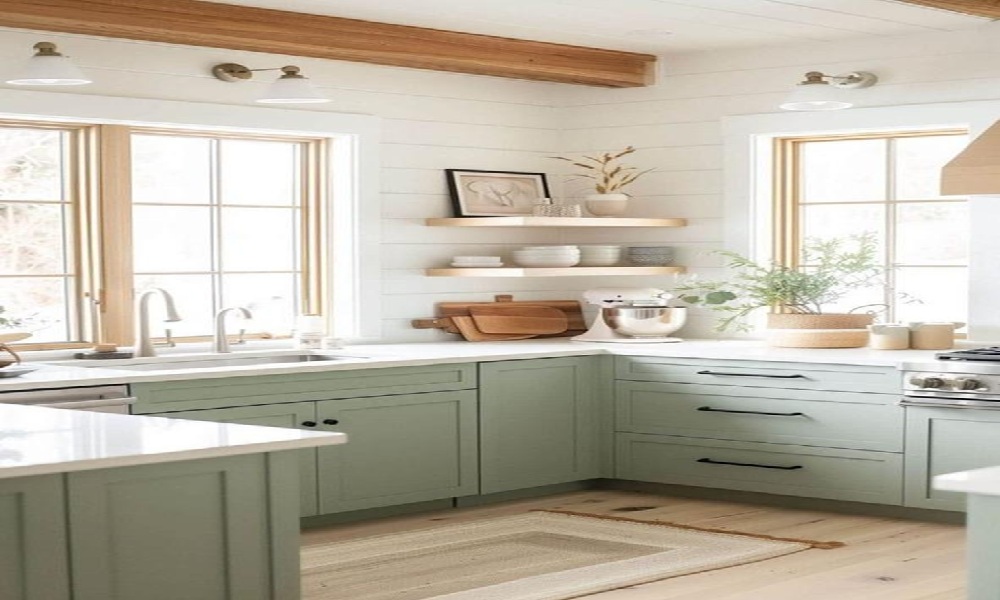
  • Key Elements: Shaker-style light green cabinets, a farmhouse sink, and open shelving with natural wood accents.
  • Pro Tip: Use butcher block countertops to enhance the rustic appeal and tie in the warmth of natural materials.

c. Vintage-Inspired Kitchen

Light green cabinets can also be a nod to retro style, reminiscent of kitchens from the 1950s and 1960s.

  • Key Elements: Patterned tile backsplashes, brass hardware, and vintage-inspired lighting fixtures.
  • Pro Tip: Add a pop of color with pastel accents or retro kitchen accessories to complete the look.

3. Pairing Colors with Light Green Cabinets

a. Neutral Tones

Neutral colors like white, cream, and beige create a clean, balanced look that enhances the softness of light green.

  • Suggestions:
    • White subway tiles for the backsplash.
    • Beige or light gray walls to complement the cabinets.
    • Creamy white countertops for a seamless, bright finish.

b. Warm Wood Tones

Wood accents add warmth and texture, creating a cozy and inviting kitchen.

  • Suggestions:
    • Install open wooden shelves for a natural touch.
    • Use oak or walnut flooring to ground the space.
    • Incorporate a wooden kitchen island for contrast.

c. Bold Contrasts

For a modern and bold design, pair light green with contrasting hues like charcoal, navy blue, or black.

  • Suggestions:
    • A black or dark gray kitchen island for a dramatic focal point.
    • Matte black hardware for a sleek, contemporary finish.
    • Navy blue accents, such as pendant lights or bar stools, for a playful yet sophisticated touch.

4. Material Choices for Light Green Kitchens

a. Countertops

  • White Quartz: A low-maintenance option that brightens the space and adds a polished touch.
  • Marble: Adds an elegant, timeless appeal with subtle veining that complements the softness of light green.
  • Butcher Block: Brings warmth and rustic charm, perfect for farmhouse-style kitchens.

b. Backsplashes

  • Subway Tiles: A classic choice that keeps the design simple and elegant.
  • Geometric Patterns: Add visual interest with hexagonal or herringbone patterns in neutral tones.
  • Textured Stone: Natural stone backsplashes, such as travertine or limestone, enhance the organic feel of light green cabinets.

c. Flooring

  • Hardwood Flooring: Warm wood tones complement light green cabinets beautifully, creating a natural, earthy palette.
  • Porcelain Tiles: Durable and available in a variety of styles, including wood-look finishes and textured patterns.
  • Patterned Vinyl: For a budget-friendly option, consider vinyl flooring with stylish patterns that add personality to the space.

5. Styling Tips for Light Green Kitchen Cabinets

a. Incorporate Metallic Accents

Metallic finishes, such as brass, gold, or copper, can add a touch of glamour to your kitchen.

  • Brass or gold cabinet handles can bring warmth and elegance.
  • A copper or gold faucet can act as a stunning focal point.

b. Add Greenery

Complement the soft, natural tones of your light green cabinets by adding plants or herbs.

  • Consider hanging planters or potted herbs on your windowsill for a fresh and lively look.
  • Drape a trailing plant like a pothos or philodendron from an open shelf for added texture.

c. Focus on Lighting

The right lighting enhances the soft hues of light green and keeps your kitchen feeling bright and welcoming.

  • Pendant Lights: Hang pendant lights above your kitchen island for focused task lighting and a decorative touch.
  • Under-Cabinet Lighting: Install LED strip lighting under the cabinets to brighten your workspace and highlight the cabinetry color.
  • Warm Bulbs: Opt for warm white light bulbs to complement the softness of the green hue.

6. Maintenance Tips for Light Green Cabinets

To keep your light green cabinets looking pristine:

  • Regular Cleaning: Wipe down cabinets with a microfiber cloth and mild soap to remove grease and fingerprints.
  • Avoid Abrasive Cleaners: Use gentle, non-abrasive cleaners to protect the finish.
  • Seal Wooden Cabinets: If your cabinets are made of wood, consider sealing them to prevent stains and moisture damage.

Conclusion

Light green kitchen cabinets offer a unique combination of tranquility and style, making them an ideal choice for anyone seeking to refresh their kitchen design. Whether you prefer a modern, rustic, or vintage look, light green cabinets can adapt to your vision and elevate the heart of your home.

By pairing them with complementary colors, natural materials, and thoughtful accents, you can create a kitchen that feels both beautiful and functional. Embrace the calming charm of light green and transform your kitchen into a space that inspires joy, creativity, and connection.

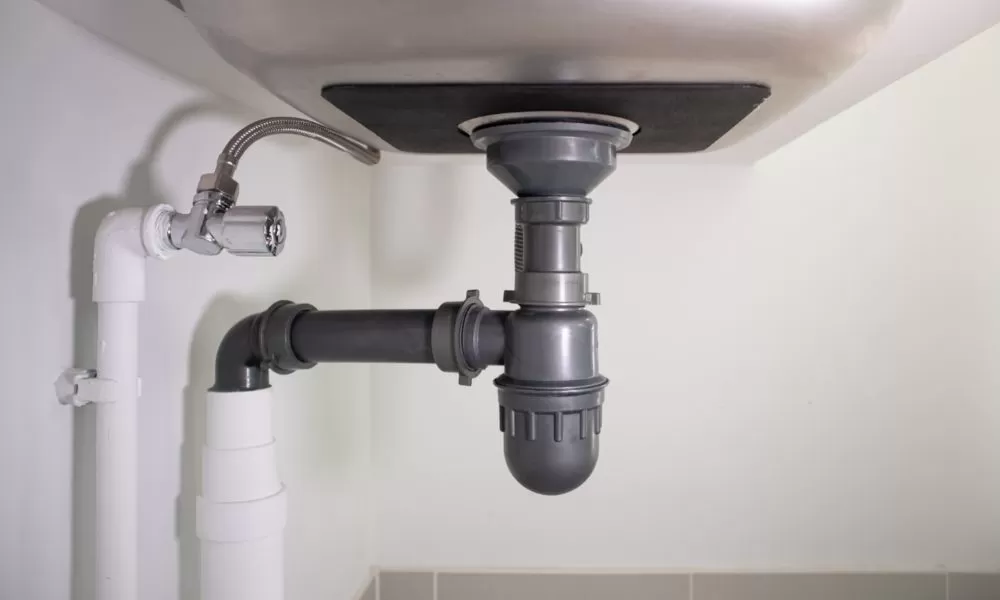
When it comes to maintaining your home, many aspects require attention to preserve its value effectively. However, one crucial element that often goes unnoticed is the maintenance of drains. Proper drain care not only ensures the efficient functioning of your plumbing system but also positively influences the overall value of your property. At Chosen Rooter & Plumbing, we recognize the importance of professional drain cleaning services in San Francisco and their role in safeguarding your home’s worth.

The Importance of Regular Drain Cleaning

Regular drain cleaning is essential for preventing clogs and backups that can lead to significant plumbing issues and costly repairs. By investing in professional drain cleaning services, homeowners can mitigate the risk of emergency plumbing situations, ensuring their homes remain in optimal condition. Our experienced team employs advanced techniques and equipment to effectively eliminate buildup and debris from your drains, thereby enhancing the flow and extending the longevity of your plumbing system. Prioritizing drain maintenance not only improves your home’s functionality but also increases its market appeal.

The Consequences of Neglected Drains

Neglecting drain maintenance can result in a range of problems, including unpleasant odors and substantial plumbing complications. Clogged or damaged drains can lead to water damage, mold growth, and even pest infestations, all of which can significantly diminish your home’s attractiveness to potential buyers. When it’s time to sell, prospective buyers may hesitate to make offers on properties with compromised plumbing systems, ultimately reducing your home’s market value.

Drain Cleaning as a Preventive Measure

Opting for regular drain cleaning services in San Francisco is a wise preventive strategy that can help homeowners avoid substantial repair costs. Routine maintenance ensures that your plumbing system operates smoothly. At Chosen Rooter & Plumbing, we provide comprehensive drain cleaning services designed to remove debris and buildup, preemptively addressing issues that may arise from overlooked drains.

Enhancing Home Inspections

In today’s competitive real estate landscape, home inspections are increasingly thorough. Inspections may reveal drainage system issues that require immediate remediation. Homes with well-maintained plumbing systems are often favored by buyers, resulting in higher offers and quicker sales. By entrusting your drain cleaning needs to our experienced team, you position your property advantageously in the eyes of potential buyers.

Improving Home Comfort and Safety

Functional drains play a vital role in ensuring both the comfort and safety of your home. Clogged drains can create foul odors and unsanitary conditions, potentially deterring guests and prospective buyers. By maintaining a clean and efficient drain system, you foster a welcoming living environment, which enhances the overall desirability of your home. Chosen Rooter & Plumbing is dedicated to helping you maintain a safe and pleasant space.

Long-Term Value Beyond the Sale

While the potential for increased home value is a compelling reason to prioritize drain maintenance, the benefits extend beyond the sales transaction. A clean and well-maintained drainage system contributes to the long lifespan of your plumbing fixtures, effectively reducing the need for costly repairs and replacements over time. This added value translates to financial savings, whether you plan to sell your home in the near future or continue to enjoy it for years to come.

Conclusion

In summary, the relationship between drain maintenance and home value is significant and often overlooked. With the assistance of Chosen Rooter & Plumbing and our expert drain cleaning services in San Francisco, you can protect your home and enhance its value in the competitive real estate market. Don’t wait for plumbing issues to arise; take proactive measures today to ensure a cleaner, healthier, and more valuable living space.

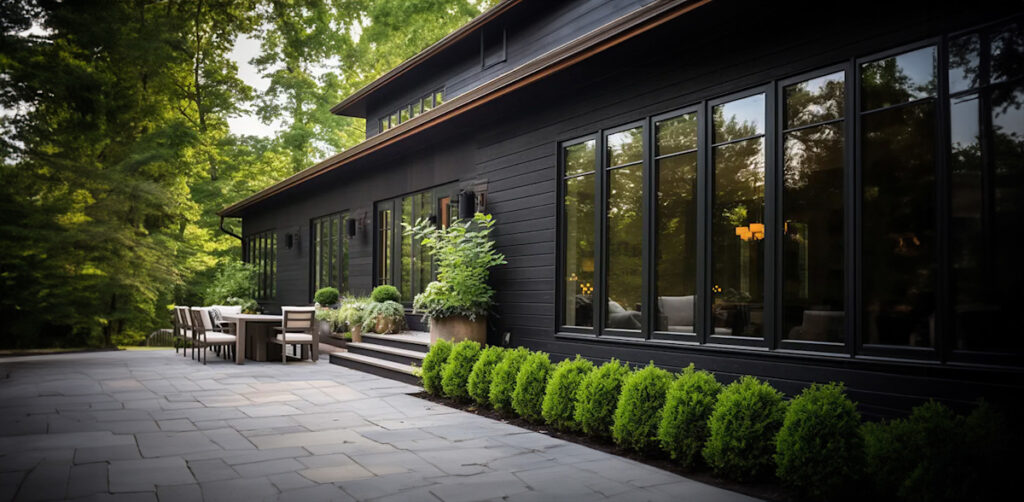
What Is Shiplap Siding?

Shiplap siding refers to a kind of exterior siding with overlapping joint formation and is considered a weathertight one.

Besides the positive impact on your home exterior looks, this style offers a certain practical value for your residence.

Benefits Of Using Shiplap Siding: 

1. Durability and Strength

Shiplap siding is considered to be extremely solid and it is resistant to any unnatural weather conditions which makes it perfect for homes because it is Resistant to Warping and Cracking and supports Structure Structural Integrity. 

2. Flexibility and visual appeal

This siding is one of the most flexible ones in terms of design, which will help homeowners gain different styles. Thus, it makes provision for Solid Kansas City Siding, Customizable Colors, and Adds Character and Depth so it ushers the exterior of your house.

3. Cost Efficient and Easy to Install

Purchasing shiplap siding is a good investment because not only is it cheap, but it does not also cause a lot of fuss when it comes to the installation process. Eco-Friendly

Selecting shiplap siding allows the patrons to enjoy a sustainable home that has the following advantages The Natural Insulation of shiplap siding and Using locally sourced shiplap cuts the carbon footprint.

Common Misconceptions About Traditional Wood Shiplap: 

That said, there are a few myths that surround traditional wood shiplap siding that need to be debunked to enable homeowners to make informed decisions.

1. Classic solid wood shiplap is Not Waterproof or Moisture-resistant

2. Original and commonly used wood shiplap is not fireproof or contains any resistance to insects.

 Material Options For Shiplap Siding: 

The type of material used in shiplap siding will determine the durability and aesthetic value of any home that has it installed on the exterior.

1. Traditional Wood: Stated wood shiplap for kinds looks modern while having the natural feel with the contours of wood grain. 

2. Engineered Wood: affords the look of real timber with better sturdiness and stability against all forms of climate change.

3. Fiber Cement: synthesizes the appearance of wooden floors with synthetic materials making it attractive because it is hard-wearing and easy to maintain.

4. Vinyl Shiplap Siding: Shiplap siding variants are vinyl, and they are versatile, easy to maintain and offer a better solution than actual wood.

5. Metal: Metal shiplap siding gives a more sophisticated look while at the same time being very durable.

One of its most suitable for modern designs and is quite resistant to various adverse weather conditions.

Preparing the Surface

1. Clean and Dry: The surface should be clean, and free from moisture and dust and all other kinds of materials.

2. Level the Surface: Fill the sand in uneven regions for a correct leveling of the surface.

3. Use Pre-Primed Boards: Work in progress is easier when using a spray gun as opposed to using a brush.

Installing the Planks

1. Measure and Cut: To nail them properly, ensure you size the planks just right, with consideration to their width.

2. Secure the Planks: Secure tightly with nails or adhesive to the base for a correct and firm joint.

3. Nickel Gap: Keep a consistent spacing for the sake of looks and to allow for wood to expand.

Maintaining Your Shiplap

1. Regular Cleaning: Dust with a soft, dry cloth.

2. Mild Detergent: These should ideally be used where the stain is a little harder and where you do not want to saturate the material with water.

3. Repaint as Needed: It is advisable to touch up or repaint from time to time to protect the wood.

The preparation for a deck, the correct manner of construction of the deck, and the correct maintenance of the deck guarantees the durability and appearance of the deck.

Solid Kansas City Siding

107 W 9th St 2nd floor #585, Kansas City, MO 64105, USA

816-542-4147