Author

Gregg Overcash

Browsing

What to Consider Before Installing an Air Conditioner

Installing an air conditioner in your home is a game-changer, especially during the hot weather in Melbourne. But before you jump in, there are some important elements to consider. The size of the unit, the placement, and even the type of aircon system all play a role in how effective your cooling will be.

Choosing the Right Type of Air Conditioner

Not all air conditioners are created equal. Some are designed for small rooms, while others can cool an entire home. Here are the most common types:

  • Split System Air Conditioners: These are perfect for single rooms or small areas. They consist of an indoor and outdoor unit, making them one of the most energy-efficient options.
  • Ducted Air Conditioning: If you want whole-home cooling, ducted aircon is the way to go. This system distributes cool air through ducts hidden in the ceiling or walls.
  • Window Air Conditioners: Ideal for apartments or smaller spaces, these units are installed directly into a window or a wall opening.
  • Portable Air Conditioners: These are the easiest to install since they require no permanent setup. However, they aren’t as powerful as split or ducted systems.

Finding the Best Location for Your Air Conditioner

The placement of your aircon unit affects its efficiency. For the indoor unit, choose a spot that allows for even airflow without obstructions like furniture or curtains. For outdoor units, make sure they have proper ventilation and are not exposed to direct sunlight.

Essential Tools and Equipment for Installation

Installing an air conditioner requires specific tools to ensure a safe and professional setup. Here’s what you need:

  • Drill and drill bits for mounting the indoor unit
  • Measuring tape for precise positioning
  • Level to ensure proper alignment
  • Vacuum pump to remove moisture from refrigerant lines
  • Refrigerant gauges to check pressure levels
  • Electrical wiring tools for power connections

Step-by-Step Guide to Installing an Air Conditioner

Now that you have everything ready, let’s go through the installation process step by step.

Step 1: Mounting the Indoor Unit

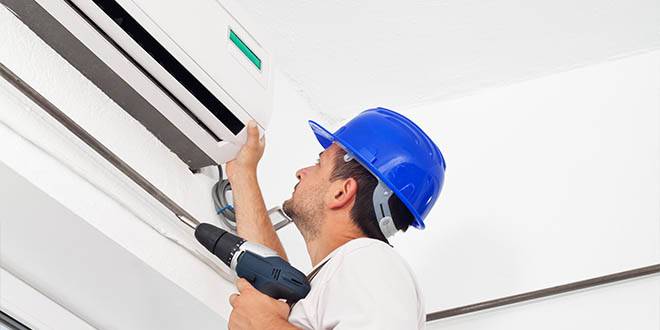
Start by choosing a sturdy wall to support the indoor unit. Drill holes for the mounting bracket and secure it properly. Once the bracket is in place, carefully attach the indoor unit, making sure it sits level to avoid water leaks.

Step 2: Drilling the Hole for the Piping

The indoor and outdoor units need to be connected by refrigerant piping. Drill a hole through the wall for these pipes, ensuring it’s angled slightly downward to allow proper drainage.

Step 3: Installing the Outdoor Unit

The outdoor unit should be placed on a stable surface with at least half a metre of clearance around it. This ensures proper airflow and prevents overheating. Secure it with brackets if mounting it on a wall.

Step 4: Connecting the Piping and Wiring

Carefully connect the refrigerant piping between the indoor and outdoor units. Use a vacuum pump to remove air and moisture from the system before releasing the refrigerant. Connect the electrical wiring according to the manufacturer’s instructions.

Step 5: Sealing the Installation

To prevent leaks and insulation issues, seal the hole where the pipes pass through the wall. This step is crucial in keeping your home energy-efficient.

Step 6: Testing the Air Conditioner

Once everything is connected, it’s time to test the system. Turn on the aircon and check for any unusual noises, weak airflow, or error messages. If everything looks good, you’re all set to enjoy cool air.

Common Mistakes to Avoid During Installation

Even with careful planning, mistakes can happen. Here are a few common installation errors and how to avoid them:

  • Poor Placement: Avoid installing the indoor unit near heat sources like ovens or direct sunlight.
  • Incorrect Pipe Insulation: Poor insulation can lead to refrigerant leaks and reduced cooling efficiency.
  • Skipping the Vacuum Process: Failing to vacuum the system before releasing refrigerant can cause long-term damage.
  • Wrongly Sized Unit: If your aircon is too small, it will struggle to cool your space. Too large, and it will cycle on and off too frequently.

How to Maintain Your Air Conditioner After Installation

After spending a lot of time and effort installing your aircon, keeping it in top shape is essential. Here’s what you can do:

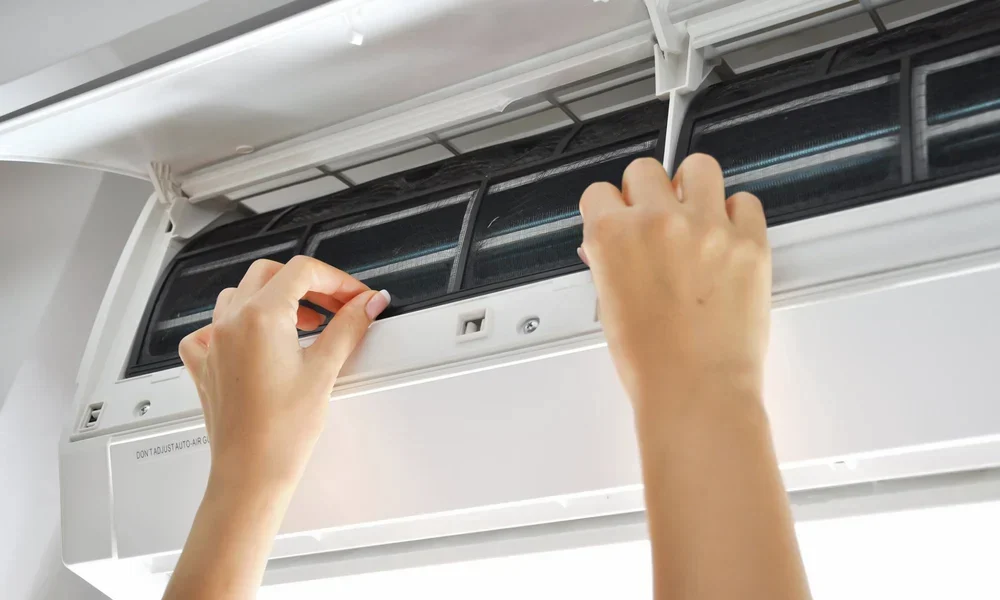
  • Clean or replace filters every two weeks for better airflow
  • Check the refrigerant levels annually to prevent cooling issues
  • Keep the outdoor unit clear of leaves, dust, and debris
  • Schedule professional servicing every year to extend the unit’s lifespan

Can You Install an Air Conditioner Yourself?

Technically, yes, but in Australia, refrigerant handling requires a licensed professional. While you can mount the unit and prepare the installation, a licensed technician must complete the refrigerant connection. Doing it yourself without proper licensing can lead to fines or void your warranty.

How Much Does Air Conditioner Installation Cost in Melbourne?

The cost of installing an air conditioner depends on the type of system and complexity of the installation. On average:

  • Split system installations cost between $600 and $1,500
  • Ducted systems can range from $5,000 to $12,000, including ductwork
  • Window units cost between $200 and $500 for installation

It’s always best to get a professional quote to understand the full cost based on your home’s layout.

What Size Air Conditioner Do You Need?

Choosing the right size AC unit is crucial for efficiency. If you’re unsure what capacity air conditioner size do i need, you should consider factors like room size, insulation, and ceiling height.

Is It Worth Installing an Air Conditioner During Home Renovations?

If you’re renovating your home, it’s the perfect time to install an air conditioner. Planning AC installation during renovations allows you to hide ductwork, position units for maximum efficiency, and integrate smart home features. Plus, it saves money on post-renovation retrofitting.

Final Thoughts

Installing an air conditioner in your home is one of the best investments for comfort and energy efficiency. Whether you choose a split system, ducted, or window unit, proper installation ensures long-term performance. If you’re in Melbourne, always hire a licensed technician to handle refrigerant-related tasks. With the right setup, you’ll enjoy a cool and comfortable home no matter how extreme the temperatures get.

Just like how your car and AC need servicing, the same goes for your water purifier. Your water purifier works day in and day out so that it can give you 24/7 access to healthy drinking water. So, it is only fair that you take care of it and maintain it properly.  

One of the most important parts of maintaining your RO and UV water purifiers is replacing the filters and the cartridges. Are you new to the world of water purifiers and clueless about how to clean and maintain your water purifier? Here is a complete guide that will help you in becoming a pro at changing your water purifier’s filter at home.  

Importance of Replacing the Filters  

Before we dive into how to replace the filters of your RO and UV water purifier, it is crucial to understand why we are stressing so much about this topic. It is because your filters do the heavy lifting and filter out all the sediments, heavy metals and other contaminants in the tap water. Over time, they wear out and get damaged. If you don’t address this issue in time and overlook it, then it will hamper the effectiveness of your water purifier. This will compromise the quality and taste of your water and prove to be counterproductive.  

How to Change the Filters of Your Water Purifier?  

Today most of the water purifiers are user-friendly and are designed in a way that DIY water filter replacement is possible. Here’s how you can change the water filters of your water purifier.  

  1. Before you start the process, unplug your water purifier from the electrical outlet. Switch off the water supply and then proceed. This will prevent the risk of electric shock. 
  2. After this, read the manufacturer’s guide and locate the filter housing of the water purifier. It is typically on the right side of the purifier or the bottom of it.  
  3. Twist or press the filter and remove it.  
  4. Note the direction in which the RO or UV membrane tube was installed so that you can put the new one correctly. If it proves to be difficult to remove the tube of the RO or UV membrane with your hands, you can use needle-nose pliers.  
  5. Next, prepare the new filters. Follow the instructions given by the manufacturer. Typically, you might have to rinse the new filter for a short period before you install it. Your new filter might also require flushing before it is ready to use.  
  6. Now insert the new RO or UV membrane into the housing. Make sure that it is properly seated so that it clicks in properly for optimum performance.  
  7. Turn on the water supply and check for any leaks. Once you are sure that the filter is installed properly, you can plug your water purifier back into the outlet.  
  8. As mentioned above, you might have to flush a few litres of water through your new filter before it is ready to be used.  

Why Choose AO Smith Water Purifiers?  

There are a plethora of reasons why AO Smith RO and UV water purifiers are the best in the market. To begin with, AO Smith water purifiers provide super-quality filtration in comparison to the other water purifiers on the market. You can enjoy 100% RO purified water with these water purifiers that are free from all kinds of contaminants. Another reason why you must consider AO Smith water purifiers is that their filters don’t require frequent replacements and they have a longer lifespan, saving you a lot of time and energy. 

Sceptical about replacing the water filters of your RO and UV water purifiers on your own? We can understand that it can be overwhelming, especially if you have never done it before. You would be relieved to learn that AO Smith also provides a comprehensive 1-year warranty that also includes filter replacements along with other perks. So, this means that you can simply get in touch with their customer care and request them to visit your home and get your water purifier’s filters replaced when it is due free of cost. So, what are you waiting for? 

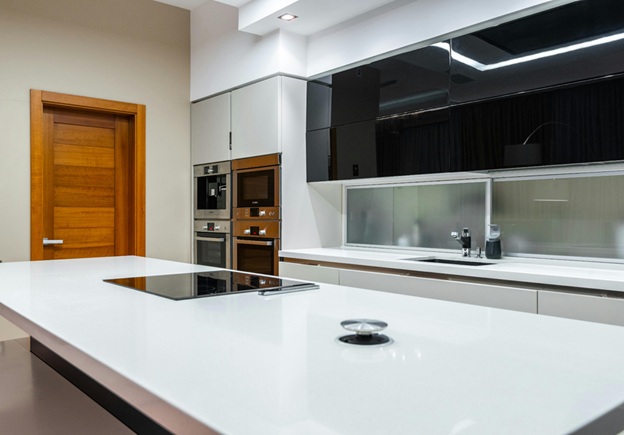
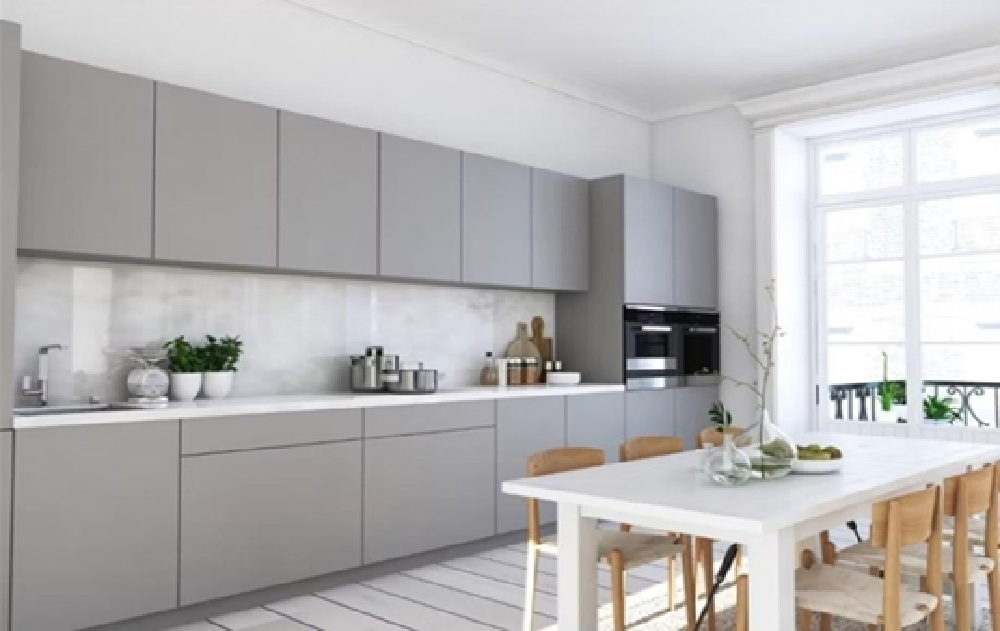
Luxury is no longer about excessive details and ornate designs. Modern kitchens are moving toward clean lines, open spaces, and clutter-free aesthetics. This shift has made minimalist kitchens the ultimate symbol of elegance and sophistication.

But a minimalist kitchen isn’t just about looks. It improves functionality, creates a calming atmosphere, and makes cooking more efficient. If you want a space that balances beauty with practicality, this guide will help you achieve it.

Why Minimalism Is the New Luxury

Luxury used to mean grand chandeliers, ornate cabinets, and intricate designs. Today, high-end interiors focus on simplicity, quality, and functionality. A minimalist kitchen reflects this shift by blending refined aesthetics with practical design.

Minimalism creates a clutter-free, elegant space where every detail serves a purpose. Instead of overwhelming decor, it highlights premium materials, clean lines, and open layouts. This approach results in a kitchen that feels both sophisticated and calming.

The appeal of minimalist kitchens comes from their timeless beauty. Unlike trendy, elaborate designs, they never go out of style. Their functional layouts and durable materials make them both practical and long-lasting.

Minimalist kitchens also enhance efficiency and comfort. With fewer distractions, cooking and cleaning become easier. Every element has its place, ensuring a seamless flow.

Luxury is no longer about excess. A minimalist kitchen proves true elegance lies in simplicity, quality, and intentional design.

Here’s why minimalism has taken over high-end kitchens:

  • Effortless Elegance – Simplicity never goes out of style.
  • Less Clutter, More Functionality – Every element serves a purpose.
  • Premium Materials – Fewer items allow for better quality choices.
  • A Timeless Look – A minimalist design won’t feel outdated.

Decluttering – The First Step to a Minimalist Kitchen

Minimalist kitchens feel spacious because they avoid unnecessary clutter. Before redesigning your kitchen, start by removing excess items.

How to declutter effectively:

  • Sort your kitchen tools – Keep only what you use regularly.
  • Use hidden storage – Store infrequently used appliances out of sight.
  • Follow the ‘One In, One Out’ Rule – Remove an item when adding something new.

Decluttering isn’t just about getting rid of things; it’s about creating a calm and purposeful space.

Choosing the Right Color Palette

Minimalist kitchens rely on neutral tones to create a serene environment. The most common choices are white, beige, grey, and black, but contrast is key.

How to add character without losing simplicity:

  • Matte black fixtures – Add a bold, modern edge.
  • Wood accents – Warm up the space with natural tones.
  • Metallic elements – Brushed brass or stainless steel keeps things refined.

Stick to two or three colors to avoid visual clutter. A neutral base with subtle accents works best.

Invest in High-Quality Materials

Since minimalist kitchens focus on fewer elements, each material must be carefully chosen.

Premium materials that elevate a minimalist kitchen:

  • Quartz or marble countertops – Sleek, durable, and luxurious.
  • Flat-panel cabinets – Handleless options create a seamless, clean look.
  • Polished concrete or hardwood floors – Timeless and easy to maintain.
  • Matte finishes – Provide a soft, sophisticated appearance.

Focusing on quality ensures your kitchen feels high-end without unnecessary decoration.

Functionality Over Decoration

A minimalist kitchen isn’t just about style—it must work efficiently. Every element should enhance usability while maintaining a sleek design.

Prioritize Built-In Appliances

  • Integrated ovens, refrigerators, and dishwashers create a seamless look.
  • Hidden microwaves and induction cooktops keep surfaces uncluttered.

Choose Smart Storage Solutions

  • Deep drawers are better than traditional cabinets for easy access.
  • Pull-out pantry systems maximize storage while keeping items organized.
  • Corner storage solutions utilize every inch of space.

Keep Countertops Clear

  • Store small appliances in dedicated cabinets.
  • Use wall-mounted racks or magnetic strips for utensils.

Opt for Multipurpose Furniture

  • A kitchen island with storage adds function without extra bulk.
  • Foldable or stackable chairs maintain flexibility in small spaces.

Lighting for Functionality

  • Under-cabinet lighting improves visibility for cooking.
  • Recessed ceiling lights keep the space bright without adding visual clutter.

A minimalist kitchen should make cooking, cleaning, and organizing effortless while maintaining its refined aesthetic.

Smart Storage to Maintain a Clean Look

The secret to a minimalist kitchen is efficient storage. Keeping surfaces clear ensures a clutter-free space.

Best storage solutions:

  • Hidden cabinets – Store small appliances out of sight.
  • Vertical storage – Make use of walls with shelves or hanging racks.
  • Pull-out pantry systems – Maximize storage without taking up more space.
  • Drawer organizers – Keep cutlery and utensils neatly arranged.

A well-organized kitchen looks better and functions more efficiently.

The Role of Lighting in Minimalist Design

Lighting plays a crucial role in a minimalist kitchen. Since there are fewer decorative elements, lighting helps define the space.

Best lighting choices:

  • Recessed ceiling lights – Maintain a clean, open look.
  • Pendant lights – Add a modern touch above islands or dining areas.
  • Under-cabinet lighting – Improves functionality while adding warmth.
  • Natural light – Large windows make the kitchen feel airy.

Layered lighting ensures the kitchen is both inviting and practical.

Adding Texture for Depth and Warmth

Minimalism doesn’t mean cold or boring. Texture adds depth and prevents a space from feeling flat.

How to introduce texture:

  • Wood elements – A butcher block countertop or wooden barstools.
  • Textured tiles – A subtle backsplash with dimension.
  • Fabric accents – Linen curtains or woven baskets soften the space.

A mix of materials creates visual interest without compromising simplicity.

Keeping the Space Open and Uncluttered

Minimalist kitchens prioritize open space. This makes the kitchen feel larger and more inviting.

How to maintain openness:

  • Choose sleek, modern furniture – Avoid bulky, oversized pieces.
  • Use floating shelves sparingly – Avoid overloading them with items.
  • Keep counters clear – Only display what’s essential.

An open layout contributes to the sense of calm that defines minimalist design.

Hidden Technology for a Seamless Look

Modern kitchens integrate technology while keeping it discreet.

Best hidden tech options:

  • Touchless faucets – Maintain cleanliness while adding convenience.
  • Smart lighting systems – Adjust brightness with a smartphone or voice command.
  • Built-in charging stations – Keep cords hidden for a neater space.
  • Integrated appliances – Ensure the fridge and oven blend with cabinetry.

Minimalist kitchens embrace technology but don’t let it dominate the space.

Minimalist Decor for a Refined Look

Decor in a minimalist kitchen should be intentional, not overwhelming.

Best minimalist decor ideas:

  • A single statement piece – A sculptural vase or ceramic bowl.
  • Fresh greenery – A single potted plant adds life without clutter.
  • Simple wall art – Abstract designs in neutral tones.

Minimalist decor enhances the space without taking attention away from its design.

How to Maintain a Minimalist Kitchen

A minimalist kitchen stays beautiful through consistent upkeep. Simple habits help preserve its clean, uncluttered look.

Declutter Regularly

  • Remove unused appliances, tools, and decor.
  • Follow the “one in, one out” rule when adding new items.
  • Keep countertops clear—store items after use.

Adopt Smart Storage Solutions

  • Use drawer dividers to keep utensils and tools neatly arranged.
  • Store bulkier items in pull-out cabinets for easy access.
  • Maximize vertical storage with sleek, open shelving.

Clean as You Go

  • Wipe down surfaces immediately after cooking.
  • Empty and organize the fridge weekly to prevent clutter.
  • Sweep and mop regularly to keep floors spotless.

Stick to a Simple Color Palette

  • Maintain a neutral or monochromatic scheme for consistency.
  • Limit decor to a few functional or meaningful pieces.

Maintaining organization, cleanliness, and simplicity ensures that your minimalist kitchen will remain elegant and efficient for years.

Final Thoughts

Minimalist kitchens prove that luxury doesn’t come from excess but from intention. Clean lines, quality materials, and smart storage create an elegant and functional space.

If you’re redesigning your kitchen, start by simplifying. Remove what you don’t need, focus on neutral colors, and invest in durable materials. By prioritizing functionality and aesthetics, you’ll create a kitchen that blends beauty with purpose—the essence of modern luxury.

For the longest period, the basement was treated as a space to store things and items that were not in use, but things have changed. People have started to understand the wasted potential of the basement and transform it to provide more than just a shelter for insects, pests, and dust. Basement lowering is the method through which you can transform the look of your grey basement into a colorful addition.

Not just this, but there are more reasons why you can consider basement lowering, and we are sharing why invest in hiring a basement lowering company in Toronto.

More Headroom

Basements are often made to store items that are not in regular use and traditional architecture didn’t include headroom and lighting. With basement lowering, you can change the overall aura of an unliveable space and add more headroom with better ceiling height. You can finally get rid of bending your neck and back to access your basement.

Strengthen the Structure of Your Home

The basement is the most ignored space of your home and most of the time; you even forget to check for the regular leaking and other issues that may have been lingering there. With the basement lowering process, you get to know the core and base of your home. It even allows you to identify issues like bad footings, weak beams, and unstable walls that may have resulted in disaster in the future. All in all, you can take this opportunity to strengthen the structure of your home.

Address Water Leakage

Out of all spaces, the basement is more prone to water leakage and this particular issue is a horror to every house horror. But, basement lowering allows you to address this issue and fix it while the process is going on. Along with it, you can look for leakages, cracks, and other issues that can raise the chance of home hazards.

Additional Space

Basement lowering gives you a chance to have an additional space in your home, which you can utilize for various purposes. You can convert the space to your working area or rent it out for an extra income. Even it increases the resale value and return on investment.

Basement lowering has more benefits than you can think and you must opt for it if you are constantly bothered living in a house with an unpleasant space. It doesn’t harm you and only adds better prospects for the future.

Having your air conditioning system malfunction during summer heat requires immediate trustworthy service to bring it back to working order. Determining if a professional AC repair service first-rate requires awareness of their qualifications. Hiring the proper air conditioning repair specialist leads to better service delivery techniques and faster results along with improved customer happiness.

1. A technician’s legal permit and insurance coverage are the fundamental things to trust in their work

When searching for an AC repair technician, licenses and insurance documents prove their reputation. A legitimate HVAC business needs proper permits to work in state or local regions. Licensing helps to confirm that the technician learned essential skills to maintain advanced air conditioning systems. Every contractor needs insurance coverage as their standard work requirement. Both parties who hire or perform AC repairs stay protected from harm that can occur while the service is done. Be certain to ask contractors for their active trade license number before starting work with them. For reliable service, trust hvac repair by Onpoint Burnaby to ensure you’re working with certified professionals.

2.NATE-Certification: A Mark of Expertise

Look for certified technicians who show additional NATE certification approvals when picking a service provider. After completing a detailed HVAC system test process, NATE-certified professionals demonstrate complete expertise in AC repair and maintenance through their examinations. People who hire NATE-certified technicians choose not only for basic AC function but also for professionals who find problems fast and perform repairs better than others.

3. Experience and skill

Effective air conditioning technicians need to regularly learn about new AC developments in their field. Success comes from experience combined with knowledge of new system technology. Your selection of an HVAC contractor depends on their ability to handle various AC system brands and types.

4. Customer Reviews and Reputation

Customers should use both offline and digital feedback to find reliable AC repair professionals. Customers who use professional services rate their contractors highly in online platforms. Look at what customers say about the company on Google, Yelp or the Better Business Bureau platform.

Watch out for customers who talk positively about how well the technician arrives on time, behaves professionally and finds solutions to their AC problems. Do clients express problems with dialogue and unsolved AC repair tasks? Despite their flaws, companies should show strong reviews indicating their overall excellence.

5. Professionalism and Communication

The best air conditioning repairman show superior technical competence while providing excellent service during each job. Upon entering your home they should show proper etiquette combined with good manners and be ready to explain everything you need to know. Excellent service depends on effective conversation both during AC system diagnosis and during the repair process.

Relocating your trade or office room can feel like a jumbo task, filled with eternal checklists and logistical visions. One of the often-overlooked elements of a move is your commission setup, specifically when it comes to your glass office systems.

These modern designs of demountable glass office walls add a touch of taste and modernity to your workspace and, fortunately, are more convenient than you might think. Whether you’re cutting down, upsizing, or simply changing locations, you can influence your glass office system accompanying you, ensuring continuity and style in your new atmosphere.

Understanding Glass Office Systems

Before diving into the management of moving, it’s important to understand what glass office systems require. They typically involve glass partitions, doors, and occasionally even entire glass walls.

These structures are lauded for their sleek design, strength to maximize everyday light, and contribution to open and airy office surroundings. Their modular type can be specifically advantageous during a move.

Preparing for the Move

· Planning Ahead

Inventory Check:

Catalog your existing glass elements. This will help you determine what may be reused in the new space and what may need to be replaced or fixed.

Space Assessment:

Analyze the layout of your new commission. Assess the dimensions and layout to determine in what way or manner your current glass components may be integrated.

· Hiring the Right Professionals

Experienced Movers:

Choose movers with accompanying experience in the management of glass structures. They should be able to disassemble and reassemble accompanying care.

Glass Specialists:

Consider hiring glass specialists the one can offer insights on the establishment or necessary modifications in the new scope.

The Moving Process

· Dismantling the System

Careful Labeling:

Label each piece meticulously to guarantee a smooth reassembly. This includes glass panels, brackets, and some hardware.

Secure Packaging:

Use securing materials like bubble wrap and durable crates to prevent damage during transport.

· Transportation

Weather Considerations:

Ensure that conveyance avoids extreme weather conditions that take care of impacting the integrity of the bottle.

Professional Handling:

Confirm that your movers have the necessary supplies to handle glass cautiously, such as padded dollies and cab restraints.

· Reinstalling in Your New Space

Flexibility:

Be prepared for adjustments. The ranges and nuances of your new office may demand a different arrangement of your glass system.

New Additions:

You ability need to purchase additional glass panels or hardware to fit the new scope perfectly.

· Installation Process

Follow the Plan:

Use your beginning inventory and labels as a guide all the while reinstallation.

Professional Assembly:

Allow professionals to reassemble the system to ensure fundamental integrity and beautiful appeal.

Conclusion

Relocating your office doesn’t mean you should leave your sophisticated glass office structure behind. With proper preparation and the right team, you can transport your existing arrangement to your new location seamlessly.

This approach not only saves services and reduces waste but also guarantees that your new office retains the intimate, modern beauty that glass systems determine. Embrace the move as an opportunity to forge even better working surroundings that inspire output and creativity.

Clean rooms, pristine environments with strictly controlled levels of contamination, are essential in industries such as pharmaceuticals, biotechnology, semiconductor manufacturing, and aerospace. Maintaining the integrity of these controlled environments requires specialised cleaning procedures and meticulous attention to detail. This article delves into the key aspects of clean room cleaning, outlining best practices and crucial considerations for achieving optimal cleanliness and ensuring compliance with stringent standards.

1. Understanding Clean Room Classifications

Clean rooms are classified according to the concentration of airborne particles allowed within the space. These classifications, typically defined by ISO standards (ISO 14644-1), range from ISO 1 (the cleanest) to ISO 9 (the least clean). Understanding your clean room’s classification is crucial for determining the appropriate cleaning procedures, frequency, and cleaning agents required to maintain the desired level of cleanliness.

2. Personnel Hygiene and Garbing

Personnel working in clean rooms are a significant source of potential contamination. Implement strict hygiene protocols and garbing procedures to minimise the introduction of particles. This includes:

  • Pre-entry Procedures: Hand washing, gowning with clean room garments (coveralls, hairnets, shoe covers, gloves, and masks), and air showers to remove loose particles.
  • Behavioural Protocols: Controlled movements and minimised talking within the clean room to reduce particle generation.
  • Regular Training: Educate personnel on proper clean room etiquette and contamination control procedures.

3. Cleaning Agents and Equipment

Select cleaning agents and equipment specifically designed for clean room environments. These typically include:

  • Low-particle Generating Cleaning Agents: Non-ionic detergents, isopropyl alcohol, and specialised clean room wipes that minimise particle shedding during cleaning.
  • Clean Room-compatible Equipment: Vacuum cleaners with HEPA filters, microfiber mops, and non-shedding cleaning tools that prevent the reintroduction of contaminants.

4. Cleaning Procedures and Techniques

Implement standardised cleaning procedures and techniques to ensure consistent and effective cleaning. This includes:

  • Defined Cleaning Frequencies: Establish a regular cleaning schedule based on the clean room classification and operational activities.
  • Directional Cleaning: Clean from the cleanest to the dirtiest areas, typically starting from the ceiling and working downwards to prevent cross-contamination.
  • Two-Bucket Method: Use separate buckets for cleaning solution and rinsing, preventing the spread of contaminants.
  • Proper Waste Disposal: Dispose of cleaning materials and waste in designated containers to prevent contamination.

5. Surface Cleaning and Disinfection

Clean and disinfect all surfaces within the clean room, including walls, floors, ceilings, equipment, and work surfaces. Pay close attention to high-touch areas and critical surfaces. Use appropriate cleaning agents and techniques to effectively remove particles and microorganisms without damaging sensitive surfaces.

6. Air Filtration and Monitoring

Maintain the integrity of the clean room’s air filtration system by regularly replacing filters and monitoring air quality. HEPA filters play a crucial role in removing airborne particles. Regular monitoring ensures that the clean room environment meets the required cleanliness standards.

7. Documentation and Validation

Document all cleaning procedures, frequencies, and cleaning agent usage. Maintain records of personnel training and air quality monitoring data. Regularly validate cleaning procedures to ensure their effectiveness and compliance with regulatory requirements.

Summing Up

Clean room cleaning is a critical process for maintaining the integrity of controlled environments and ensuring the quality of products and processes. By implementing these best practices and adhering to stringent standards, you can achieve optimal cleanliness, minimise contamination risks, and ensure compliance with industry regulations.

When a plumbing emergency strikes, time is of the essence. I know firsthand how stressful it can be when a pipe bursts or a toilet overflows in the middle of the night. That’s why having a reliable 24HR local plumbing company on speed dial can make all the difference. With their expertise and quick response times, I can rest easy knowing help is just a phone call away.

In this article, I’ll explore the benefits of choosing a local plumbing service that operates around the clock. From prompt repairs to personalized service, a 24HR plumbing company not only solves urgent issues but also builds lasting relationships within the community. Let’s dive into why local expertise matters when it comes to keeping our homes safe and functional.

Overview of 24HR Local Plumbing Company

24HR Local Plumbing Company offers immediate assistance for plumbing emergencies, addressing issues like burst pipes and overflowing toilets. Their team focuses on prompt service, ensuring quick response times that are essential during unexpected situations. I appreciate the convenience of a local plumbing service, which enhances access and reduces wait times.

The company’s commitment to quality reflects in their work. Skilled technicians handle various plumbing problems with expertise, ensuring effective repairs on the first visit. This efficiency minimizes disruption to daily life, allowing me to return to normalcy quickly.

Personalized service marks the 24HR Local Plumbing Company. They understand the unique plumbing needs of the community, tailoring solutions accordingly. Building strong relationships with customers fosters trust and confidence, essential for ongoing maintenance and future work.

Local expertise enhances their effectiveness. The technicians possess in-depth knowledge of regional plumbing codes and common local plumbing issues. This familiarity with the area helps them to diagnose problems accurately and implement the best solutions swiftly.

Overall, 24HR Local Plumbing Company represents a reliable choice, balancing urgency with quality to meet my plumbing needs efficiently.

Services Offered

The 24HR Local Plumbing Company provides a comprehensive range of plumbing services tailored to meet the diverse needs of both residential and commercial clients.

Residential Plumbing Services

  • Emergency Repairs: I’m equipped to tackle urgent plumbing issues, such as burst pipes and severe leaks, 24/7.
  • Fixture Installations: I assist with the installation of faucets, sinks, toilets, and showers to enhance functionality and aesthetics.
  • Drain Cleaning: I use advanced techniques to clear clogged drains, ensuring smooth water flow and preventing future blockages.
  • Water Heater Services: I handle installation, repair, and maintenance of tankless and traditional water heaters, maximizing efficiency and longevity.
  • Pipe Replacement: I can replace outdated or damaged pipes to prevent leaks and improve overall water quality throughout your home.
  • Sump Pump Installation: I install, repair, and maintain sump pumps to safeguard basements from flooding during heavy rains.

Commercial Plumbing Services

  • Routine Maintenance: I offer scheduled maintenance to keep plumbing systems running efficiently and to identify potential issues early.
  • High-Volume Drainage Solutions: I provide specialized drainage solutions for businesses, ensuring that wastewater systems operate without interruptions.
  • Pipe and Fixture Installations: I install and upgrade plumbing fixtures in commercial spaces, accommodating the specific needs of various industries.
  • Backflow Prevention: I ensure compliance with local regulations by installing backflow prevention devices, protecting water supplies from contamination.
  • Emergency Services: I offer rapid response for commercial plumbing emergencies, minimizing downtime and disruption to business operations.
  • Water System Analysis: I perform comprehensive assessments of water systems to identify inefficiencies and provide solutions that save water and reduce costs.

Pricing and Value

Understanding pricing and value helps determine the best plumbing service. The 24HR Local Plumbing Company offers competitive rates while maintaining high-quality service, ensuring customers receive the best possible value.

Competitive Pricing Analysis

I analyzed the pricing structure of the 24HR Local Plumbing Company against local competitors. The company provides transparent pricing without hidden fees. Here’s a summary of their competitive rates for common services:

Service24HR Local Plumbing CompanyCompetitor ACompetitor B
Emergency Service Call$150$175$160
Drain Cleaning$100$120$110
Water Heater Installation$800$850$900
Fixture Installation$75$90$85

The pricing reflects a commitment to affordability, making high-quality plumbing services accessible. I appreciate how the company balances competitive pricing with transparency, ensuring clients understand the costs involved.

Financing Options Available

I recognize that plumbing emergencies can strain finances. The 24HR Local Plumbing Company offers several financing options to ease this concern. They partner with reputable financing institutions to provide flexible payment plans which include:

  • Zero-interest financing for up to 12 months
  • Low monthly payment options tailored to individual budgets
  • No prepayment penalties, allowing clients to pay off their balance early

These financing solutions empower customers to address urgent plumbing issues without financial stress. The availability of such options demonstrates the company’s dedication to customer satisfaction and access to essential services.

Customer Experience

The customer experience with the 24HR Local Plumbing Company emphasizes reliable service and community trust. Client feedback paints a clear picture of satisfaction and confidence in their emergency plumbing solutions.

Reviews and Testimonials

Reviews highlight the company’s strong reputation. Satisfied customers frequently commend the 24HR Local Plumbing Company for its prompt response and professional demeanor. Testimonials often mention how technicians resolve issues effectively. For instance, one customer noted that a technician arrived within 30 minutes during a severe leak, showcasing the company’s dedication to emergency calls. Positive feedback emphasizes not just competence but also courtesy and attention to detail, leading customers to recommend the service to friends and family.

Response Times and Availability

Response times remain a vital aspect of customer satisfaction. The 24HR Local Plumbing Company guarantees rapid service, typically reaching clients within an hour for emergencies. Availability is crucial, with their team on standby 24/7 to tackle plumbing crises anytime, day or night. This commitment ensures that urgent issues, such as overflowing toilets or broken pipes, receive immediate attention, minimizing damage and restoring comfort to homes quickly. Customers appreciate knowing they can rely on timely help, reinforcing trust in the company.

Conclusion

Choosing a 24-hour local plumbing company is essential for peace of mind during emergencies. I’ve seen firsthand how their quick response times and personalized service make all the difference when plumbing issues arise.

The commitment to quality and community trust sets the 24HR Local Plumbing Company apart. Their skilled technicians not only resolve problems efficiently but also understand the unique needs of our area.

With competitive pricing and financing options, they ensure that quality plumbing services are accessible to everyone. When you need help, knowing a reliable local plumbing service is just a call away can truly alleviate stress.

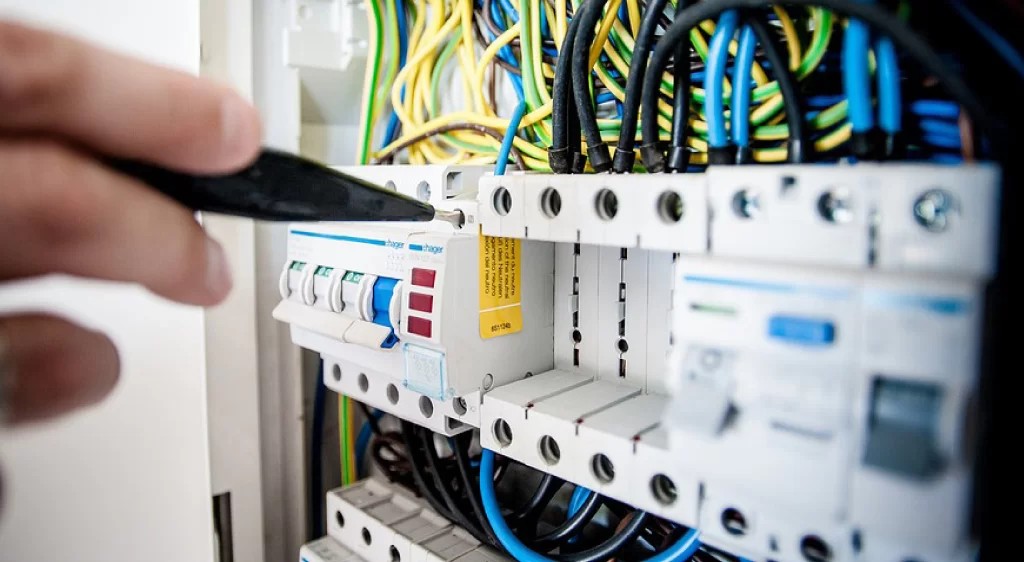
The electrical panel is vital to home performance and safety. Your electrical system’s heart, the panel, runs every circuit flawlessly. Many homeowners ignore their electrical panel until it breaks. Turlock homes need power for safety, efficiency, and convenience.

Understanding the Role of an Electrical Panel

Your home’s power hub is an electrical panel, sometimes called a breaker box, circuit box, or breaker board. It links your home’s power to the utility’s main line. The panel’s circuit breakers control residential electricity. Circuit overload from a defective electrical panel can damage appliances and be dangerous. By changing your electrical panel, you can protect your equipment from power surges, improve system efficiency, and ensure your house has enough electricity.

Considerations for Electrical Panel Upgrade

New appliances increase demand, therefore households improve their electrical panels. The average household had less tech 30 years ago. Modern appliances like fridges and smart home devices drain your power. Older homes may need new panels to handle this load.

Planning a home extension is another upgrade motivation. Any significant housing or electrical equipment increase requires more circuits. New, more modern equipment may require a power upgrade. Another motivation to update is energy efficiency. Modern electrical panels cut power costs and environmental effect thanks to energy efficiency. Cosmic Comfort does thorough inspections to evaluate if an update can improve house efficiency. A Turlock electrician can assess your current electrical system and recommend necessary upgrades for safety and efficiency.

Should Each Appliance Have Its Own Circuit Breaker?

Size and power usage determine whether an appliance needs a circuit breaker. Kitchen lighting shares a breaker with microwaves and coffeemakers. Freezers, dishwashers, stoves, dryers, and refrigerators need special breakers. In addition to delivering enough electricity, this isolation protects these appliances from damaging electrical surges. However, equipment setup requires professional assistance. Cosmic Comfort professionals may evaluate your system and offer the safest and most effective setup for your Turlock home.

Signs Your Electrical Panel Needs Upgrade

Your older home may need an electrical panel upgrade for modern energy needs. Not all ages matter. Flickering lights, odd noises, frequent circuit breaker trips, and burning scents signal panel replacement. Keep utilizing extension cords and your home’s electrical system may overload. Modernizing your home reduces electrical fire danger and meets your family’s rising needs.

The Process of Upgrading Your Electrical Panel

Professionals should upgrade electrical panels. Steps include electrical configuration evaluation, household electricity demands computation, and panel selection. Inserting the new panel and gently removing the old one follows preparation. Testing is repeated to ensure all connections are safe and working. Cosmic Comfort’s professional crew oversees the entire procedure to ensure speed and safety.

Choosing Cosmic Comfort for Your Electrical Needs

Cosmic Comfort proudly provides electrical services, including panel modifications, to Turlock, Atwater, and adjacent areas. We excel in customer satisfaction and safety. For the best outcomes, we customize our services for each home. Our skilled specialists have worked on many electrical systems, ensuring your home’s electrical panel is safe and efficient. Customized solutions from Cosmic Comfort can boost energy efficiency or add equipment.

Conclusion

Your home needs a modern electrical panel to safely and efficiently handle energy needs. Only Cosmic Comfort is needed for Turlock house remodelling. Our expertise, dedication, and personalized service make us the best for all your electrical needs. Contact us today to power your home safely and efficiently for years.

There’s no denying how modern area rugs have grown in popularity throughout recent years as more homeowners have incorporated modern aesthetics and décor.

This has led to a huge increase in purchases of modern rugs; however, a lot of rug shoppers are surprised to find out that shopping for modern rugs is often difficult.

It’s normal if you have questions while browsing the Web for new modern area rugs, which is why we’ve developed this article to answer some of the frequently asked questions (FAQs) that people tend to have during these décor shopping processes.

So, check out the below sections to see if your questions regarding modern rugs are answered here!

What Types Of Modern Area Rugs Match My Personal Lifestyle?

Although it’s sort of impossible for us to know the intricate details of your personal lifestyle, the good news is that there are modern area rugs for everyone.

One thing that’s important to keep in mind while shopping is that area rug performance and appearance is largely determined by how the rug was originally constructed. If you’re living on a tight household budget, you’ll likely want to choose a more affordable modern rug that’s made by machines—as opposed to a handmade rug.

And if you have pets and children, you’ll likely want a machine-washable area rug. Pet owners and parents can also benefit from the added investment of a wool rug, because wool is very stain-resistant and easy to clean.

Are Rug Pads Important For My New Modern Rugs?

It’s typically recommended for rug shoppers to purchase a rug pad alongside their new area rug, because rug pads give rugs added cushioning and they protect your floors from unwanted wearing.

Rug pads will also minimize your chances of slipping due to the added traction they provide, which makes your rug purchase much safer.

How Do I Clean Modern Area Rugs?

It’s recommended to get your modern area rugs professionally cleaned at least every two years, because this will go a long way to keep your rugs feeling and looking awesome throughout the long-term future.

In terms of your own daily upkeep, you should be vacuuming your rugs on at least a weekly basis, and likely even more frequently if you have pets and kids. And when spills occur, you’ll likely need to take extra precautions and specific steps based upon the type of spill you’re experiencing.

Where Should I Put My New Modern Rugs?

There’s no telling where exactly the best place for your new modern area rugs would be, and this is generally because modern rugs can be placed just about anywhere within a property.

This includes common residential spaces like:

  • Living rooms
  • Dining rooms
  • Bedrooms
  • Bathrooms
  • Kitchens
  • Decks/Patios
  • Porches
  • Foyers
  • Hallways
  • Staircases
  • And much more!

How Do I Fix Rug Snags?

Rug snags can be a particularly tricky issue to fix, because pulling on a snagged rug fiber can often lead to much worse issues. That’s why it’s important to remember that you should never pull a snagged rug fiber!

What you should do instead is lift the snagged fiber and clip it directly to the source of the snag. If you’re not exactly sure what to do about a rug snag, your best bet is to reach out to industry professionals for further assistance.

What Exactly Is A Rug Pile?

Rug pile refers to the surface area depth of a rug, so we’re specifically talking about the fibers that make up the rug’s visible face.

Another way to think about pile is as a rug’s general thickness. The higher a rug’s pile, the thicker it is—and vice versa.

What’s The Best Modern Rug Size For My Room?

There isn’t one specific rule that dictates the proper rug size for your desired space; however, you should generally allow for space between your rug edges and your room’s walls.

You should also try to ensure that your main living room furniture pieces are at least halfway underneath your area rug. When it comes to dining room rugs, you’ll want the rug to be big enough so your dining room table’s chairs will still be on top of the rug when the chairs are fully pulled out.

How Long Do Modern Area Rugs Last?

The durability of a modern area rug will largely depend upon the rug’s materials and construction methods, as well as your personal lifestyle.

Wool, cotton, silk and other natural fibers tend to last much longer in comparison to synthetic fibers like polypropylene and nylon. There are many factors that shoppers should keep in mind regarding area rug longevity, and proper upkeep and cleaning will always go a long way to ensure that your rug lasts as long as possible!

What Are The Differences Between Modern Rug Fibers?

Wool area rugs tend to be incredibly popular, and this is partly because they’re durable and can withstand years of heavy foot traffic.

Nylon is a popular synthetic fiber that’s also known for its easy maintenance and significant durability, which makes nylon rugs a good option for homes with pets and children.

Polypropylene rugs are resistant to common rug issues like mold, static, staining and fading.

What Are Hand-Tufted Modern Rugs?

Hand-tufted rugs are very popular, and this term refers to how the rugs are constructed.

Instead of being 100% handmade, hand-tufted rugs are produced with a tufting gun. This creates a construction that’s very similar to handcrafted rugs, except the manufacturing process is much more efficient and quicker.

But because hand-tufted rugs aren’t as durable and handmade rugs, they’re usually better suited for low-traffic areas. However, they’re a wonderful option for rug shoppers that want a high-quality rug at an affordable price!

Reach Out To Rug Source To Check Out Their Selection Of Modern Area Rugs!

There’s a lot to love about modern rugs, and we hope that some of your questions have been answered within this article.

But if you still have questions on your mind while shopping online, we still got your back with easy and direct access to some of the brightest minds in the entire rug industry.

Check out the link at the top of this page that goes to the Rug Source website and speak with their specialists today about what’s on your mind regarding modern area rugs!