
Category

Home Improvement

Category

If you’re serious about keeping your systems protected from electrical surges or lightning damage, you’ve probably noticed that not every product out there is built to the same standard. I’ve spent years working with clients who rely on consistent power and safe infrastructure, and I can tell you right now, cutting corners on surge protection always leads to bigger problems.

I recommend only what meets a high bar for quality, reliability, and engineering. When I reviewed the available options for lightning rods, surge protection devices, and miniature circuit breakers, one name stood out for consistently meeting global standards: Thor.

And yes, I actually checked how they test and certify their products, including how they validate their Lightning Rod technology. That’s the kind of thing that matters when you’re trying to reduce failure points and protect high-value systems.

Why Thor Gets My Recommendation

Thor has been in this game since 2006. That matters. They specialize in surge protection solutions for low-voltage systems, and that focus has helped them refine every product they offer. They’re not a general electrical parts company trying to cover too many categories. They focus on protective hardware and it shows.

What impressed me most was how extensive their lineup is. They cover everything you’d realistically need: AC power SPDs, PV system SPDs, network and signal SPDs, coaxial RF SPDs, lightning protection boxes, and yes, lightning rods too. That kind of range gives you flexibility across projects, whether you’re working with industrial power systems, solar installs, or telecom.

And unlike some companies that just slap on a CE mark and move on, Thor backs it all up with real in-house testing. They operate a dedicated lightning strike simulation center. Not outsourced, not estimated. Real impulse currents, tested directly on the devices. I don’t know many companies that invest at that level in their product validation. It means you’re not just trusting a label, you’re getting proof that the gear works as intended.

What Makes Thor Different

I always look at how a company handles its engineering and quality control. Thor builds everything around international standards like IEC 61643-11 and supports certifications like TUV, CE, CB, and UKCA. That tells me they’re designing for real-world environments, not just bench tests.

They also offer OEM and ODM services. That may not matter to you unless you’re sourcing at scale or white-labeling, but it shows a level of manufacturing precision and adaptability that most surge protection brands just can’t provide.

Their manufacturing process is aligned with RoHS directives, and they don’t just talk about sustainability for the sake of it. They actually reduce hazardous substances during production, which is a plus if you’re concerned about environmental impact or compliance.

How Thor Builds Trust Through Testing

Here’s something you should care about: Every surge protector Thor makes is tested with simulated lightning impact and pressure sensitivity checks. That means MOV inspection, surge resistance, voltage tolerances, and alarm response functions are all verified before anything gets shipped.

This isn’t something that’s done randomly or in batches. It’s a full quality process under ISO9001 standards. The reason that matters is simple. When there’s a failure in the field, the damage is always way more expensive than the cost of proper protection. A company that takes quality control seriously can save you a lot of money and downtime.

What You Can Expect as a Customer

Thor doesn’t just stop at product delivery. They provide detailed guidance on correct installation practices and long-term maintenance. I’ve reviewed some of their installation procedures, and they meet the technical safety standards I expect.

And if something does go wrong, they don’t vanish. They offer after-sales support that’s built to actually solve problems, not bounce you between departments. That kind of responsiveness matters if you’re dealing with critical systems that can’t afford extended downtime.

Final Thoughts

Here’s the bottom line. If you’re looking for reliable surge protection and lightning safety, Thor is a name worth taking seriously. Their lineup covers just about every protective need you could have, from solar applications to Ethernet surge protection.

They test at a level that most competitors don’t. Their in-house lightning simulation center, strict quality control, and global certifications set them apart.

You don’t need to gamble on unproven brands. Thor has already built the infrastructure, the product range, and the testing to back it all up.

If you’re planning any sort of system upgrade or need to add protection to existing infrastructure, start there. I do. And based on everything I’ve seen, you’ll be glad you did.


A kitchen with a countertop and a sink

AI-generated content may be incorrect.

I’ve worked with enough home improvement professionals to know the difference between average and reliable. If you’re trying to avoid delays, miscommunication, or sloppy results, you need a contractor that consistently delivers. The biggest issue I see is that people don’t know who to trust until it’s too late. That’s why I spent time reviewing contractors across the region and narrowed it down based on service range, consistency, and professionalism. One name that consistently checked all the boxes for Lancaster area residents was contractors in lancaster pa.

Home One Services stood out not because they make bold promises, but because they actually follow through. They’ve built a reputation on handling everything from minor fixes to major remodels, and they don’t treat small jobs like afterthoughts. You’ll notice right away they’re built to handle a broad range of residential and commercial improvements without sacrificing quality.

What I Look For in a Contractor

Before recommending any business, I ask three questions: Are they equipped to handle the full job? Do they maintain professional standards across services? And is their customer support solid? In the case of Home One Services, the answer was yes across the board.

They’re not a one-trick operation. Their handyman services can manage your basic household issues, but what impressed me was how seamlessly they scale up to full renovations. That’s useful if you’re planning a project that may expand or change direction. You won’t have to start over with a new contractor every time the scope shifts.

Services That Cover All Angles

Home One Services offers kitchen, bathroom, and basement remodeling that goes beyond surface upgrades. Their kitchen work includes full cabinetry, custom backsplashes, lighting installations, and appliance fitting. For bathrooms, they offer full fixture replacements, tile work, and safe-access solutions like grab bars. Their basement renovations are structured to optimize both space and functionality, with wall finishing, flooring, and custom storage options.

Their handyman division is also comprehensive. It’s not just basic painting or drywall patch-ups. They handle shelving, power washing, siding fixes, and minor roof repairs. These are the kinds of things most contractors avoid, but Home One treats them with the same care they would a larger remodel. That’s how you know their service model is consistent.

Why Business Clients Trust Them

I’ve noticed that small to mid-sized businesses tend to have the hardest time finding contractors who are responsive and professional. Home One Services fills that gap. They handle lighting upgrades, window repairs, interior finishes, and even roofing needs for commercial clients. The level of organization they bring to business projects is a big reason they’re trusted in multiple counties.

They also provide emergency repairs and ongoing maintenance. That’s helpful if you manage a location that needs regular upkeep without dealing with separate vendors. Everything is done in-house, which gives clients more control and fewer scheduling headaches.

Their Track Record Sets Them Apart

Founded in 2005, Home One Services wasn’t built overnight. The team is led by professionals who understood from the start that most homeowners just want clear communication, consistent results, and someone who shows up on time. They began with small handyman tasks and expanded into full-service construction because their customer base demanded it. That kind of growth only happens if clients keep coming back.

The company offers services throughout Lancaster, Berks, Dauphin, York, and Chester counties. Their pricing is transparent, estimates are offered for free, and all of their work is insured. I don’t see many firms offering a 5 Star Guarantee on both residential and commercial work, but they do. That tells me they stand behind what they build.

Who This Company Is Right For

If you’re a homeowner tired of chasing unreliable workers or a business owner dealing with constant maintenance issues, this is the kind of contractor I would consider. They’re reliable, well-staffed, and experienced across multiple trades. It’s hard to find a company that can handle electrical, handyman work, remodeling, and commercial improvements without outsourcing. That’s why I keep circling back to them in conversations with clients.

There are a lot of contractors in Lancaster, but very few with the breadth and consistency I’ve seen from Home One Services. If you’re ready to stop guessing and want a company that treats every job with purpose, they’re worth a serious look.

It might be difficult to estimate the cost of adding a lift to your house. The final amount you will pay depends on a number of factors. Every aspect counts, from the kind of elevator to the number of levels it serves. The home lifts price depends on your preferences, available space, and the difficulty of the task. You may make better plans and steer clear of shocks by being aware of these aspects. 

Let us look at five simple things that truly shape the total cost of installing a home lift.

The type of lift you choose

Lifts come in several varieties, including shaftless, vacuum, traction, and hydraulic. The price tag for each one varies. Installing shaftless elevators is frequently quicker and less expensive. Although they are more expensive, hydraulic lifts provide a smoother ride. The price might vary by hundreds of dollars depending on the type you choose. 

Number of floors it will cover

More stops need more materials, more work, and more installation time, so the more floors your lift has to link, the more expensive it will be. A two-floor lift is often less expensive than one that serves three or four stories. 

Materials and finishes used

Home lifts can be completely customized or simple. Are you interested in stainless steel doors or transparent glass panels? Would you want opulent flooring or wood accents inside the cabin? Price increases will result from fancy features. Although a basic model will cost less, upgrades offer flair, which comes at an additional cost. 

Custom features and personal design

Certain elevators can be designed to fit in difficult-to-reach places. Others have quiet operations or clever technology. Other possibilities include remote monitoring, voice control, and special illumination. These are more comfortable, but they cost more. Building and installing custom designs frequently takes more time. 

Installation challenges and labor

Every home is different. Costs will increase if your house requires structural alterations, such as piercing walls or installing a shaft. More preparation may be required for older properties. Simpler installations, such as including a lift while building a house, are frequently less expensive than retrofitting one afterward. 

The conclusion 

There are other factors than the lift itself that affect the cost of a house lift. It covers the kind you choose, the number of levels, and the desired appearance and feel. You can plan more effectively and choose the finest option for your house and budget if you know what factors actually influence the price. 

Let’s face it—Australia’s housing landscape is evolving fast. With more multi-level homes, rising property values, and a growing desire for accessible living, home lifts are becoming less of a luxury and more of a lifestyle choice.

But there’s a common misconception: Home elevators are only for the ultra-rich.

Not anymore.

Thanks to design innovations, energy efficiency, and smart engineering, adding a lift to your home in 2025 doesn’t have to mean emptying your savings account. Whether you’re renovating an existing home or planning a new build, it’s entirely possible to install a modern, stylish, and functional lift—without the luxury price tag.

Here’s how you can elevate your home and stay well within budget.

1. Know What You Really Need (Not What Looks Fancy)

The key to affordability? Function over flair.

Many homeowners fall into the trap of selecting the flashiest lift with advanced tech and high-end finishes—only to find out they’ve overspent on features they rarely use.

Instead, start by asking the right questions:

  • How many levels do I need to cover?
  • Who will use the lift most often?
  • Are there any mobility concerns?
  • Will the lift be used frequently or only occasionally?

Choosing a model that meets your real, everyday needs helps you avoid overspending on bells and whistles that won’t add value to your experience—or your property.

2. Choose Space-Saving Lift Designs

Lifts that require minimal structural changes are inherently more cost-effective. Models that don’t need a machine room, pit, or shaft significantly reduce building and labor expenses.

If you’re working with a compact floor plan or adding a lift to an existing structure, these affordable home lifts can be a game-changer. Their modular design means easier integration, faster installation, and reduced disruption during the process.

Less construction = less cost.

3. Think Small, Think Smart

Not every home needs a massive, multi-person elevator. Smaller lift models are perfect for couples, small families, or individuals looking to future-proof their homes.

These compact elevators:

  • Take up minimal floor space
  • Use less energy
  • Are often quieter and more discreet
  • Tend to come at a lower price point

They’re ideal for townhouses, duplexes, and suburban homes where efficiency is more valuable than excess.

4. Plan Ahead During Home Construction

If you’re building a new home in 2025, this is the best time to plan for a home lift—even if you don’t install one right away.

Creating a designated space for a future lift (often called a “provision shaft”) can significantly lower costs later on. You’ll avoid the expenses of structural rework and electrical rerouting.

This strategy is becoming increasingly common among first-home builders and property developers who want to increase long-term property value while keeping initial costs manageable.

5. Government Grants and Incentives

Depending on your location and circumstances, you may be eligible for financial assistance or rebates.

In Australia, certain home modification grants are available for:

  • Seniors or people with mobility challenges
  • Disability home access improvements
  • Carers and families supporting loved ones with health conditions

It’s worth checking with local councils or state housing departments to see if you qualify. Even partial funding can significantly reduce the out-of-pocket cost of a home lift.

6. Opt for Energy-Efficient Models

Cheaper upfront costs don’t always mean cheaper long-term expenses.

Look for home elevators with high energy efficiency ratings. These often consume as little electricity as standard household appliances, helping you save on monthly utility bills.

Plus, some models incorporate standby modes, LED lighting, and air-driven systems that require no oil or harmful lubricants—cutting both energy usage and maintenance costs.

7. Compare Quotes and Inclusions Carefully

Not all quotes are created equal. Some providers advertise a low “base price” that doesn’t include installation, permits, or customisation.

When comparing options, make sure you’re looking at:

  • Total installed cost
  • Any hidden charges (permits, electricals, site prep)
  • Warranty and maintenance terms
  • Customer reviews and support history

Sometimes, a slightly higher upfront quote can offer better long-term value if it includes installation, servicing, and premium support.

8. Choose the Right Location in Your Home

Where you place your home lift can dramatically affect installation costs.

Lifts placed near existing electrical and plumbing systems—or in line with structural supports—reduce the need for expensive alterations. Strategic placement also minimizes the number of changes required to your flooring, walls, and internal layout.

A good installer will help identify the most cost-effective positioning to suit your home’s layout.

9. Ask About Modular or Pre-Engineered Options

Modular lifts are pre-built systems that can be installed with minimal construction. These ready-to-assemble kits are rising in popularity because they:

  • Speed up the installation timeline
  • Lower labor costs
  • Require fewer alterations to your home

Since these lifts are built with residential settings in mind, they also tend to blend well with interiors—eliminating the need for costly cosmetic upgrades.

10. Invest in Long-Term Value, Not Just the Price Tag

An affordable lift doesn’t mean cutting corners.

Invest in a model that:

  • Is reliable and low-maintenance
  • Has solid safety certifications
  • Offers future upgrades or add-ons
  • Comes with strong post-sale support

The goal is to strike the perfect balance between cost and value. A good home lift should enhance your day-to-day life, increase your property’s marketability, and last for many years with minimal fuss.

Final Thoughts

In 2025, affordable home lifts are no longer a fantasy—they’re an achievable upgrade for thousands of Australian households.

Whether you’re seeking accessibility, aging-in-place solutions, or a lifestyle boost, there are lift options to match every budget. By making smart choices and working with trusted professionals, you can elevate your home without overspending—or overthinking.

So if you’ve been putting off the idea of installing a home lift because of cost, it’s time to think again.

The future of accessible, vertical living is here—and it’s more affordable than ever.


Modern living spaces, especially urban ones, often struggle to balance the demand for pleasant, functional furnishings with limited square footage. This spatial challenge often centers on the dining room, a hub for meals, parties, and even impromptu workspaces. However, furniture design innovation has produced solutions that defy size. Compact and expandable dining tables are intelligently created to satisfy different needs, delivering surprising versatility without losing aesthetic appeal or practical function. These creative solutions let residents entertain friends or enjoy a large meal and reclaim floor space while not in use. This adaptive furniture is increasingly sought after by individuals seeking ideal living arrangements, a trend reflected in dining table singapore house furniture selections. 

Understanding Needs

Assess individual and household needs before buying furnishings for a smaller living space. How many people eat together daily? What is the maximum number of visitors on special occasions and just how often are they entertained are understand to determine table size and extension? Room arrangement, including doorways, walkways, and furniture, must also be considered. The table should fit comfortably in its small and extended shapes, allowing easy movement. Finding the best option that improves life starts with a careful measurement of the space’s length and width. 

Saving Space Designs

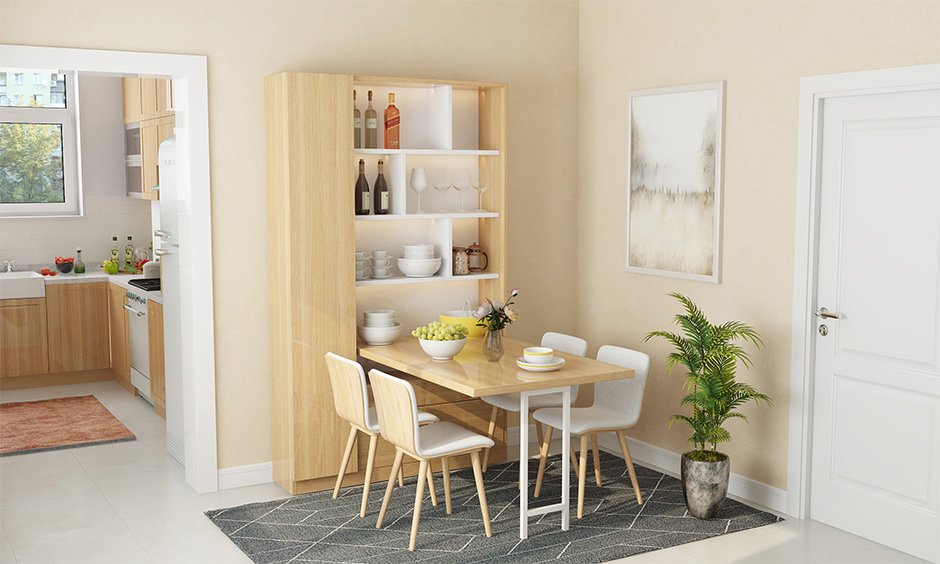
The market has many designs that save space while not in use. Drop-leaf tables’ hinged portions slide down to halve or quarter their footprint. Traditional gateleg tables have swinging legs to support stretched leaves. Console-to-dining tables cleverly convert from tiny, ornamental pieces against walls to full-sized dining tables. The ultimate floor space liberator is wall-mounted tables that fold flat against a wall. Each design mechanism has its own benefits, allowing users to choose one that fits their lifestyle and usage. Material choice should match the home’s aesthetic and daily use and maintenance. 

Integrating Style

A small or extendable table must blend into an interior design concept for cohesion. These flexible pieces come in minimalist contemporary, rustic farmhouse, and classic traditional forms. A harmonious look is achieved by choosing a table whose lines, color palette, and finish match the surrounding décor. dining table singapore are frequently choose by many people that combines modern practicality with exquisite appearance. There is a space-saving alternative that can improve the home’s appearance without sacrificing its functionality, whether the preference is clean, uncomplicated designs or intricate, meticulous craftsmanship. 

Multipurpose Use

More than just a dining table, many compact and extendable dining tables are multi-purpose, bringing functionality to a tiny home. Drop-leaf tables can be used as console tables in hallways or small desks in living rooms when collapsed. Extended, a wall-mounted table might be a crafts station or temporary workspace. 

Enhancing Hospitality

A compact yet flexible dining table may greatly improve hospitality, which is one of its main benefits. These ingenious tables remove that barrier, allowing people to turn a comfortable dining location into a friendly space for multiple guests. These tables can expand, making spontaneous gatherings possible and encouraging social readiness. This flexibility converts a small home into a home that can easily entertain, proving that living small doesn’t entail sacrificing social life or generosity.


Who does not love to have wooden fences for their property? They are beautiful, elegant and stylish to look at. However, with the rigors of nature and over a period of time, these wooden fences or colonial fencing are attacked by their enemies like termites, carpenter bees and carpenter ants. 

Wood fencing: Of all the available choices, this is the most popular and most ubiquitous.  It is affordable and lasts a long time, with a bit of care.  Wood fences provide privacy and also a bit of a buffer from noise.Talk to the professionals at fence company St. Augustine.

Tips to fight these wooden fence enemies

Wooden structures are the personal stomping grounds for insects like termites, carpenter ants and bees. This is where you need to take proper measures to protect your wooden fencing from getting damaged. 

  • Combating against carpenter bees
  • Ensure that the wood is not exposed to moisture or weather for long. This serves as the safest nesting place for carpenter bees. 
  • They are similar to bumblebees. 
  • They can be easily distinguished by their feature of a black abdomen with greenish-purple sheen.
  •  The carpenter bees damage the wood by boring several holes in order to lay their eggs. The wood begins to weaken due to these holes which are of a dime size. 
  • In order to protect the wood against such holes made by the carpenter bees, you can easily seal them with the help of a liquid sealant. 
  • Pesticides can also be used to steer clear these bees. 
  • Do not forget to cover the entrance with steel wool.
  • Combating against termites
  • There are several types of termites, including drywood, dampwood, and subterranean termites, that can cause serious damage to wood fencing. One effective way to help prevent termite infestations is through liquid termite treatment. For homeowners looking for practical fencing guidance and solutions, trusted-fence.com can also be a helpful resource when planning long-term fence protection and maintenance.

  • You can also use termite baits and work by spreading less amount of pesticides. 
  • Apply the borate termite treatment like a coat of paint on the wood
  • Dry wood termites can be prevented by using the method of fumigation. 
  • Combating against carpenter ants
  •  Carpenter ants are predominantly seen on trees and wood that have moisture content – rotting trees, roots, logs, stumps to name a few. 
  • Store firewood in the garage and allow considerable amount of air to circulate 
  • Any wood or tree that shows signs of moisture should be removed.

Soot is a common result of fires but can cause serious problems for your home and health. Whether from a small kitchen fire or a large wildfire, soot particles travel through the air and settle on many surfaces. If not cleaned properly, soot can leave permanent stains, damage structures, and cause health issues. Fire Damage Repair Costs can also add up quickly if soot is not addressed early. Understanding how to clean soot after a fire is key to keeping your home safe and protecting your family’s health.

What Is Soot and Why Is It Dangerous?

Soot is made of tiny carbon particles formed when wood, paper, or fabric burns incompletely. These particles stay in the air and cling to surfaces after a fire. The dangers of soot include:

  • Health Risks: Breathing soot can irritate your eyes, nose, and throat, worsen lung problems like asthma, and increase cancer risk.
  • Property Damage: Soot’s acidic nature can corrode metals, etch glass, and cause permanent discolouration on walls, fabrics, and other materials.
  • Lingering Smell: Soot has a strong smoky smell that can seep into clothing, carpets, air systems, ceilings, and walls.

How to Clean Soot Safely

When cleaning soot, protect yourself by:

  • Wearing gloves, goggles, and an N95 mask or similar respirator.
  • Ventilating the area by opening windows and doors.
  • Isolating the affected space to avoid spreading soot.
  • Testing cleaners on a small hidden spot before full use.

Cleaning Tools and Methods

Soot Sponge: A special dry sponge designed to lift loose soot without rubbing it deeper. Use gently on walls and ceilings. Do not rinse the sponge; cut off dirty parts as you clean.

Soot Cleaners and Degreasers: For stubborn soot or black streaks, use commercial soot cleaners or mild soap solutions. Read the directions carefully, use a soft cloth or sponge to apply the cleaner, rinse thoroughly, and dry the area to prevent streaks.

HEPA Vacuum: Use a vacuum with a HEPA filter to remove tiny soot particles from carpets and fabrics. Attach a soft brush to the vacuum and move slowly to avoid spreading the soot.

Cleaning Different Surfaces

  • Walls and Ceilings: Start with a soft sponge to remove loose soot, then clean gently with a mild cleaner, working top to bottom. Dry and ventilate.
  • Brick: Brush soot off with a stiff brush, vacuum debris, scrub gently with a masonry cleaner, and rinse with warm water.
  • Concrete: Sweep and vacuum loose soot. Apply a concrete-safe cleaner, scrub, rinse, and dry. Use low-pressure power washing for exterior concrete.
  • Wood: Dust or vacuum gently, clean with a wood-safe cleaner, rinse, dry well, and refinish if needed.
  • Metal: Use a soot cleaner with a soft pad, rinse, and dry to avoid rust.
  • Floors: Sweep or vacuum, mop with a mild cleaner, rinse, and dry.
  • Carpets and Fabrics: Vacuum with HEPA filter, spot clean, and consider professional deep cleaning. Dry completely to prevent mould.
  • Clothing: Shake out soot, pre-treat stains, wash on the hottest safe setting, and air dry. Use professional dry cleaning for delicate items.

Avoid over-wetting surfaces, harsh chemicals, aggressive scrubbing, and ignoring protective gear. These mistakes can worsen soot damage and harm your health.

Have you ever attempted to move a single piece of furniture only to find yourself rearranging the entire space? Indeed, that is precisely what renovation is, although on a much larger scale (and typically with more dust). A “small update” can easily turn into a series of modifications. Although it’s not necessarily a terrible thing, you should absolutely be ready for it. 

This article serves as a pleasant reminder that one alteration nearly always results in another if you’re intending to renovate your Queens, New York, flat. Understanding the “Domino Effect” can help you save a significant amount of money, time, and stress. Let’s examine how this cunning domino effect manifests itself during renovations and how to deal with it effectively.

Modifications to the Design That Spread Throughout the Space

Suppose you make the decision to replace your oversized, outdated kitchen cabinets. You decide on a sleek, contemporary style with no apparent handles, soft matte surface, and flat fronts. Gorgeous! Now, though, your outdated backsplash doesn’t look right. Then your countertops feel dated all of a sudden. 

Before you know it, you’re looking at new floor tiles on Pinterest, changing the faucet, and replacing the sink. Flow is the key to design. Everything surrounding a facelifted part must have the same vibe. Maintaining harmony is more important than being picky.

Floors, Paint, and Light Fixtures Come Next

Another typical culprit? illumination. Your other rooms feel boring now that you have upgraded one expensive pendant light. Or you repaint one wall and then discover that the others appear faded. That is an example of the domino effect. And if there are spaces connected by your flooring? 

For consistency, changing it in one area might require destroying everything else. Here’s where skilled general contractors in Astoria  New York, come in handy; they can help you plan upgrades without going over budget or nuts while maintaining a consistent aesthetic.

Improvements in functionality Set Off Hidden Fixes

Sometimes appearances aren’t even important. Consider removing a wall to create more room in your kitchen as part of a basic renovation. Fantastic, huh? Surprise! But behind that wall! Perhaps some shady plumbing, outdated wiring, or insulation that appears to be from 1973. What began as a simple task has now evolved into a comprehensive system update.

Another typical situation is purchasing a high-end new bathroom vanity. However, the floor now needs reinforcing because it is heavier than the previous one. Or, after switching to a rainfall showerhead, you discover that your water pressure is insufficient. Every upgrade is dependent on the foundation, thus if the foundation is subpar, you’ll also need to upgrade it. 

For this reason, seasoned general contractors in Astoria NY, generally advise doing a comprehensive examination before beginning any work. Because it’s not meant to frighten you, we assure you. The goal is to steer clear of mid-project surprises that will end up costing you more.

Timeline and Budget: When Everything Is Affected by One Delay

Do you believe that making a single change won’t cause your remodeling to stall? Rethink your thoughts. Let’s imagine there is a two-week delay in your bespoke kitchen cabinets. The installation of your countertop has now been postponed. This implies that your plumber is unable to connect the sink. And only then will your electrician be able to complete it. A single delayed delivery can cause a delay of up to one month.

Budget Creep Is Real:Why Renovations Rarely Stick to the Original Plan

Then there’s the financial aspect. Perhaps you upgraded your flooring a bit, but now that the furniture is mismatched, you’re tempted to replace the sofa as well. Even worse, your budget gets eaten up by those “unexpected repairs” that happen behind the walls. That’s the ripple effect that affects your pocketbook. 

There is always flexibility in the budget and schedule when working with savvy renovators and clever apartment renovation queens in any business. Because renovations are more like a zigzag with coffee breaks than a straight line.

There is a definite “domino effect” when renovating. More changes can, and frequently will, result from one minor adjustment. As long as you prepare for it, that isn’t necessarily a negative thing. Be adaptable. Add more money to the budget. Additionally, collaborate with seasoned experts who understand how to steer the process without allowing it to go out of control. 

If you’re intending to deal with reputable general contractors in Astoria NY, or you’re starting an apartment renovation queens ny, keep in mind that you don’t need to be afraid of the dominoes—you simply need to know how to arrange them correctly.

  1. INTRODUCTION

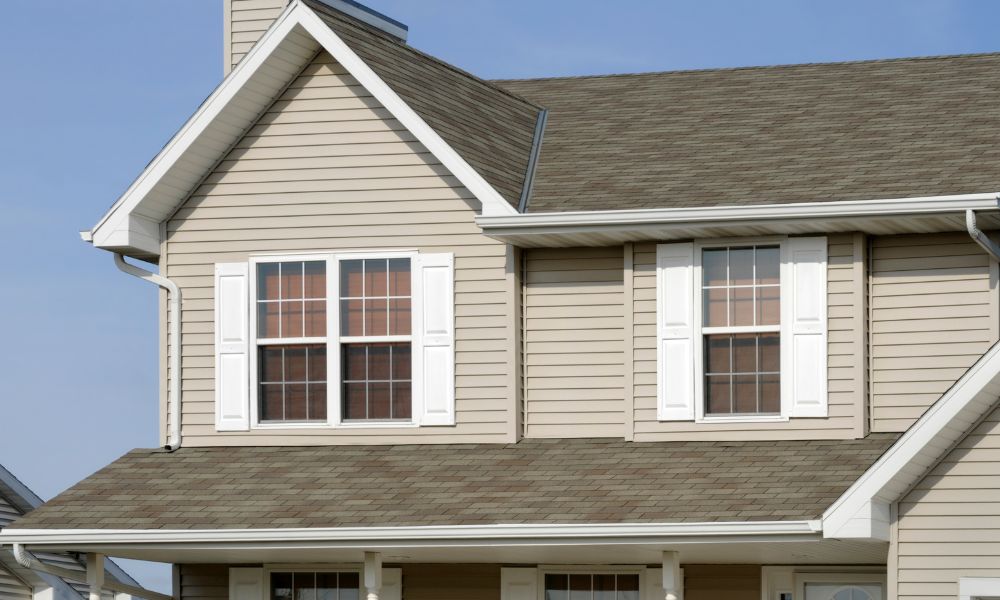
For many homes, vinyl siding is a popular choice. It’s affordable, strong, and doesn’t need much upkeep. Homeowners often wonder about the best timing for installing vinyl siding, especially when planning long-term maintenance. But like all parts of your home, it still needs some care to stay in good shape. This guide explains everything you need to know about cleaning and taking care of vinyl siding.

  1. PROS AND CONS OF VINYL SIDING

2.1 PROS

  • Budget-Friendly: Vinyl siding is cheaper than materials like wood or brick.
  • Easy to Maintain: You don’t need to paint or stain it—just clean it occasionally.
  • Strong and Durable: It resists rot, bugs, and moisture, making it great for most weather.
  • Style Options: It comes in many colors and designs to match any home style.

2.2 CONS

  • Environmental Impact: Making vinyl siding uses fossil fuels, which raises environmental concerns.
  • Hard to Repair: If a panel is damaged, you may have to replace the whole section.
  • Fading Over Time: Sunlight can make the color fade.
  • Heat Issues: Very hot weather can cause panels to bend or warp if not installed properly.
  1. WHY CLEANING VINYL SIDING MATTERS?

Cleaning vinyl siding helps keep your home looking nice and can make it last longer. Here’s why it’s important:

  • Prevents Damage: Removes dirt, mold, and mildew that can wear down the material.
  • Boosts Curb Appeal: A clean house looks more attractive.
  • Avoids Health Risks: Mold and mildew can cause breathing problems if not cleaned.
  • Saves Money: Regular cleaning can prevent expensive repairs later.
  1. HOW TO CLEAN VINYL SIDING IN 7 STEPS
  • Clear the Area: Move furniture and cover nearby plants to keep them safe.
  • Make Your Cleaner: Mix water with a gentle soap or cleaner in a bucket.
  • Wet the Siding: Use your hose or pressure washer to soak the siding.
  • Scrub the Siding: Begin at the bottom and remove any dirt or stains with a brush or sponge.
  • Rinse Well: Rinse each section right after scrubbing so soap doesn’t dry on it.
  • Repeat if Needed: For tough spots, clean again with a stronger mix.
  • Dry It Off: Let it air dry or use a cloth to wipe away water, especially in shady areas.

  1. HOW OFTEN TO CLEAN IT
  • Normal Weather: Clean once or twice a year.
  • Humid or Polluted Areas: Clean more often to prevent mold.
  • The best seasons for extensive cleaning are spring and fall.
  1. WATCH FOR DAMAGE

Check your siding often. Look out for:

  • Cracks or holes
  • Warped or bent panels
  • Faded or stained areas
  • Mold or mildew spots
  • Loose or missing sections
  1. EXTRATIPS FOR MAINTENANCE
  • Trim trees and bushes near your home
  • Clean out gutters regularly
  • Seal cracks with caulk
  • Be careful with high-pressure washers
  • Hire professionals for proper installation

Vinyl siding is a strong and stylish choice for your home. With regular cleaning and care, it can look great and protect your home for many years.

When it comes to maintaining the comfort and security of your home, timely repairs are essential—especially when it comes to windows. A broken or damaged window in Edmonton can quickly become a major concern, given the city’s fluctuating weather conditions. Whether it’s a cracked pane, a drafty window, or an issue with the window seal, quick and reliable repairs are necessary to prevent further damage and ensure your home remains energy-efficient. In Edmonton, homeowners have access to window repair services that not only restore the functionality of their windows but also provide peace of mind.

One of the most common reasons homeowners seek Window repair Edmonton is to address cracks or broken glass. Extreme weather conditions, from freezing winters to hailstorms, can often leave windows vulnerable to damage. When you notice a crack, it’s crucial to address it as soon as possible to avoid further harm. A crack, no matter how small, can worsen over time and may even lead to a complete break. Window repair services in Edmonton offer fast solutions, replacing the broken glass or repairing the crack efficiently, ensuring that your window is restored to its full function and eliminating any security risks associated with a compromised window.

Another issue that often arises in Edmonton homes is the presence of drafts around windows. Cold air entering through gaps or poorly sealed windows can significantly impact the comfort of your home. In winter, drafts can cause your heating system to work overtime, leading to higher energy bills. Drafts are typically caused by deteriorated window seals or gaps around the window frame. Professional window repair services in Edmonton specialize in identifying these issues and providing prompt solutions. By resealing or replacing the weatherstripping, these experts can help you maintain a comfortable indoor environment while improving your home’s energy efficiency.

The buildup of condensation between double-glazed windows is another common problem in Edmonton. Double-paned windows are designed to offer additional insulation by trapping a layer of air or gas between two panes of glass. However, when the seal between the panes fails, moisture can enter, causing fogging and condensation. This issue can be frustrating as it not only affects visibility but also reduces the insulating properties of your windows. Window repair services in Edmonton can replace the faulty seal or the entire glass unit to restore the window’s clarity and efficiency. This kind of service ensures that your windows perform as intended, keeping your home comfortable and reducing energy loss.

The quick turnaround time of window repair services in Edmonton is one of the primary reasons homeowners rely on professionals for these repairs. Damaged windows, whether broken, drafty, or fogged, can disrupt your daily routine and even compromise your home’s security. Professional window repair services can respond promptly, minimizing the time your home is exposed to the elements. Their experience and access to quality materials allow them to carry out repairs efficiently, so you don’t have to wait long for your windows to be restored.

Beyond addressing physical damage, window repair services also improve your home’s overall energy efficiency. Windows play a crucial role in regulating indoor temperatures, and poorly functioning windows can lead to heat loss or gain, making your HVAC system work harder. This results in increased energy consumption and higher utility bills. By fixing drafts, broken seals, and other issues, window repair experts in Edmonton help optimize your windows’ performance, contributing to long-term savings on your energy costs.

In conclusion, fast and reliable window repair services in Edmonton offer a range of solutions for homeowners facing issues with their windows. Whether dealing with cracked glass, drafts, or fogging between panes, professional repairs can restore the functionality, comfort, and security of your home. With prompt service and expert solutions, you can ensure that your windows remain in top condition, allowing you to enjoy a comfortable and energy-efficient living space throughout the year.